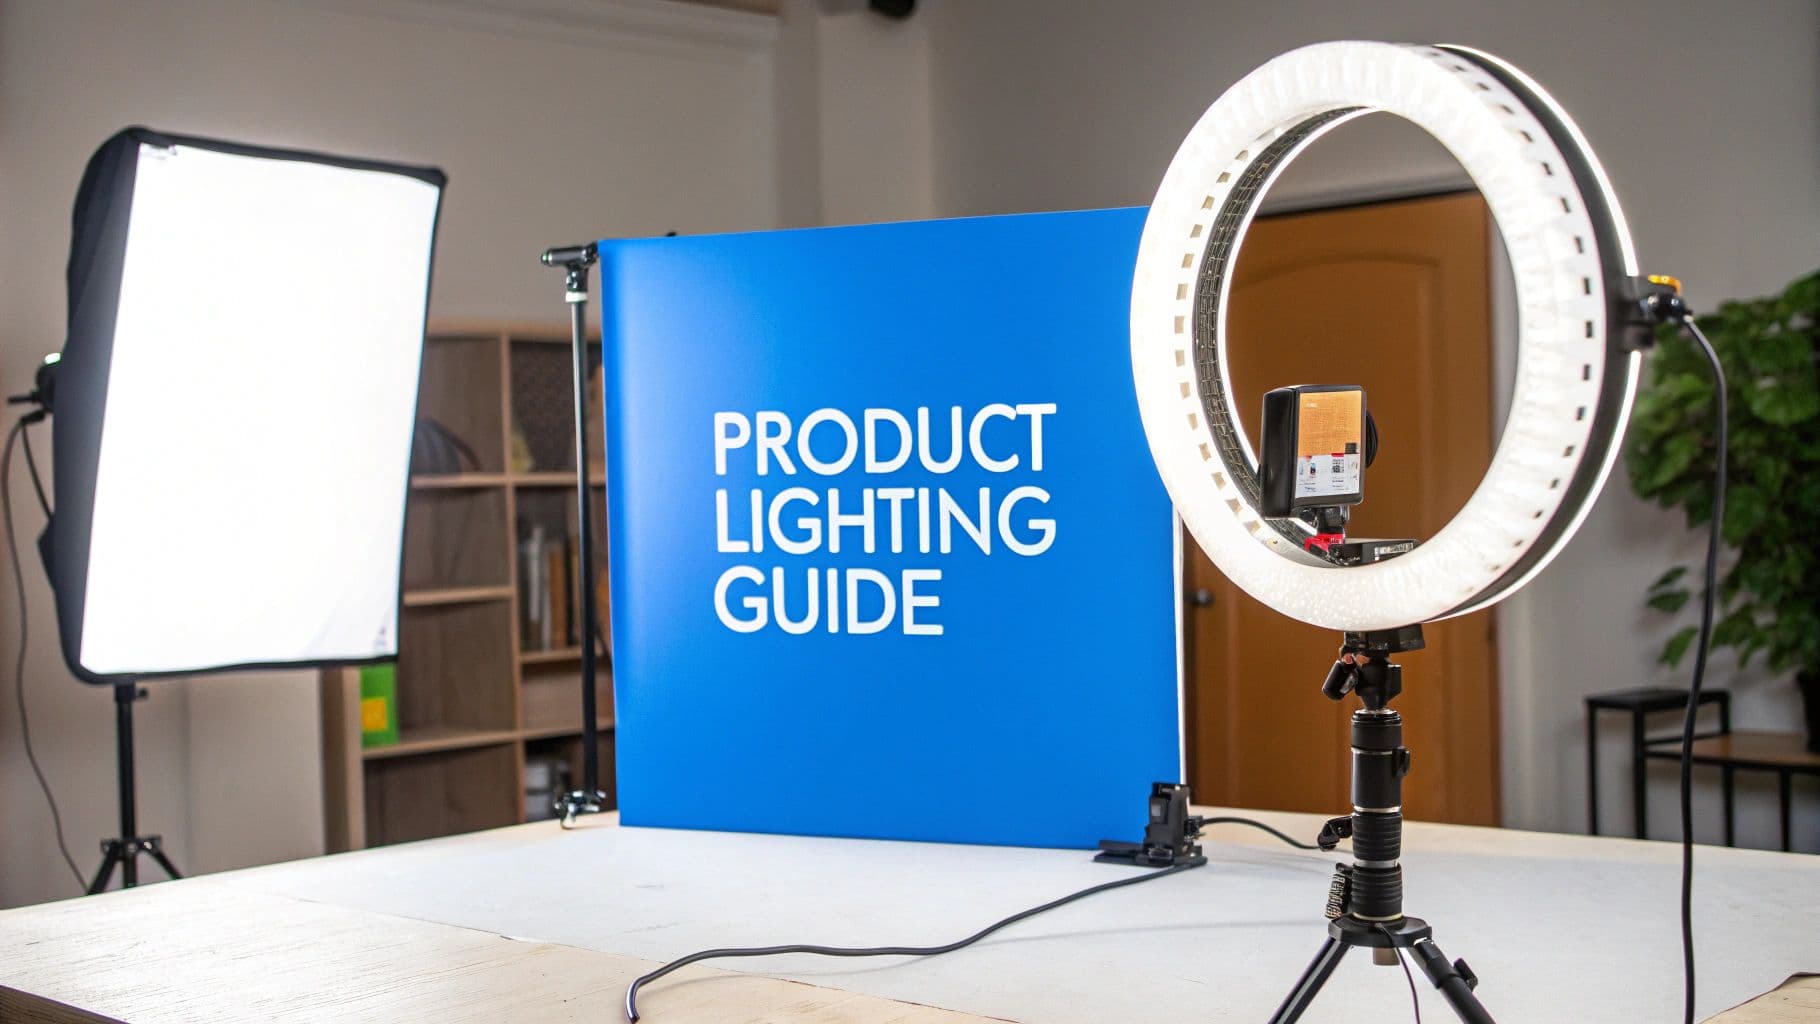
8 Best Lighting for Product Photography Setups in 2025
Discover the 8 best lighting for product photography setups. From softboxes to ring lights, our guide helps you choose the right gear for stunning images.
In product photography, lighting isn't just an accessory; it's the fundamental element that separates an amateur snapshot from a professional, sales-driving image. The right illumination dictates mood, defines texture, and ensures color accuracy, directly influencing how customers perceive your product's quality and value. Get it wrong, and you risk flat, unappealing photos that fail to convert. Get it right, and you create visuals that stop scrollers in their tracks.
This comprehensive guide is designed to demystify the process of choosing the best lighting for product photography. We will move beyond generic advice to provide a detailed breakdown of the most effective lighting tools and setups available. You will learn not just what to use, but how and why each option works for specific scenarios, from small, reflective jewelry to large, textured furniture.
We will explore a range of solutions, including versatile softbox kits, powerful strobe systems, and even the strategic use of natural light. Each section offers practical implementation guidance, honest assessments of limitations, and specific feature analysis to help you make an informed investment. Whether you're a small business owner, an e-commerce manager, or a seasoned photographer, this resource will equip you with the knowledge to control light and consistently produce stunning, high-quality product images.
1. Softbox Lighting Setup: The Versatile Gold Standard
A softbox is an indispensable tool in the world of product photography, serving as the industry's gold standard for creating clean, professional images. It works by taking a harsh, direct light source (like a strobe or continuous LED) and diffusing it through a layer of translucent fabric. This process spreads the light over a larger area, resulting in a soft, even illumination that wraps around your product, minimizes harsh shadows, and reduces specular highlights or glare.
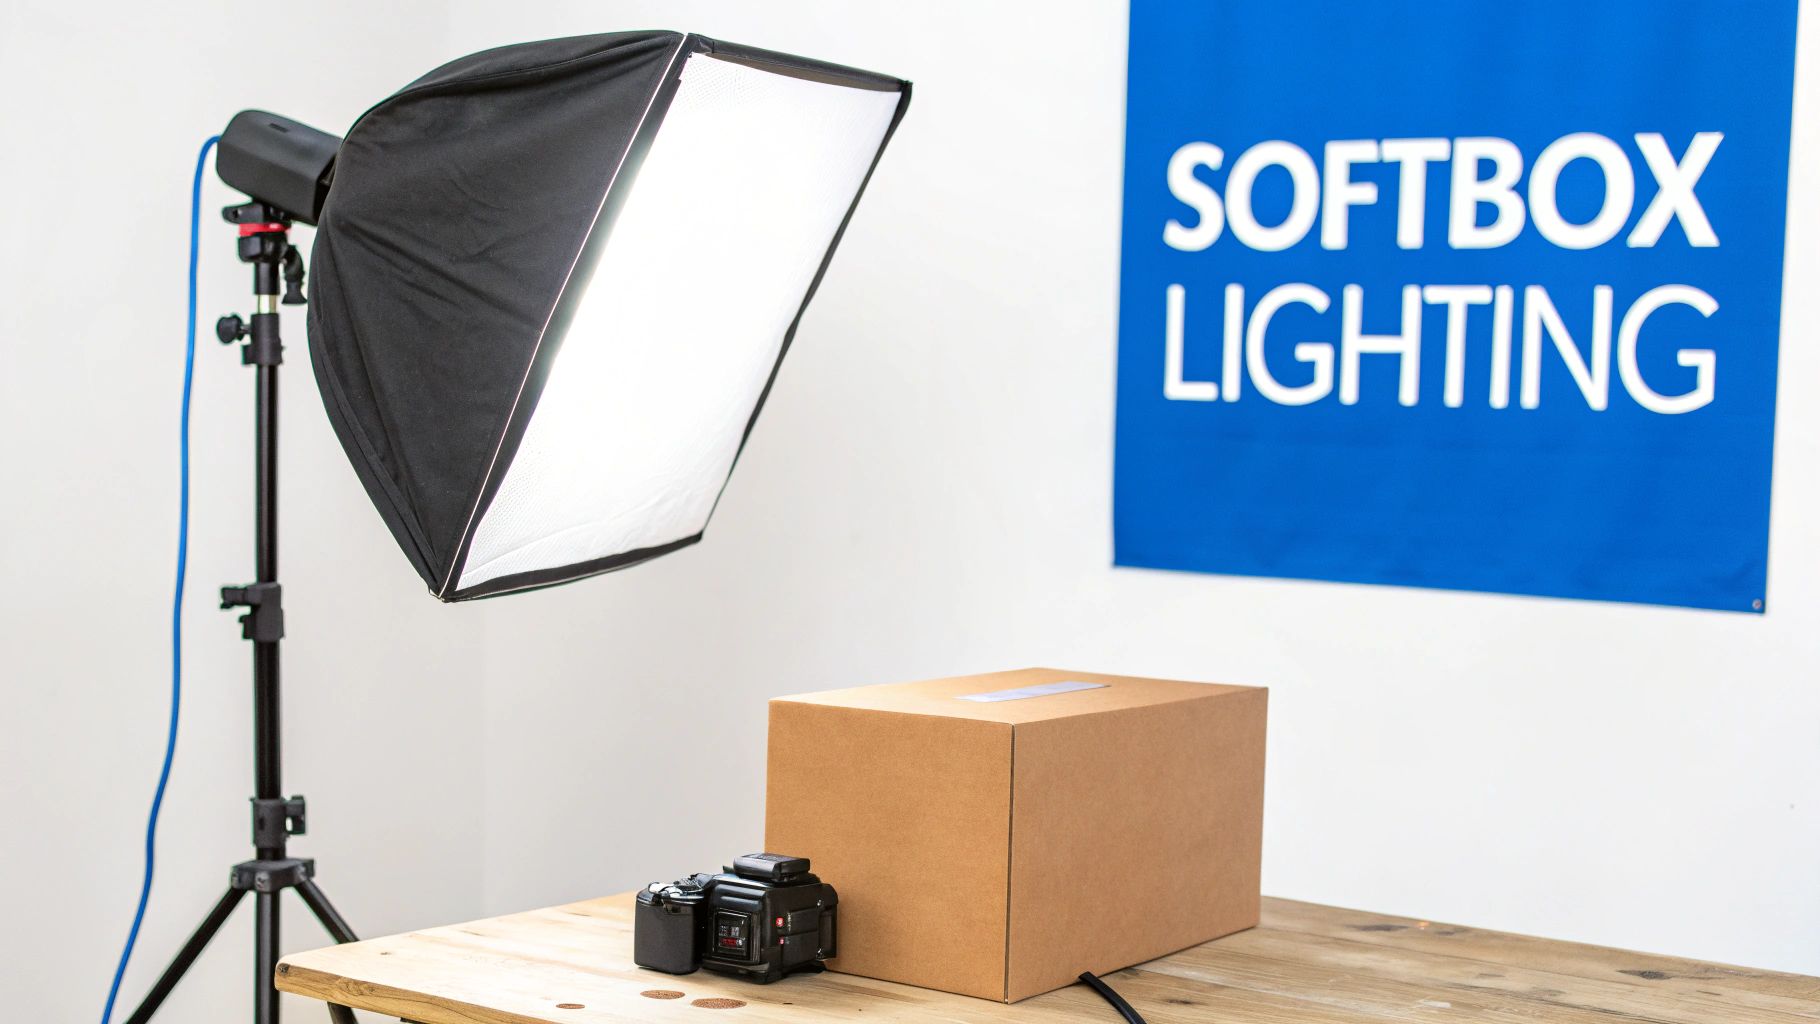
This controlled softness is precisely why it's considered the best lighting for product photography for a vast range of items. From the crisp, clear shots of electronics on Amazon to the flattering light on clothing for fashion brands, softboxes provide a versatile and scalable solution.
Best Use Cases for Softboxes
A softbox setup excels when your goal is to showcase a product's form and texture without distracting reflections or shadows.
- E-commerce Product Listings: Ideal for creating a consistent, professional look across an entire online store, especially for items like home goods, electronics, and apparel.
- Reflective or Glossy Products: Essential for photographing items like jewelry, glassware, or polished metal. The large, soft light source minimizes the sharp, mirror-like reflections that a bare bulb would create.
- Food Photography: Softboxes can mimic the gentle light from a large window, making food look fresh and appealing while controlling shadow depth.
Key Benefit: The primary advantage of a softbox is its ability to create diffuse, flattering light. This mimics the quality of natural light from an overcast sky, which is universally appealing and effective for almost any subject.
Practical Setup and Considerations
To get the most out of your softbox, positioning is key. A common starting point is the 45-degree angle setup, where one softbox (the key light) is placed at a 45-degree angle to the product. You can then use a white foam board or a second, less powerful softbox on the opposite side to fill in and soften any remaining shadows. For long, thin products like wine bottles or cosmetic tubes, a tall, narrow "strip" softbox is an excellent choice for creating a long, continuous highlight that defines the object's shape.
2. LED Panel Continuous Lighting: The WYSIWYG Solution
LED panel lights have surged in popularity, offering a "what you see is what you get" (WYSIWYG) continuous lighting solution. Unlike flash or strobe lighting, these panels stay on, allowing you to see exactly how light and shadow play across your product in real-time. This immediate visual feedback makes adjustments intuitive and fast, dramatically simplifying the setup process for photographers of all skill levels.
Modern LED panels provide consistent, flicker-free illumination with adjustable brightness and color temperature. High-end models boast high Color Rendering Index (CRI) ratings, ensuring that the colors of your product are captured with extreme accuracy. This makes them a top choice for situations where precise color representation is non-negotiable.
Best Use Cases for LED Panels
LED panels are incredibly effective for both still photography and video, especially when you need to see your lighting setup live.
- Color-Critical Products: Essential for items like cosmetics, fabrics, and brand packaging where color accuracy is paramount. A high-CRI LED panel ensures the product's color on screen matches its color in real life.
- Video and Live Content: The go-to choice for YouTube unboxing videos, social media content, and product demonstrations. Their continuous nature provides consistent, high-quality light for moving subjects.
- Flat Lay Photography: Perfect for top-down shots of food, crafts, or arranged products. You can easily adjust the light's position and intensity to eliminate unwanted shadows and create a clean, even look.
Key Benefit: The main advantage of LED panels is their continuous light output. This allows for real-time adjustments to highlights and shadows, removing the guesswork often associated with flash photography and speeding up your workflow significantly.
Practical Setup and Considerations
For optimal results, invest in panels with a CRI rating of 95 or higher to guarantee accurate color rendering. A common setup involves using a key light placed at a 45-degree angle to the subject, with a second panel or a reflector on the opposite side to act as a fill light. Consider bi-color panels, which allow you to adjust the temperature from cool daylight to warm tungsten, giving you creative flexibility. To soften the sometimes-harsh output from an LED array, use the included diffusion panel or bounce the light off a white ceiling or foam board for a more flattering effect.
3. Ring Light Setup: For Shadowless Detail
A ring light is a circular lighting fixture designed to fit around a camera's lens, providing a direct, even, and nearly shadowless source of illumination. Originally created for dental and medical purposes, its unique ability to cast uniform light has made it incredibly popular in product photography, particularly for close-up shots and social media content where clarity and detail are paramount. It floods the subject from every angle, eliminating the small shadows that can obscure texture and form.
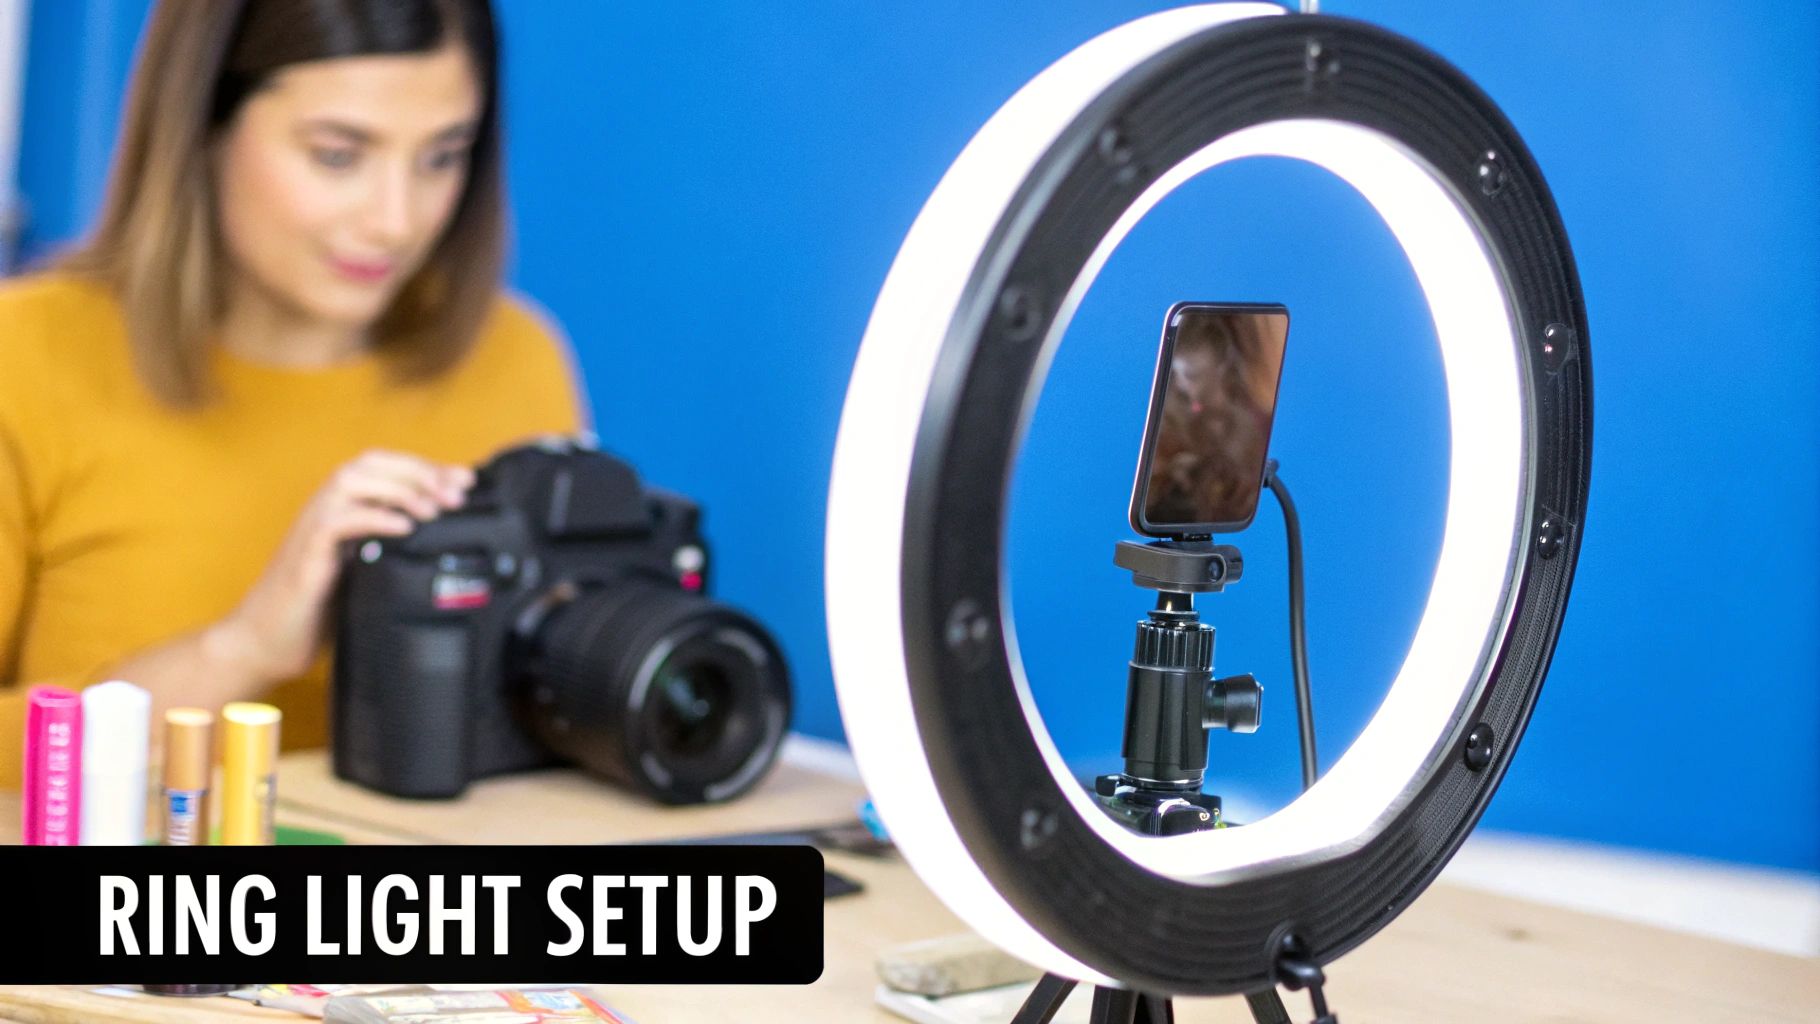
The distinctive, halo-like catchlight it creates in reflective surfaces is a signature look, often embraced by beauty and cosmetics brands. Its simplicity and effectiveness, especially with affordable kits popularized by brands like Neewer, make it a strong contender for the best lighting for product photography for anyone needing consistent, straightforward results without a complex setup.
Best Use Cases for Ring Lights
A ring light setup is at its best when your primary goal is to eliminate shadows and highlight the intricate details of a small to medium-sized product head-on.
- Makeup and Cosmetics: Perfect for showcasing product textures, swatches, and application. The shadowless light ensures true-to-life color representation.
- Jewelry Photography: It provides even illumination on gemstones and metals, minimizing distracting reflections and highlighting faceted details.
- Small Handmade Goods: Ideal for small business owners on platforms like Etsy who need simple, repeatable lighting for items like crafts, small accessories, or baked goods.
- Watch Photography: The even light source can effectively eliminate harsh glare on the watch face's crystal, allowing for a clear view of the dial.
Key Benefit: The main advantage of a ring light is its ability to produce incredibly flat and even lighting. This minimizes textural shadows, making it perfect for top-down shots or detailed macro photography where every feature must be clearly visible.
Practical Setup and Considerations
While a ring light is often a "point-and-shoot" solution, a few adjustments can dramatically improve your results. For larger products, use a larger ring light (18 inches or more) to ensure the light wraps around the item effectively. To avoid a completely flat look, try positioning your product slightly off-center within the ring; this will create subtle, defining shadows. You can also place a white fill card to one side to bounce light back and add a bit of dimension. Be mindful of the signature circular catchlight, as it will be very prominent on glossy or reflective items.
4. Strobe Flash Lighting System
For photographers who need ultimate power, precision, and the ability to freeze motion, a strobe flash lighting system is the definitive choice. Unlike continuous lights, strobes emit an intense, split-second burst of light synchronized with your camera's shutter. This powerful flash overpowers ambient light, providing incredibly crisp detail, rich color saturation, and perfectly consistent exposures from one shot to the next, regardless of your shooting environment.
This level of control and power is why strobes are the workhorse for high-volume e-commerce studios and high-end commercial advertising. When consistency and sharpness are non-negotiable, many consider strobes the best lighting for product photography, especially for catalog work where hundreds of items must look uniform.
Best Use Cases for Strobes
Strobe systems shine in controlled studio environments where capturing the absolute sharpest detail is the top priority.
- High-Volume E-commerce: Essential for creating the clean, white-background images required by platforms like Amazon. The power and consistency are ideal for shooting hundreds of products efficiently.
- Action or Motion Shots: Perfect for creative product shots involving splashes, powders, or falling objects. The short flash duration freezes motion with perfect clarity.
- Large Products: From furniture to automotive parts, powerful strobes like those from Profoto or Broncolor can evenly illuminate large subjects that smaller lights cannot handle.
- Luxury and Fashion Goods: The high-quality light reveals intricate textures and details in high-end apparel, accessories, and cosmetics.
Key Benefit: The primary advantage of a strobe system is its ability to deliver a massive amount of light in an instant. This freezes subject motion, eliminates motion blur from camera shake, and produces exceptionally sharp images with vibrant, accurate colors.
Practical Setup and Considerations
A typical strobe setup begins with a key light and a fill light to control the lighting ratio. Because the flash is too fast to see, strobes include a "modeling light," a small continuous bulb that stays on so you can preview how shadows will fall on your product before you take the picture. For precise exposures, an external light meter is highly recommended to measure the flash output and dial in your camera settings perfectly. Investing in sturdy light stands and a variety of modifiers, like softboxes and beauty dishes, will allow you to shape the powerful light to fit any product.
5. Light Tent/Photo Box Setup: The All-in-One Solution
A light tent, often called a photo box or light box, is a cube-like enclosure made of translucent, light-diffusing fabric. It's designed to create a self-contained, miniature studio that bathes a product in soft, even light from every direction. By placing lights outside the fabric walls, the setup eliminates harsh shadows and reflections, producing a clean, floating-on-white look with minimal fuss.
This contained environment makes it some of the best lighting for product photography for beginners and small-scale sellers. Its simplicity and consistency are why brands like Foldio have gained popularity, offering innovative, portable designs that make professional results accessible to everyone.
Best Use Cases for Light Tents
A light tent is the perfect tool when speed, consistency, and a shadowless background are top priorities, particularly for smaller items.
- High-Volume E-commerce: Ideal for Etsy and eBay sellers who need to photograph dozens of small items like handmade jewelry, crafts, or collectibles quickly and with a uniform look.
- Highly Reflective Small Objects: Excels at photographing tricky items like coins, watches, and small electronics, as the 360-degree diffusion minimizes distracting glare and hotspots.
- Catalog and Inventory Shots: Perfect for supplement companies photographing bottles or businesses creating internal catalogs of small parts and components.
Key Benefit: The main advantage of a light tent is its ability to deliver ultra-diffused, shadow-free illumination with an incredibly simple setup. It removes the guesswork from light placement, ensuring consistent, professional-looking images every time.
Practical Setup and Considerations
Using a light tent is straightforward, but a few tips can elevate your results. For the best diffusion, place at least two light sources on opposite sides of the tent. A third light placed on top can add extra brightness. Ensure your product only takes up about one-third to one-half of the interior space to avoid a cramped look. For a truly professional shot, position your camera on a tripod directly in front of the opening. This prevents camera shake and ensures a sharp, clear image. Many kits come with interchangeable backdrops, so don't be afraid to experiment with different colors beyond basic white to make your product pop.
6. Three-Point Lighting Setup: The Foundation of Control
While not a piece of equipment itself, the three-point lighting setup is a foundational technique that represents the pinnacle of lighting control in product photography. This classic method, borrowed from cinematography, uses three distinct light sources to shape, define, and separate a product from its background. It involves a key light (the main, brightest source), a fill light (a softer source to fill in shadows), and a back or rim light (to create separation and dimension).
Mastering this technique is crucial for creating dynamic, professional-grade images with depth and a high-end feel. It’s a versatile system that provides the ultimate control, making it a strong candidate for the best lighting for product photography when precision is non-negotiable.
Best Use Cases for Three-Point Lighting
This setup is ideal for creating polished, commercial images where the product needs to look its absolute best, with carefully managed highlights and shadows.
- Luxury Goods: Perfect for high-end items like watches, jewelry, or premium electronics, where every facet and texture must be showcased flawlessly.
- High-End Cosmetics: Used to create dimensional shots that highlight the product's form and premium packaging without it looking flat.
- Automotive Parts: Excellent for defining the complex shapes, finishes, and build quality of mechanical components for catalogs and online stores.
- Hero Shots: When you need a single, stunning image for a marketing campaign or website banner, this setup provides the necessary polish and impact.
Key Benefit: The primary advantage of three-point lighting is unparalleled control. By adjusting the position, power, and quality of each of the three lights, you can precisely sculpt the product, manage mood, and create a sense of three-dimensional space.
Practical Setup and Considerations
The success of a three-point lighting setup lies in the balance and ratio between the lights. Start with your key light, placing it at a 45-degree angle to the product to establish the main shadows. Next, introduce the fill light on the opposite side at about half the power of the key light to soften those shadows without eliminating them. Finally, position the back or rim light behind and slightly above the product, aimed to skim its edges. This final light creates a subtle outline that pops the subject off the background, adding a critical layer of professional depth.
7. Speedlight/Flash Gun Setup: The Portable Powerhouse
Speedlights, often called flash guns, are compact and powerful flash units that offer incredible versatility for product photography. While often seen mounted on a camera, their true potential is unlocked when used off-camera, providing a portable and adaptable lighting solution. Modern speedlights feature advanced functions like Through-The-Lens (TTL) automatic exposure, high-speed sync, and wireless remote control, making them a go-to for photographers needing to work quickly and flexibly on location.
This infographic outlines a simple decision tree to help you determine if a speedlight is the right tool for your specific product photography needs based on location, automation, and subject size.
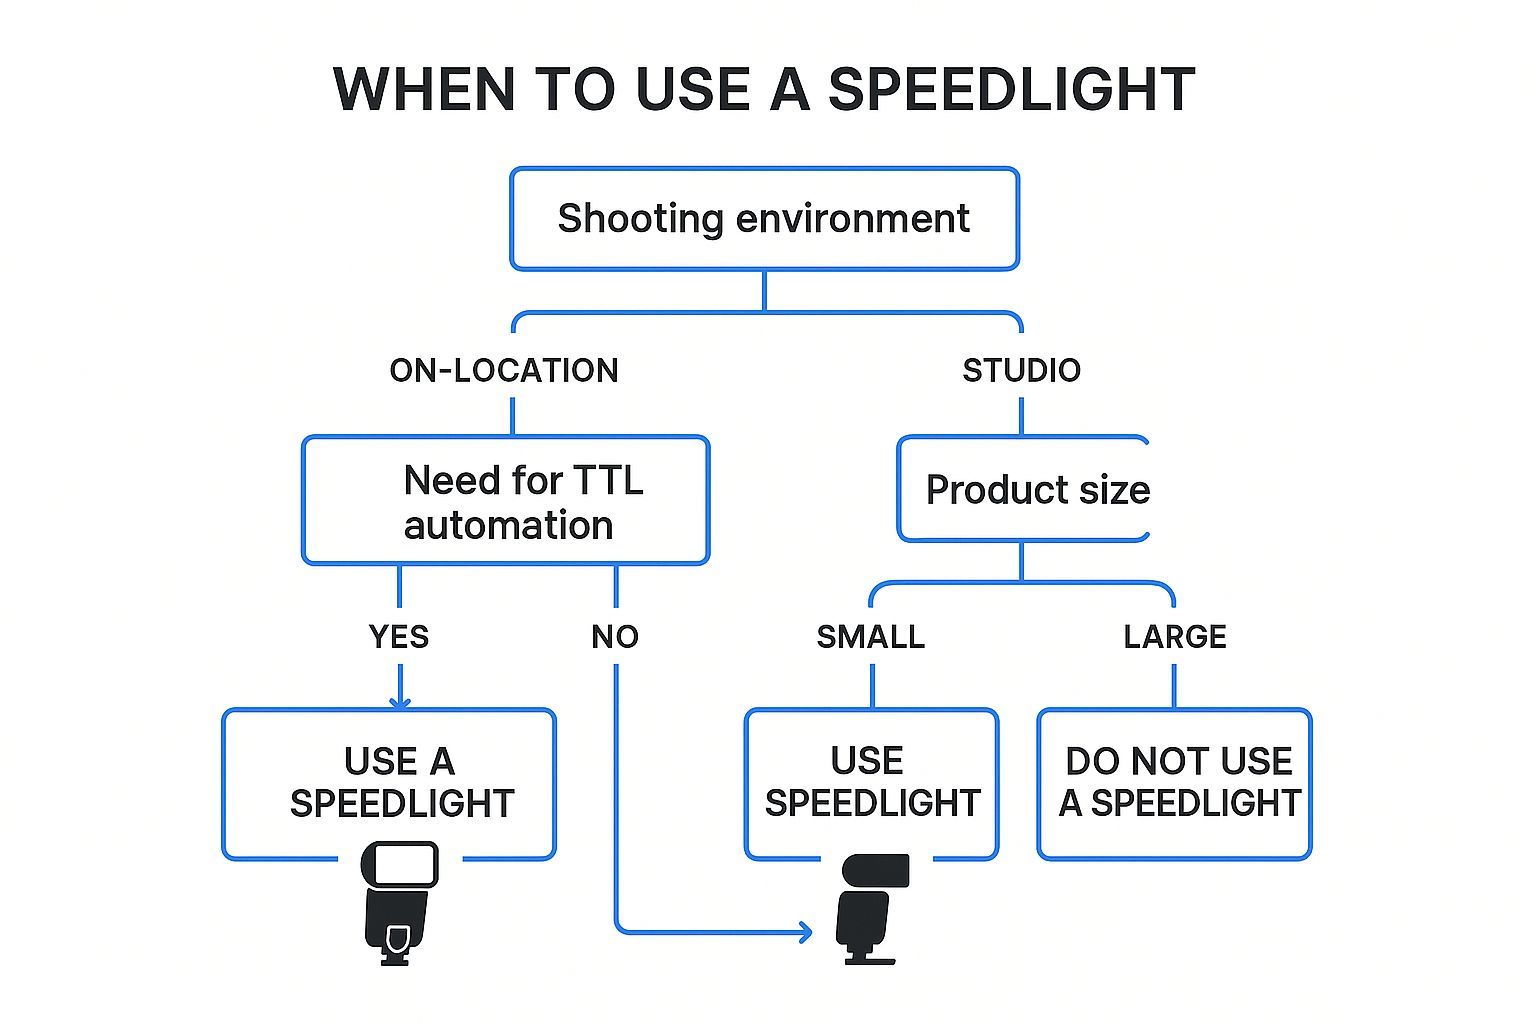 As the flowchart illustrates, speedlights are an ideal choice for on-location shoots with small-to-medium-sized products, especially when you can benefit from the speed of TTL automation.
The ability to create high-quality light anywhere is what makes a speedlight setup a strong contender for the best lighting for product photography for mobile professionals. Photographers like Joe McNally and the community popularised by David Hobby's "Strobist" blog have demonstrated that these small flashes can produce results rivaling large studio strobes.
Best Use Cases for Speedlights
A speedlight setup shines in situations where portability, speed, and creative control are paramount, particularly outside of a traditional studio environment.
- On-Location Product Shoots: Perfect for real estate agents photographing home features, or travel photographers documenting local crafts and products in their native environment.
- Event and Detail Photography: Wedding and event photographers frequently use speedlights to capture crisp detail shots of rings, shoes, menus, and other small products on-site.
- Food Photography: A speedlight paired with a small modifier is excellent for restaurant menu photography, allowing for professional lighting without disrupting the dining area with large equipment.
Key Benefit: The primary advantage of a speedlight is its unparalleled portability combined with powerful, controllable light. You can pack a multi-light setup into a small camera bag, giving you studio-level control anywhere you go.
Practical Setup and Considerations
To avoid the harsh, direct look of on-camera flash, always use your speedlight off-camera with a wireless trigger. Bounce the flash off a nearby neutral-colored wall or ceiling to create a large, soft light source. For more direct control, attach a small diffuser or a portable softbox to the speedlight. For consistent results and reliable power during a shoot, investing in rechargeable lithium-ion battery packs is highly recommended over standard AA batteries.
8. Natural Window Light Setup: The Authentic & Accessible Choice
Often overlooked in favor of complex gear, natural window light provides soft, directional illumination that can create stunning, authentic-looking product photos at zero cost. This approach effectively uses a large window as a giant, pre-made softbox. The light is naturally diffused, especially on an overcast day or from a north-facing window, resulting in a gentle quality that beautifully renders textures and colors.
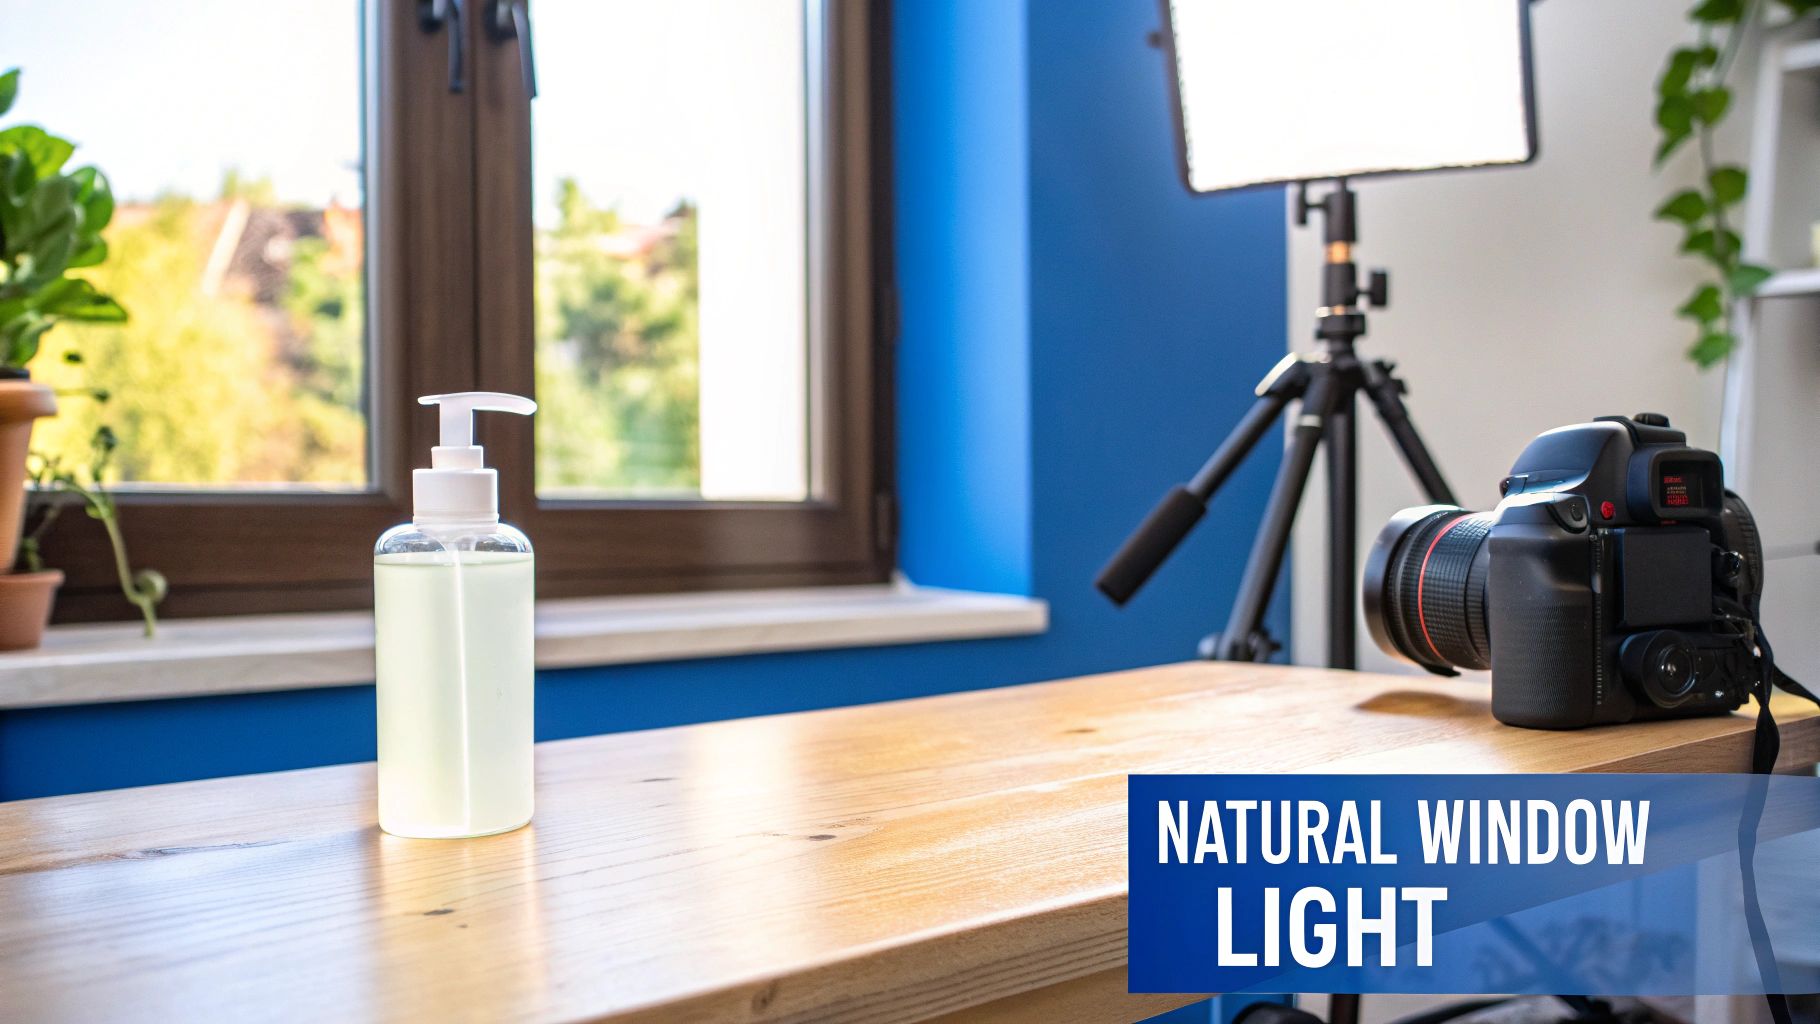
This method's ability to produce an organic and relatable feel makes it a powerful contender for the best lighting for product photography, particularly for brands cultivating a lifestyle or artisanal aesthetic. It's the go-to choice for social media content, where authenticity often outperforms polished, studio-perfect shots.
Best Use Cases for Natural Window Light
Natural light excels when the goal is to create a mood, tell a story, or present a product in a realistic, everyday context.
- Lifestyle Product Photography: Perfect for showcasing home goods, textiles, or decor in a natural setting that helps customers envision the products in their own space.
- Artisanal Food and Crafts: The soft, honest quality of window light enhances the texture and handmade appeal of artisanal foods, ceramics, and other crafts.
- Skincare and Cosmetics: Used to achieve a clean, fresh, and authentic look that highlights product texture and natural skin tones without a heavy commercial feel.
- Social Media Content: Instagram influencers and lifestyle bloggers frequently rely on window light to create a consistent and appealing visual feed.
Key Benefit: The main advantage of using window light is its authenticity and accessibility. It creates a believable, high-end look without any investment in lighting equipment, making professional-quality photography attainable for everyone.
Practical Setup and Considerations
Mastering window light is about control and modification. Start by turning off all other indoor lights to avoid mixed color temperatures. Position your setup near a large window, but not in direct, harsh sunlight. For the softest light, shoot on an overcast day or use a north-facing window, which provides consistent, indirect light throughout the day. Place your product 3 to 6 feet from the window and use a white foam board or reflector on the opposite side to bounce light back, filling in shadows and balancing the exposure. A tripod is essential to keep images sharp, as the lower light levels may require slower shutter speeds.
Top 8 Lighting Setups Compared
| Lighting Setup | Core Features/Characteristics | User Experience/Quality ★★★★☆ | Value Proposition 💰 | Target Audience 👥 | Unique Selling Points ✨ | Price Range 💰 |
|---|---|---|---|---|---|---|
| Softbox Lighting Setup | Fabric diffusion panel, various sizes & shapes, compatible with strobes & LEDs | Soft, even lighting; minimal shadows & glare | High-quality professional results | Medium to large products, electronics, fashion | Eliminates harsh reflections; versatile; quick setup | $50-$500 |
| LED Panel Continuous Lighting | Continuous flicker-free light, adjustable color temp, high CRI, dimmable | WYSIWYG lighting preview; consistent color accuracy | Energy efficient; multi-use for photo & video | Small to medium products, social media, demos | Adjustable temp; cool operation; quiet | $30-$1000+ |
| Ring Light Setup | Circular LED/fluro light around lens, dimmable, color temp adjustable | Even, shadowless illumination; distinctive catchlights | Portable & easy to use | Small products, jewelry, cosmetics, macro | Creates circular catchlights; compact | $25-$300 |
| Strobe Flash Lighting System | Powerful flash bursts, modeling lights, fast recycle, wireless triggering | Exceptional image quality; sharp details ★★★★★ | Professional-grade results | Pro product photographers, large products | Overpowers ambient light; precise control | $200-$5000+ per light |
| Light Tent/Photo Box Setup | Translucent fabric enclosure, multiple light entry, collapsible | Easy for beginners; consistent shadowless lighting | Very affordable & portable | Small to medium products, beginners, e-comm | 360° diffused light; minimal expertise required | $20-$200 |
| Three-Point Lighting Setup | Key, fill, background lights with adjustable ratios; works with any light source | Full control over lighting mood & dimension ★★★★★ | Versatile & scalable | Professionals, creatives, advanced learners | Industry standard; teaches lighting fundamentals | $300-$3000+ |
| Speedlight/Flash Gun Setup | Compact, battery-powered, TTL, high-speed sync, wireless control | Portable; flexible; TTL aids beginners ★★★☆☆ | Affordable & mobile solution | Location shoots, small-medium products, budget | On/off camera use; fast recycle; versatile | $100-$600 per speedlight |
| Natural Window Light Setup | Large soft natural light source, directional, modifiable via curtains/reflectors | Soft, flattering light; natural color rendition ★★★★☆ | Free light source; eco-friendly | Lifestyle, food, small-medium products, budget | Authentic natural light; no power needed | $0-$100 (accessories) |
Choosing Your Perfect Light: Final Recommendations
Navigating the world of product photography lighting can feel overwhelming, but as we've explored, the path to stunning images is less about owning the most expensive gear and more about understanding the right tool for the job. From the controlled, professional diffusion of a softbox setup to the accessible simplicity of natural window light, each method offers a unique pathway to highlighting your product's best features. The key takeaway is that there is no single "best" light; instead, there is the best lighting for your product photography needs, budget, and workspace.
Remember, the goal is always to control and shape light to serve your product. A strobe flash system offers unparalleled power to freeze motion for dynamic shots, like a splashing beverage, while a light tent provides a foolproof environment for eliminating reflections on highly glossy items like jewelry or chrome. Your choice directly impacts workflow efficiency and the final aesthetic of your brand.
Key Principles to Guide Your Decision
As you move forward, keep these core principles at the forefront of your selection process. They will act as your compass, guiding you toward a solution that not only works today but can also grow with your business.
- Control Over Convenience: While natural light is free, a dedicated artificial lighting kit like LED panels or a three-point setup offers complete control, allowing you to shoot at any time of day and achieve consistent results. Consistency is the cornerstone of a professional and trustworthy e-commerce presence.
- Start with Your Product: Let your product's characteristics dictate your lighting. Small, reflective items thrive in a light tent. Larger items like furniture demand the broad, soft light from large softboxes. Textured products like fabrics benefit from the shadows created by a well-placed Speedlight.
- The Power of Diffusion: Harsh, direct light creates distracting glare and hard shadows. Every effective setup we've discussed, from softboxes to bouncing a flash, hinges on the principle of diffusion. Mastering how to soften and spread your light source is a non-negotiable skill.
Your Actionable Next Steps
Feeling empowered? Here’s how to translate that knowledge into action:
- Audit Your Products: List your top 3-5 most commonly photographed items. Note their size, texture, and reflectivity.
- Assess Your Space and Budget: Be realistic about your available shooting area and financial constraints. This will immediately help you decide between a compact ring light and a more expansive three-point lighting system.
- Invest in One Core System: Choose one of the recommended setups that best aligns with your audit. Don't try to buy everything at once. Start with a solid foundation, like a two-light softbox kit, and master it.
- Practice and Experiment: The best lighting for product photography is ultimately discovered through hands-on practice. Set up your chosen lights and start shooting. Move the lights, change the angles, and adjust the power. Take notes on what works and what doesn't.
Ultimately, investing in and mastering your lighting is a direct investment in your brand's perceived value. It’s the critical element that transforms a simple snapshot into a compelling photograph that stops the scroll, builds trust, and drives sales. The perfect shot is waiting for you; now you have the knowledge to go out and illuminate it.
More guides in FAQs & How-To Guides
February 5, 2026
Sample Article Title for Testing
A sample article for testing webhook integration with Outrank
Read guideOctober 27, 2025
How to Take Professional Product Photos That Sell
Learn how to take professional product photos with our guide. Master your camera, lighting, and editing to create stunning images that drive e-commerce sales.
Read guideOctober 2, 2025
What Are Transaction Fees? A Guide for Your Business
What are transaction fees and how do they impact your business? This guide demystifies payment processing with clear examples and actionable cost-saving tips.
Read guideGet the estate sale pricing guide
Enter your email for pricing ranges, planning notes, and a clearer path to launch.