Packaging Fragile Items for a One-Day Pickup
Packaging fragile items for estate pickup: methods by item, a shake test, labels, reuse tips, and when not to ship.
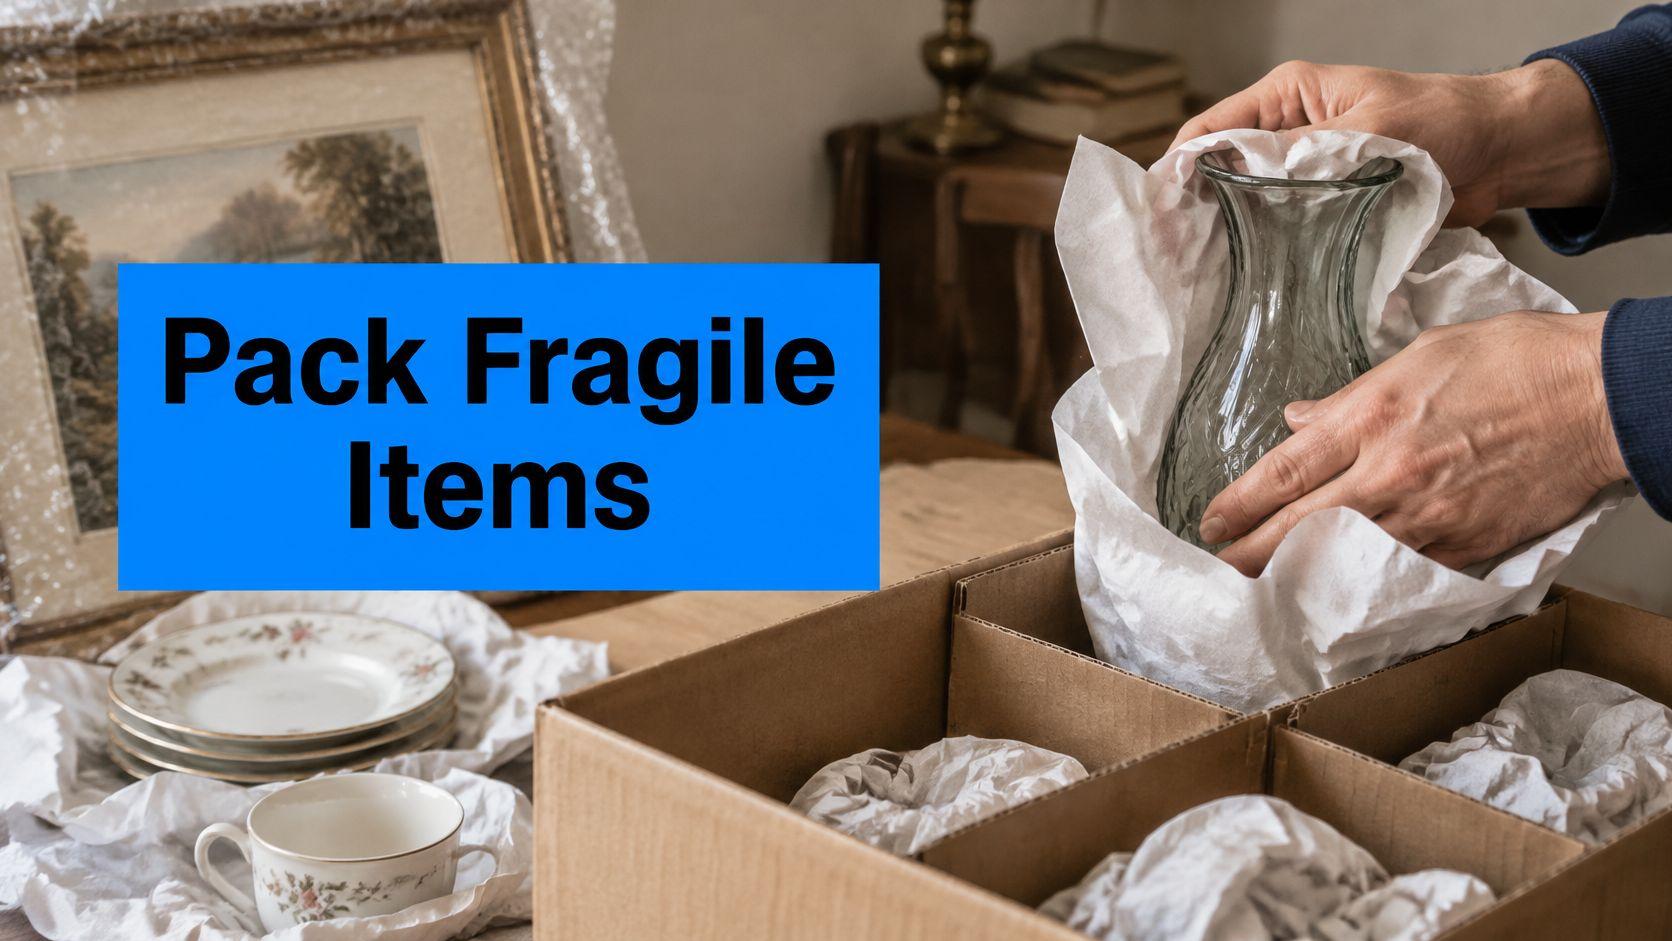
More bubble wrap isn't automatically better protection. A vase can sit inside a bulky parcel and still slide into a carton wall, while an overstuffed box can press directly on a handle or frame corner. For a household sale, packaging fragile items means controlling movement, protecting weak points, and documenting condition, not turning every teacup into a parcel-delivery project.
For a coordinated local pickup, I'd use about two inches of resilient cushioning around ordinary glass and ceramics as a starting packing target, then adjust for weight, shape, and condition. That's a practical setup, not a guarantee or a substitute for specialist packing. Pair it with photos taken before the tissue goes on and a pickup inventory a helper can follow without opening boxes.
Materials Checklist and Reuse Rules
Gather supplies before opening a lot. Otherwise, you'll end up holding a partly wrapped bowl while someone searches the garage for tape, or borrowing the cushion intended for the next carton.
Make separate piles for surface protection, cushioning, and structural support. Paper protects a finish. Foam cushions an impact. A rigid divider keeps neighboring pieces apart. A towel can cushion a vase, but it won't replace a divider between drinking glasses.
Materials Checklist for Fragile Lots
| Material | Use for | Check before use |
|---|---|---|
| Double-wall cartons | Glass and china in the main carton | Square corners, intact flaps, firm bottom |
| Snug inner carton | Hollow ceramics and high-value pieces | Room for the wrapped item and a continuous cushion |
| Acid-free or plain paper | Wrap on glass, frames, and silver | Clean, unprinted, suitable for the surface |
| Foamed plastic or bubble wrap | Glass and screens | Intact cushioning, wrapped over the protective paper |
| Clean towels or linens | Soft cushion around vases | Dry, clean, free of buttons and zippers |
| Corner guards | Framed art corners | Rigid enough to resist localized pressure |
| Cardboard dividers | Plates and stemware | Firm panels that keep pieces apart |
| Packing tape | Bottom and every seam | Packaging-grade adhesive that bonds to the carton |
| Crumpled paper | Accessible hollow cavities | Loose, supportive fill, never forced into fragile walls |
| Marker and labels | Lot number, room, buyer name | Legible from the walking path |
| Camera and ruler | Condition photos | Clear lens and readable scale beside the piece |
Reuse the Sound Materials, Not the Questionable Ones
Press the corners of a reused carton before committing to it. Reject damp, crushed, torn, or softened boxes, even if another layer of tape would make them look serviceable. Grocery cartons are suitable only when their structure and load capacity suit the contents.
Use newsprint only outside a clean protective wrap. Keep printed paper away from silver, photographs, and unfinished wood because ink can transfer. For paper collectibles, Famous Movie Posters' guide to acid-free tissue and poster tubes is a useful material-selection reference, though a brittle or mounted work shouldn't be rolled because a tube is available.
- Reserve foam and bubble wrap: Use them where cushioning matters most, especially glass and screens.
- Keep linens accountable: Don't accidentally pack a family tablecloth into a sold lot as disposable padding.
- Skip migrating loose fill: Packing peanuts are awkward around hollow ware and make pickup-day unpacking untidy.
Cost check: If the outer carton is mostly empty space, choose a smaller sound carton before reaching for more filler.
Match Each Fragile Item to a Packing Method
Start with the part most likely to fail. A wineglass needs protection around its stem and rim; a framed print needs protection at its corners and face. Wrapping both in the same thick cocoon ignores the different ways they can break.
The International Safe Transit Association's packaging guidelines identify four fundamental hazard categories: shock, vibration, compression, and atmospheric conditions. For a household handoff, think of a dropped carton, a vibrating car floor, another box stacked above, and a humid garage. Surface abrasion also deserves attention when wrapping finished objects.
Packing Method by Fragile Estate Item
| Item | Main failure | Packing method | Cushion target |
|---|---|---|---|
| Stemware and glassware | Rim and stem shock | Wrap separately, gently fill the bowl, stand upright, prevent rim contact | Continuous cushion around each protected piece |
| China and plates | Edge chips and stack compression | Put cardboard between plates, make manageable bundles, pack on edge | Rigid separation plus a cushioned perimeter |
| Framed art | Corner crush and face abrasion | Protect suitable faces with paper or glassine, fit corner guards, stand on edge | Corner blocks and a rigid protective face sheet |
| Electronics | Screen shock and loose parts | Bag cables, wrap the body, keep loose fill away from vents | Fitted foam or stable cushioning without screen pressure |
| Hollow ceramics and antiques | Existing cracks and vulnerable walls | Photograph marks first, gently support accessible cavities, double-box higher-value pieces | Cushioned inner carton held securely in the outer carton |
Stemware needs separation more than bulk. Gently place paper inside an accessible bowl without forcing it outward, then wrap the whole glass. Don't tighten wrapping around the stem or let a neighboring base bear against the rim.
For china, keep bundles small enough to handle comfortably. Cardboard between plates prevents direct contact, while edge packing avoids making the bottom plate carry a tall stack. Check that dividers remain in position when the carton is lifted.
Framed art needs a different judgment. Put protective paper against sound glazing or a suitable frame surface, not directly against friable paint, charcoal, or a delicate decorative finish. An unglazed or unstable artwork may need specialist handling rather than a household wrapping method.
Enough Cushion Without a Swollen Carton
Use the introductory cushion target as a working allowance, not permission to force every object into the same arrangement. Maintain support beneath the item as well as beside it, and give handles, spouts, and projecting feet their own protected space. A carton should close flat without pressing on the contents.
For a useful comparison of compartment-based protection, Mylarmen's vial packaging breakdown offers a way to think about separating small fragile objects. The relevant principle for estate glassware is individual restraint, not adopting a medical-packaging specification.
Attribute's industry packaging guidance discusses right-sizing and reducing unnecessary packaging. For a household seller, the practical choice is straightforward: remove excess carton volume without sacrificing the cushioning around the item.
Families use DIYAuctions when settling a parent's home, downsizing after decades in a house, or clearing a property before listing it. Those mixed inventories call for item-specific decisions. A sturdy mixing bowl and a repaired porcelain figurine shouldn't receive identical treatment.
Close the flaps and gently move the carton before sealing. Any shifting means the arrangement needs adjustment, not automatically another layer around the outside.
Labels Photos and a Pickup Inventory
Take condition photos before wrapping anything. Once tissue covers a maker's mark or foam hides a repaired handle, you've lost the simplest opportunity to record what the buyer is receiving.
Work on a clear table with good light and a plain background. Keep the lot identifier beside the item so similar bowls, candlesticks, or framed prints don't become confused in your photo folder.
Build the Evidence Trail in Packing Order
- Record the whole object: Photograph all sides, the underside, and any removable components.
- Show condition clearly: Capture chips, cracks, repairs, worn decoration, and vulnerable projections.
- Record identifying details: Include maker's marks, signatures, serial numbers, and labels where present.
- Add scale: Place a ruler beside the piece without resting it against a delicate finish.
- Match the description: Write a short condition note consistent with the auction listing.
A useful note is specific: “Small chip beneath the foot; visible in underside photo.” “Good for its age” doesn't tell a helper or buyer what to expect. Don't treat photographs as proof that transit damage could never occur; they establish the visible condition at the time you packed.
Photograph the item again once it's seated in its cushioning, while its position and separation are still visible.
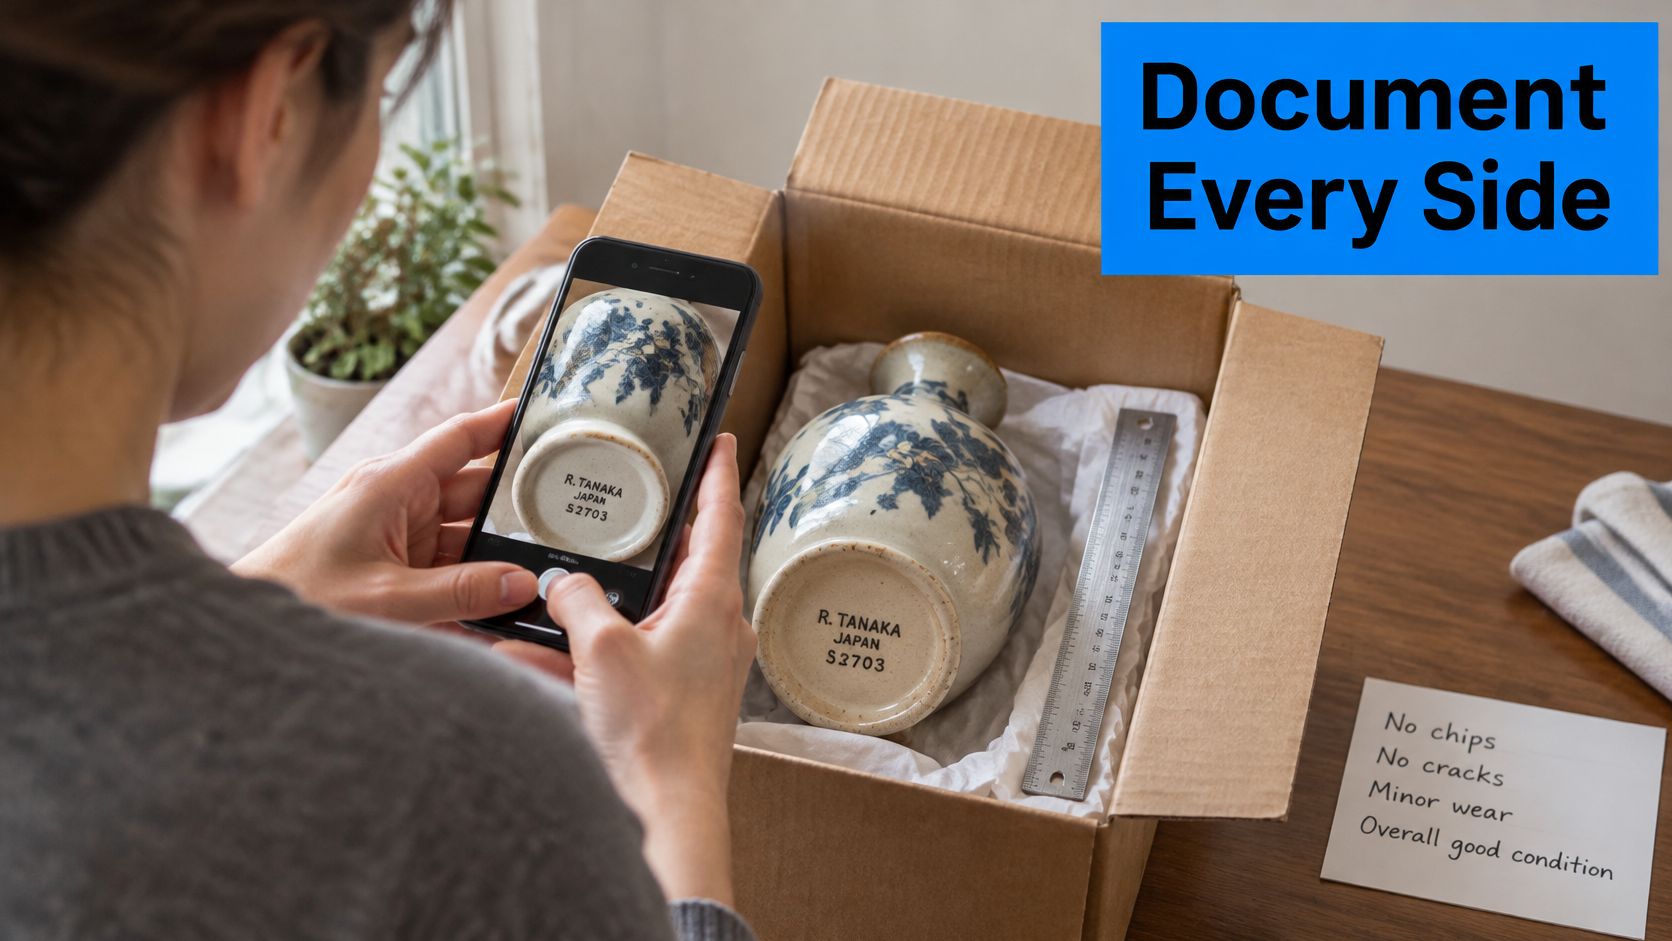
Finish with a photo of the sealed, labeled carton. Store the images under the same lot identifier used on the pickup sheet, rather than leaving them scattered among unrelated phone pictures.
Give Helpers a Sheet They Can Actually Use
We organize lots room by room, preserving context only the family knows. Keep that room reference on the carton even when you move finished lots into a shared staging area.
A personal property inventory list provides a useful basis for the pickup sheet. Include the lot identifier, short description, carton count, buyer name, and payment status.
| Pickup field | What the helper needs |
|---|---|
| Lot | Identifier matching the carton |
| Description | Recognizable wording, such as blue floral tea service |
| Cartons | Complete count, including separately packed lids |
| Buyer | Name matching the collection record |
| Payment | Paid or unpaid, checked against the current record |
| Handoff | Space to record collection or an unresolved issue |
Face labels toward the walking path, not toward the wall. Keep buyer information visible to helpers without displaying it unnecessarily to everyone arriving.
In a 2025 survey of US consumers, 69% reported receiving a poorly packed order that reduced their opinion of the brand, according to VistaPrint's shipping and returns survey. That's a US shipping finding, not a global measure of local estate pickups, but it reinforces why a neat, understandable handoff matters.
Our sale process ends with a coordinated local pickup day instead of repeated days of buyers walking through the house. Keep the photo set and collection record, and ask buyers to retain packaging if they report damage. Carrier insurance requirements are a separate matter, not something a driveway pickup sheet establishes.
How to Pack a Fragile Lot Step by Step
Prepare a cleared work surface, the chosen carton, and the lot label before starting. Keep unwrapped pieces away from the table edge and leave a separate area for completed cartons.
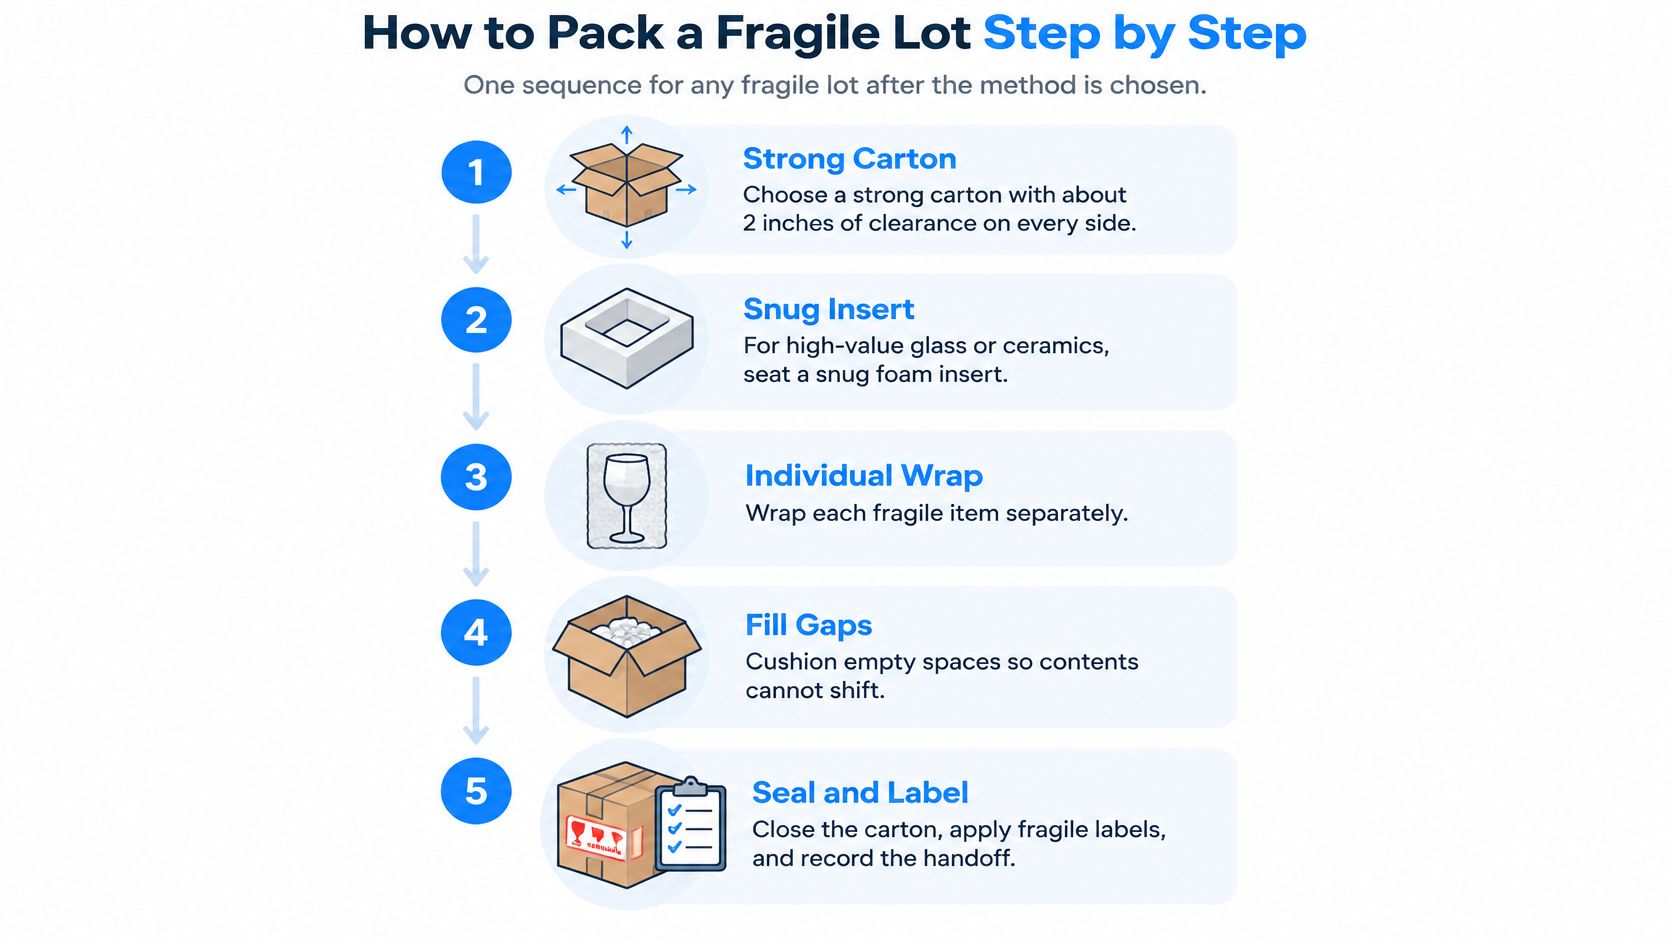
This visual summarizes the packing flow; the detailed sequence below includes the checks that are easy to miss.
Pack From the Bottom Up
-
Choose and prepare the carton.
Use a sound box with clearance for the chosen cushion, including beneath the object. Tape the bottom before loading and lay in the base cushion. For high-value glass or ceramics, prepare an inner carton and a larger outer carton, with resilient material separating their walls. The common slip is choosing the box from the bare object's dimensions, then discovering the wrapped piece no longer fits. -
Wrap each object separately.
Put clean protective paper against a suitable surface, followed by foam or bubble wrap where needed. Secure the wrapping to itself, never with adhesive directly on the object. A shared wrap around several cups doesn't keep their handles from striking each other. Leave enough visible shape to identify which way each piece should sit. -
Support accessible hollow areas gently.
Place loosely crumpled paper inside a sound bowl or vase where it can be inserted and removed without force. Don't ram paper through a narrow neck, press against an existing crack, or assume internal fill makes damaged ceramic structurally sound. Pack detachable lids separately and cushion their knobs without loading them. -
Separate the contents before filling the remaining space.
Set dividers so objects can't touch when the carton is carried. Keep dense lamp bases, books, and tools out of glass cartons unless a rigid arrangement independently restrains them. Packing a heavy object beside porcelain and adding a soft towel between them leaves the heavier object free to push through that cushion. -
Immobilize the load without forcing the flaps.
Fill gaps evenly, including spaces around the lower portion of the object. The USPS package-preparation guidance recommends cushioning that prevents shifting, calls for loose fill to overfill the container before closure, and specifies packaging tape at least 2 inches wide. Overfilling loose cushioning isn't the same as compressing a fragile object beneath a bulging lid. If closure needs force, rearrange the pack. -
Seal the carton and remove confusing markings.
Reinforce the bottom, central closure, and edge seams with packaging tape. Cover or remove obsolete labels on reused boxes, then apply the current lot identification. Keep the closure flat and check that tape adheres to clean cardboard rather than dusty paper or loose wrapping. -
Lift, gently test, and correct.
Support the bottom, lift the carton, and make a small controlled movement. Don't perform a vigorous shake or a deliberate drop with inherited goods. If you feel movement, reopen the carton and correct the specific gap, then reseal and check again. A Fragile marking helps a helper identify the contents; it doesn't replace the internal restraint needed for ordinary carrying.
Learn the Feel Before Packing the Best Pieces
Use inexpensive, sound glassware for a practice carton before starting the good china. You're learning how much paper provides spring, how firmly a divider should sit, and whether the finished weight feels manageable.
A quiet carton is a useful movement check. It isn't proof that the item can withstand a drop, a crushed corner, or pressure from a heavier load.
If you prefer a moving demonstration alongside the written sequence, use the packing video below while preparing the practice carton.
When a Packed Box Still Fails
A rattle means something can still travel inside the carton. Locate the movement before adding material: it may be a loose lid, a divider that slips upward, or the entire inner box shifting in its outer cushion.
Don't mistake a louder warning for a need to wrap everything again. Most pickup-day packing problems need a targeted correction.
Fragile-Pack Problems and Same-Day Fixes
| Symptom | Likely cause | Fix |
|---|---|---|
| Rattle on the shake test | Item can still shift | Add fill or tighten the inner arrangement until silent |
| Bulging carton or popping tape | Overweight or overfilled | Split the load and retape all seams |
| Glass-on-glass sound | Pieces touching | Insert a rigid divider |
| Frame corner poking out | Missing or ineffective corner guards | Add guards and repack on edge |
| Crushed bottom | Weak carton or excessive stacking | Replace the carton and use a low, stable stack |
| Haze on metal or paper | Possible moisture trapped in plastic | Inspect the surface and move suitable items to paper in a dry room |
Fix the Cause Rather Than Hiding the Symptom
A bulge needs less load, not stronger persuasion. If you have to lean on the flaps, open the carton. Separate the lot into additional boxes and update the carton count immediately so the buyer doesn't leave a component behind.
A glass-on-glass ring calls for separation. Find the contact point, including rims above dividers and handles projecting into neighboring compartments. Soft wrap can flatten under pressure; a properly fitted rigid partition keeps the pieces apart.
A frame corner pushing against cardboard needs structural protection. Fit a corner guard and provide clearance around it rather than taping a patch over the outside. Inspect the opposite corner too, since a tilted frame may be loading both ends diagonally.
For a crushed bottom, replace the box instead of reinforcing already weakened cardboard. Haze or dampness requires inspection before rewrapping: it may be residue, finish deterioration, or moisture, and changing materials won't diagnose the object's condition.
- Separate incompatible weights: Cast iron and porcelain belong in different cartons, not beneath a thicker shared blanket.
- Check every finished pack: Similar objects can have different repairs, weights, and projecting details.
- Isolate uncertain pieces: Set aside unstable or unusually valuable items rather than improvising under pickup-day pressure.
A Home Check Isn't a Laboratory Test
The ISTA parcel-testing overview recommends at least two packaged-product samples for fragile or liquid products under its 3A procedure and encourages five or more repetitions with new samples to improve statistical confidence. Repeated testing matters because both products and packaging vary.
That doesn't mean dropping a family heirloom to validate its box. It means treating a successful household movement check modestly and inspecting each completed carton rather than assuming an entire matching set is safe.
For emotionally significant objects, decide whether they belong in the sale before solving their packaging. Our guide to what family heirlooms are can help separate items to retain from items ready for a new owner. These are focused corrections, not a reason to unpack the entire house.
Stage One Pickup Day and Skip the Ship
Default to coordinated local pickup for mixed estate glass, china, and frames. Consider shipping when a remote sale justifies the additional packing work and you're prepared to follow the applicable carrier, insurance, and contents rules. A local handoff avoids the parcel network, but the buyer's drive still requires a stable load.
Stage completed cartons by buyer along a clear path. Keep heavy cartons low, leave doorways unobstructed, and never put fragile lots beneath furniture awaiting collection.
Make the Handoff Easy to Carry
- Lift with support: Bend at the knees, keep the carton close, and support it with both hands beneath the base.
- Keep glass upright: Preserve the intended orientation rather than flipping a carton to find its label.
- Load heavy cartons low and flat: Don't balance them on seats or place them above lighter fragile boxes.
- Limit fragile stacks: I'd keep them no more than two cartons high, and lower still when the boxes are mismatched or the vehicle floor isn't level.
- Restrain the load: Prevent cartons from sliding or tipping during braking and turns.
Vehicle vibration and bumps can loosen a marginal arrangement. Don't put loose objects on top of the finished cartons, and keep the labels accessible until the buyer has confirmed the complete lot.
We bring local buyers into a coordinated pickup process so packing serves a defined event rather than repeated porch meetings. You decide what stays, what each item is worth, and when pickup happens. If a buyer doesn't collect, you can re-list the lot, donate it, or offer it to the next-highest bidder; our post-sale support guidance helps you plan the follow-through.
Start with the fragile lots in one room: photograph their condition, choose sound cartons, pack and gently test each finished box, then print the lot list. Set your DIYAuctions pickup date once you have a clear staging plan, so every labeled carton has a destination and every helper knows what to hand over.
Get the estate sale pricing guide
Enter your email for pricing ranges, planning notes, and a clearer path to launch.