Clean Out a House: Expert Tips for 2026
Clean out a house for moving, downsizing, or estates. Our guide offers tips on sorting, selling, & disposal for a stress-free process.
You're standing in a house that used to feel familiar, and now it feels like inventory.
Every flat surface has a story on it. Closets are packed tighter than you remembered. The garage has become a holding zone for things nobody wanted to decide on. You know the place has to be cleared, but the first question isn't small. It's not “What should I do today?” It's “How do I clean out a house without wasting time, money, and good items?”
That pressure is real. Routine cleaning already takes a surprising amount of time. The average person spends nearly 6 hours per week on routine house cleaning, which adds up to over 1.5 years of life, according to Summit Janitorial's cleaning facts roundup. A full house clean-out is bigger than maintenance cleaning because it adds sorting, packing, selling, donating, hauling, and final cleanup.
That's why the people who get through this process cleanly don't treat it like “decluttering.” They treat it like a project with a financial outcome. Some items should stay. Some should go fast. Some should be sold before they're damaged, dumped, or donated by mistake. If downsizing is part of your situation, these tips for downsizing your home are useful because they force the right early decisions about space, priority, and what belongs in the next chapter.
If you're looking at local service options while deciding whether to handle parts of the job yourself, this guide to house cleanout options near you can help frame the labor side of the project.
Facing the Overwhelm Before You Begin
The hardest moment is often the first one. Not the hauling. Not the cleaning. The first one, when you walk into a crowded room and realize every object seems to ask for a decision.
In estate work, people often lose days. They start opening random drawers, move a few boxes into the hallway, fill one trash bag, find a photo album, and then stall. By the end of the day the house isn't cleaner. The mess has just shifted.
Practical rule: A house clean-out is not one giant task. It's four separate jobs done in order. Planning, sorting, liquidating, and disposal.
That order matters. If you skip planning, you re-handle items. If you skip sorting discipline, saleable pieces disappear into donation piles. If you haul too early, you throw away value. If you postpone disposal planning, the house stays half-finished.
Why the house feels bigger once you start
A full house clean-out exposes work that normal housekeeping hides. Behind furniture, inside cabinets, under beds, in sheds, in file drawers, in attic corners. People think they're clearing contents. In reality, they're also uncovering deferred decisions.
The emotional weight is part of the labor. So is the physical sequencing. Inherited homes are especially tough because you're not just deciding what something is. You're deciding what it means, who might want it, and whether it has resale value.
The better way to think about it
Don't ask, “How do I get all this done?” Ask, “What is the outcome for this property?”
Typically, the outcome falls into one of these lanes:
- Prepare for sale: Clear the home, protect anything with resale value, and leave the property in presentable condition.
- Settle an estate: Identify assets correctly, avoid disputes, and convert appropriate items into proceeds.
- Downsize a move: Keep only what fits the next home and liquidate the rest.
- Reset a rental or inherited property: Remove contents efficiently without creating legal or condition problems.
Once you define that outcome, the project becomes manageable. Each room becomes a work unit. Each item gets a category. Each decision supports the final result.
That's the shift that gets people unstuck. You're not just trying to clean out a house. You're trying to close out one chapter without giving away money or creating avoidable problems.
Create Your House Clean-Out Game Plan
A clean-out usually goes sideways before the first bag is filled. One person starts clearing drawers, someone else pulls items for donation, and by the end of the day nobody knows what was removed, what might have value, or who approved any of it. That confusion costs time, creates family tension, and often leaves money on the table.
Start by confirming who has authority to remove, sell, donate, or discard property. In estate, foreclosure, inherited, or tenant-related situations, that step protects everyone involved. Haul Pros notes that verifying ownership and legal status before removal helps prevent liability and keeps the work aligned with probate or contract requirements.

Set the rules before you touch a room
Every profitable clean-out starts with a written plan, even if it is just one page. The goal is to reduce bad decisions made under pressure. If the house contains furniture, tools, collections, antiques, or everyday goods with resale demand, your planning choices will affect how much of that value you keep.
Answer these two questions first:
- Who approves decisions
- What outcome the property needs to reach
That outcome should be specific enough that every sorting decision supports it. Good examples include:
- Empty and broom clean for listing
- Hold back family keepsakes, sell marketable contents, donate usable remainder
- Clear the house for renovation without disposing of fixtures or salvageable materials
- Secure documents, jewelry, firearms, and records before the general clean-out starts
If several relatives or stakeholders are involved, assign one final decision-maker. Group-text clean-outs are slow and expensive.
Map the work so nothing valuable gets buried
Walk the house before any real sorting begins. Open closets. Check attic access. Look in the basement, garage, sheds, and under beds. The point is not to organize yet. The point is to measure scope and spot value early, before sellable items get mixed into donation piles or damaged during hauling.
A simple room map should track four things:
| Area | What's in it | Risk level | Action priority |
|---|---|---|---|
| Main bedroom | Furniture, clothing, personal papers | Medium | Early |
| Garage | Tools, mixed storage, chemicals | High | Early |
| Basement | Old furniture, possible moisture issues | High | Immediate check |
| Kitchen | Daily goods, cookware, food, paperwork | Medium | Early |
This is also the right time to identify rooms that may produce sale inventory. In practice, garages, workshops, dining rooms, and storage areas often hold more resale value than people expect. A written map keeps those areas from getting rushed.
If you want a practical worksheet to carry into the house, this room by room declutter checklist helps keep the process consistent.
Create one control area
Set up one clean zone for paperwork, valuables, supplies, and anything that needs a second review. I prefer a dining room corner, an empty bedroom, or a cleared section of the kitchen table if the house is small. The location matters less than the rule. Nothing in that area gets donated, sold, or discarded without review.
Use that control area for:
- Legal documents
- Keys and garage remotes
- Jewelry and small valuables
- Photos, albums, and family archives
- Medication that needs proper handling
- Firearms until lawfully transferred or secured
- Your inventory notes and sale candidates
This single step prevents some of the costliest mistakes in a house clean-out.
Schedule disposal around the sale plan
Do not order a dumpster on instinct. Too early, and usable inventory gets thrown away because the container is sitting there. Too late, and trash blocks the workflow. The better approach is to estimate volume after the walk-through, then book labor, donation pickups, and disposal in the order the house will be processed.
If you expect heavy debris, mixed household trash, or renovation waste, reserve the container before your sorting days are fully booked. The Environmental Protection Agency's guide to renting a dumpster outlines practical points on container sizing, placement, and what materials may require special handling.
A strong plan is plain, not complicated. Who decides. What gets protected. What is likely to sell. When hauling happens. Which rooms get handled first. That structure turns a stressful clean-out into a controlled project with a better financial result.
The Room-by-Room Sorting System
A profitable clean-out is won in the sorting stage. If items get mixed, rushed into donation boxes, or shoved into “deal with later” corners, the house gets emptier but the financial result gets worse.
Work one room at a time. Finish the decisions in that room before spreading into the next. That keeps saleable items grouped, reduces repeat handling, and makes it much easier to prepare a strong liquidation later. If you want a practical guide while you work, this room-by-room declutter checklist for house clean-outs helps keep the standard the same from the first closet to the last garage shelf.

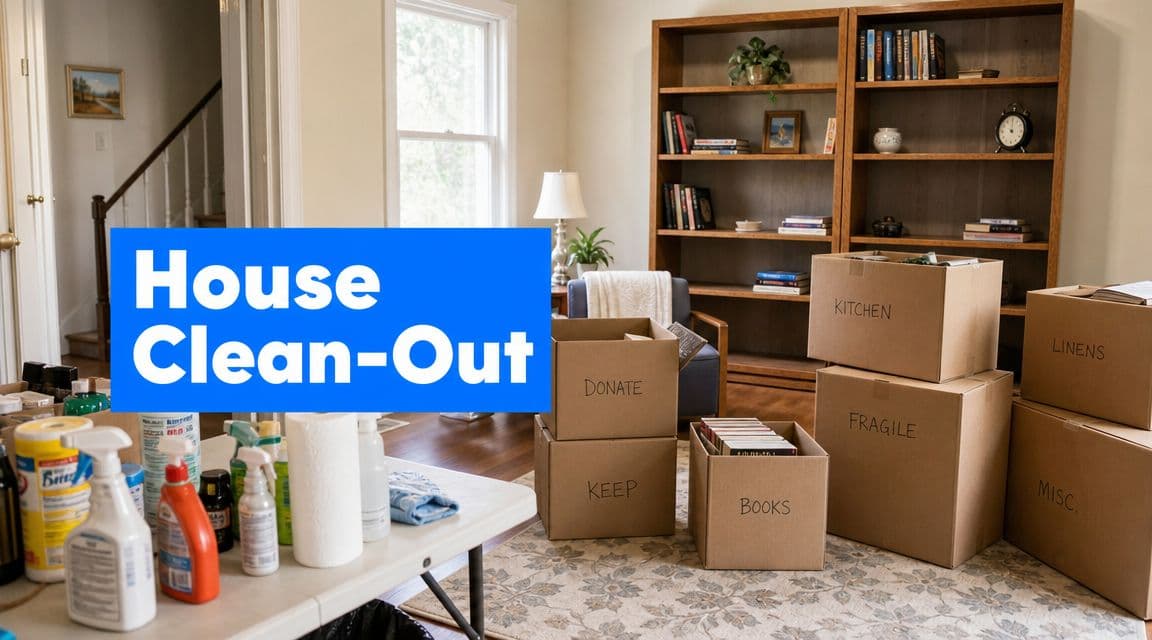
Use four categories and keep them strict
Loose categories cost money. I see it all the time. A “maybe” pile turns into a mixed pile, and mixed piles are where good inventory gets donated, broken, or forgotten.
Keep the sort to four choices:
- Keep for items with a confirmed owner and destination
- Sell for items with realistic resale value or dependable buyer demand
- Donate for clean, usable items that are not worth the time to photograph, lot, or transport for sale
- Discard for broken, unsafe, stained, expired, or very low-value material
If a decision cannot be made on the spot, place the item in the review bin you already set up in the control area. Do not create a fifth category across the floor or an entire room of delayed decisions.
Start with the rooms that build momentum
Begin where the choices are practical, not sentimental. Laundry rooms, hall closets, guest rooms, pantries, and basic storage spaces usually move faster than bedrooms, offices, or areas filled with family history.
That early progress matters for two reasons. It builds a repeatable pace, and it shows everyone helping with the clean-out what qualifies as sell, donate, or discard before the harder rooms begin. Good standards early usually lead to better sale inventory later.
A reliable sequence looks like this:
-
Pull obvious trash first
Remove spoiled food, empty packaging, broken storage bins, and anything unsanitary or beyond use. -
Open up the room
Clear floors, beds, tabletops, and counters so you can see what is there. -
Sort the contained spaces last
Drawers, cabinets, closets, and labeled boxes come after the visible clutter is under control.
Make the decision once and label it well
Every extra touch adds time and increases the chance of a bad call. Pick up the item, assign the category, and move it to that zone.
Labeling is part of sorting, not an afterthought.
The keep pile needs specific labels such as “son taking Friday,” “move to assisted living,” or “estate documents for attorney.” The sell pile also needs enough detail to preserve value. Write down brand names, model numbers, missing parts, matched sets, and anything that explains why a buyer would want the item. Those notes pay off later when the sale is being organized.
Watch for the categories that quietly produce money
Clean-outs rarely make their best return from one dramatic antique. The better result usually comes from volume in useful categories that people underestimate during sorting.
| Category | Why it gets overlooked | Better move |
|---|---|---|
| Tools | Blended into garage clutter | Group by type, keep chargers and cases together, test basic function |
| Vintage kitchenware | Looks ordinary in cabinets | Pull complete sets and separate better materials from everyday miscues |
| Small furniture | Assumed too common to sell | Keep sturdy, clean, usable pieces together for lotting |
| Lamps and decor | Parts get separated | Tape shades, finials, and cords together before moving |
| Collectibles and hobby items | Stored in unmarked boxes | Photograph the group before donation and keep related items together |
The trade-off is time. Not every usable item belongs in the sell category. A folding chair or worn side table may sell, but if it will drain labor and add little return, donation is the better call. Strong sorting is not about saving everything. It is about protecting the items that can materially improve the sale total.
Protect your decision quality
Fatigue ruins judgment. The National Institute on Aging notes that older adults and family caregivers benefit from pacing demanding tasks and taking breaks during stressful projects, which applies directly to long clean-outs and estate work. See the National Institute on Aging guidance on caregiving and stress.
Stop while your standards are still good. The tired final stretch is where paperwork gets tossed with junk mail, costume jewelry gets mixed with better pieces, and solid resale items get dropped into donation boxes because nobody wants to look at one more shelf.
A steady pace beats a heroic day followed by mistakes.
Maximize Proceeds with an Online Auction
The sell pile is where the financial outcome is decided.
Most households have more resale opportunity than people expect, but they lose it in the method they choose. A garage sale prices too low because everything must move in a few hours. One-off marketplace listings eat up time because each item needs separate communication, scheduling, and no-show management. Holding items “until later” usually turns a sell pile into a donation pile.
An organized online auction works better when the house has enough volume to attract buyers across categories. Furniture, tools, household goods, decor, collections, workshop items, garage contents, and practical everyday items all benefit from being presented as one event instead of dozens of scattered posts.

Treat sale items like assets, not leftovers
The biggest mistake I see is waiting until the house is nearly empty to think about selling. By then, matching pieces are separated, provenance is gone, parts are missing, and good buyer photos are harder to take.
A profitable liquidation starts during sorting. As you identify saleable items, keep them clean, grouped, and accessible. Protect hardware in labeled bags. Keep sets together. Write down anything you know about maker, age, material, or use.
That prep work does two things. It preserves value, and it cuts listing friction later.
What makes online auction listings work
You do not need polished catalog prose. You need clarity.
Strong listings usually include:
- Clear photos: Front, side, detail, labels, flaws, and scale.
- Honest condition notes: Chips, wear, repairs, missing parts, stains, and whether the item is untested.
- Simple titles: “Oak side table with drawer” beats “beautiful vintage piece.”
- Grouped lots where appropriate: Hand tools, holiday decor, craft supplies, and kitchen lots often move better grouped than individually.
- Pickup logic: Heavy items, second-floor items, and large furniture should be identified clearly.
A short chair listing with good photos often outperforms a long listing with weak visuals. Buyers need confidence more than adjectives.
Know when to lot and when to separate
Here, money is often made or lost.
| Item type | Better as single lot | Better grouped |
|---|---|---|
| Signed art | Yes | No |
| Power tools | Usually | Sometimes by brand or type |
| Everyday dishes | Rarely | Yes |
| Matching furniture pair | Often | Yes, if buyers want the set |
| Costume jewelry | Sometimes select pieces | Yes for mixed lower-value lots |
The rule is practical. Separate what buyers compare closely. Group what buyers want in quantity or utility.
If it takes longer to research and list an item than the likely sale justifies, group it and move on.
Use a platform that matches the project
If you want to run the sale yourself instead of handing it to a traditional estate sale company, how to do an online auction is worth reviewing before you build your catalog. The process is easier when the platform already supports photos, bidding, scheduling, payment, and pickup coordination in one place.
DIYAuctions is one example of that approach. The platform lets individuals run their own online estate sale, handles marketing to local buyers, processes payments, and uses a 10% commission model capped at $1,000, while sellers catalog items and manage the sale flow.
That fee structure matters because labor and cleanup costs can already take a meaningful bite out of estate value. Angi reports that estate cleanout services typically cost $275 to $4,000, with an average of $1,250, and that labor, junk removal, dumpster rental, and post-cleaning can add substantially more in its estate cleanout cost guide. When the clean-out itself has real expense attached to it, preserving sale proceeds becomes part of the job, not a bonus.
The practical advantage of one sale event
A good online auction does more than bring in money. It reduces drag on the rest of the project.
You identify what sells. Buyers remove those items during pickup. The house gets lighter without random negotiations across a month of private messages. You can then donate and discard from a cleaner, smaller remainder.
That's the difference between liquidation and leftover selling. One clears the path. The other keeps you stuck in it.
Handle Donations Disposals and Difficult Items
A clean-out can lose money after the sale is over.
I see it happen when the remaining contents get treated as one big trash problem. Good donations get mixed with broken goods. A full-service junk crew gets called for material the family could have loaded themselves over a weekend. Hazardous items get discovered late and stall the whole job. The last third of the project is where a lot of estates either protect their net return or give it away in avoidable cleanup costs.

Choose the removal method by labor, not just price
Donation, junk removal, and dumpster rental solve different problems. The right choice depends on who is available to do the lifting, how quickly the property must be cleared, and whether the leftovers are bulky, bagged, scattered, or hazardous.
| Option | Works best when | Trade-off |
|---|---|---|
| Donation drop-off or pickup | Items are clean, usable, and already sorted | Staff or family still need to box, stage, and coordinate |
| Junk removal crew | The house needs to be cleared fast and labor is limited | Higher cost, less control over what gets loaded first |
| Dumpster rental | Volume is steady and you have people to load over a few days | You need driveway space and you do the labor |
For cost comparison, the Better Business Bureau notes in its guide to junk removal versus dumpster rental that junk removal usually makes sense when labor and speed matter, while dumpster rental can cost less when you have time and enough volume to fill it yourself. That distinction matters in estate work. Paying for labor is often the right move, but only after reusable and saleable material is already out of the way.
A practical rule helps here. If the property has one hard push left and family help is thin, hire the crew. If the house has a garage, basement, or outbuilding that will take several rounds of loading, a dumpster often gives better control over cost.
Donation should be selective
Donation is not the place for guilt.
Only send items another household or charity can use right away. Clean dishes, solid small furniture, working lamps, usable linens, and everyday decor often fit. Broken particleboard furniture, stained mattresses, incomplete appliances, expired pantry goods, and boxes of mystery cords do not.
Families often overestimate what a nonprofit will accept. The result is double handling. They load it once for donation, get turned away, then pay to haul it again. Tight standards save time and protect the property from becoming a holding area for items no one wants.
If you need a model for separating reusable contents from true disposal, Roomstage AI property clearing gives a useful overview of how professionals split salvage, donation, and removal work.
Difficult items need their own lane
Some categories should never be dropped into general trash or left for the last day.
Handle these separately from the start:
-
Personal documents
Pull tax records, legal papers, titles, military records, and anything with account or identity information. Shred what does not need to be kept. -
Medications
Keep prescription bottles contained and out of open trash. -
Firearms and ammunition
Store them securely and confirm the lawful transfer process before anyone starts clearing the room. -
Paint, chemicals, solvents, and automotive fluids
Set these aside for local hazardous waste guidance. -
Electronics and batteries
Group them for recycling or special disposal rather than mixing them into a general junk load.
One problem item can contaminate an otherwise easy donation run or disposal load. Catching those categories early keeps the clean-out moving.
Sentimental items need boundaries
Emotion does not respond well to an open-ended pile.
Use a physical limit. One bin per sibling. One shelf for keepsakes. One banker box for original papers and photos. A defined container turns a vague family debate into a decision people can finish.
I also recommend a deadline for review. Pull sentimental items to one clearly marked area, notify the family, and set a date for final decisions. Without that deadline, the house stops being a project and turns back into storage.
The Final Clean and Preparing for What Is Next
An empty house still isn't finished.
Once the contents are out, the property itself becomes visible again. Scuffed baseboards, greasy kitchen surfaces, dust outlines where furniture sat, closet debris, sticky cabinet shelves, garage residue, nail holes, and odors all stand out more in a vacant home than they did when it was full.
Clean for handoff, listing, or occupancy
The standard needed is simple. The house should feel cleared, sanitary, and ready for the next action. That might be listing photos, contractor access, tenant turnover, or family transfer.
A final pass usually includes:
- Floors vacuumed and swept
- Cabinets and drawers emptied and wiped
- Appliances checked and cleaned
- Bathrooms sanitized
- Trash and leftover hardware removed
- Exterior entry points cleared of remaining debris
If you uncover water staining, soft materials, musty smells, or signs of prior leaks, stop and assess before calling the job done. The EPA says water-damaged areas and items should be dried within 24 to 48 hours to prevent mold growth, in its mold and moisture guidance. During final clean-out, that matters because hidden moisture can turn a cleared property into a remediation project.
Look at the house as a buyer or successor would
Walk the home room by room with fresh eyes. Open closets. Check under sinks. Smell the basement. Look behind doors. Make sure the house is empty in the places people forget, not just the places they see first.
If you need examples of how professionals think about clearing interiors before the next stage of property presentation, this piece on Roomstage AI property clearing is a useful reference.
The best clean-outs don't just remove belongings. They protect value, reduce conflict, and leave the property ready for what comes next. That's why a good system matters. When you clean out a house with a plan, you don't just get the rooms empty. You get closure, usable proceeds, and a property that's finally moving forward.
If you're preparing for a sale, an estate settlement, or a major downsize, start with one room, one inventory list, and one clear rule for every item. That's how large clean-outs become finishable.
More guides in Estate Organization & Cleanup
March 16, 2026
Your Guide to Estate Cleanout Services Cost in 2026
What does an estate cleanout services cost? Our 2026 guide reveals key pricing factors, regional differences, and smart strategies to help you save thousands.
Read guideMarch 15, 2026
A Complete Guide to Estate Cleanout Services
Learn about estate cleanout services, including costs, the process, and how to choose the right company. Make a difficult time easier with our expert guide.
Read guideMarch 14, 2026
Estate Cleanout: A Quick, Stress-Free Guide to estate cleanout
Estate Cleanout: estate cleanout planning, legal prep tips, and stress-free guidance to maximize value.
Read guideGet the estate sale pricing guide
Enter your email for pricing ranges, planning notes, and a clearer path to launch.