Your Guide to a DIY Estate Tag Sale
Discover how to run a successful DIY estate tag sale. Our guide offers practical advice on pricing, marketing, and managing your online event.
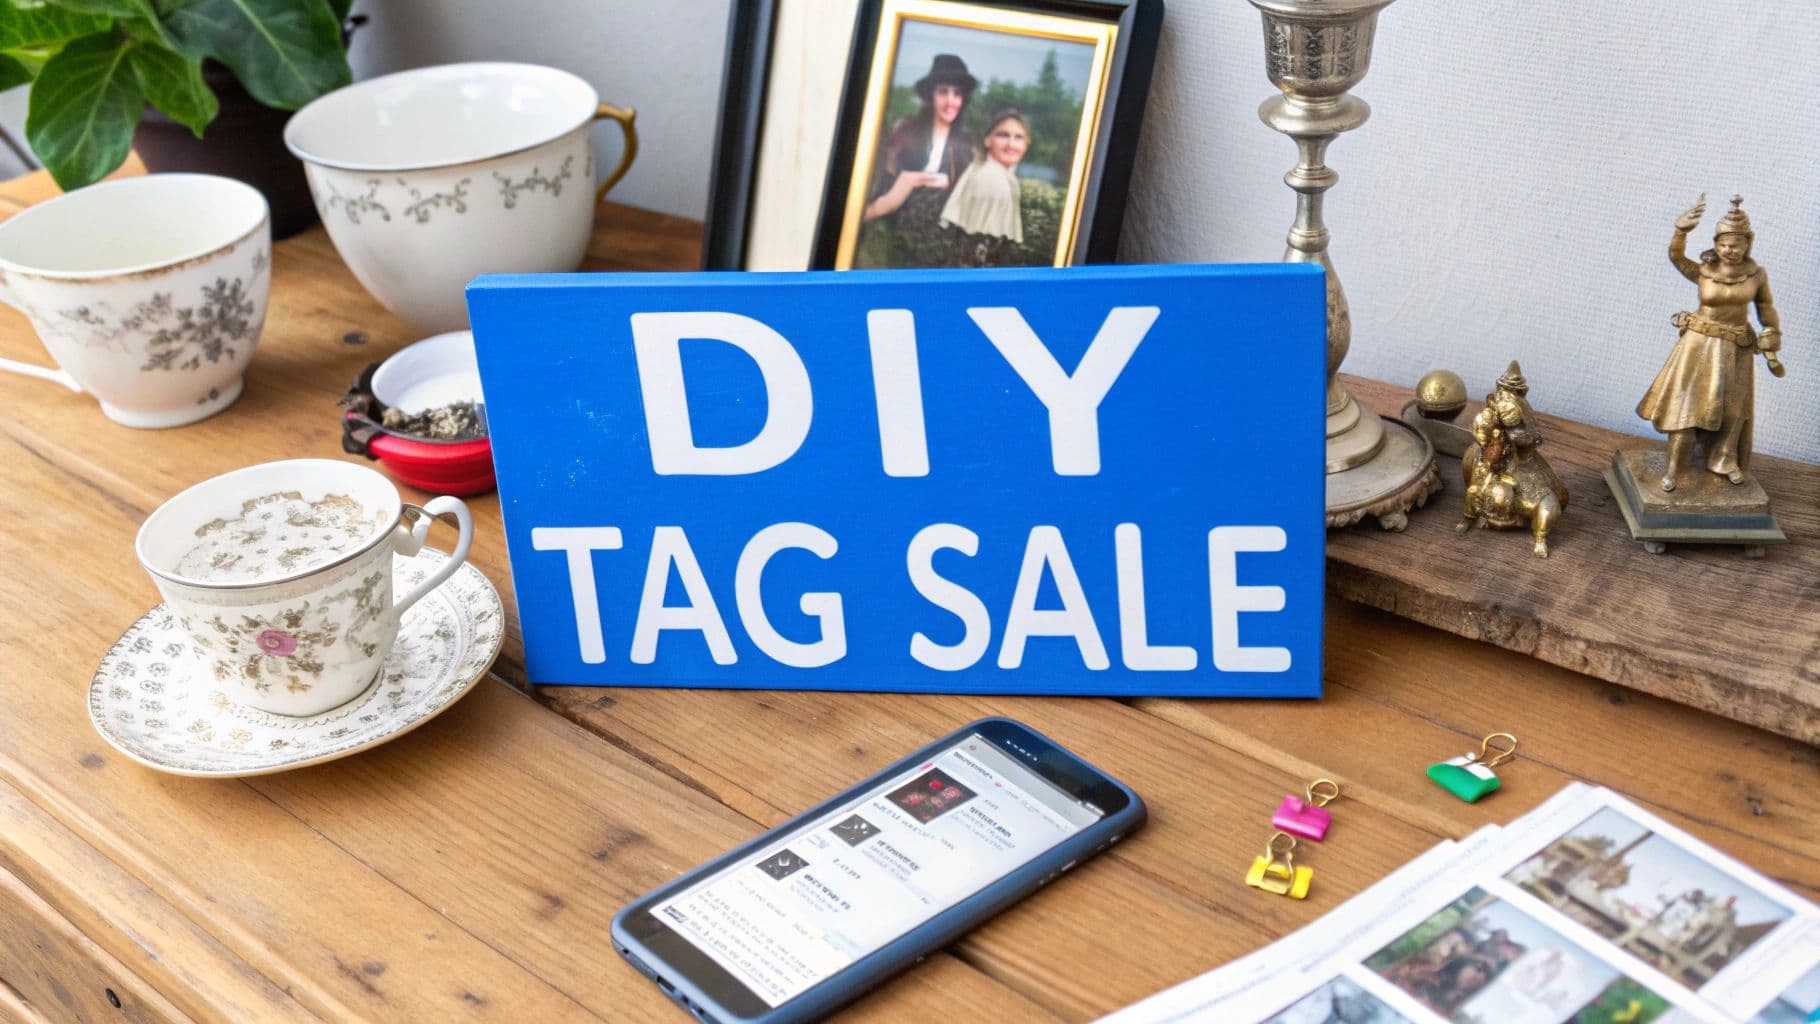
So, what exactly is an estate tag sale? It's the process of selling pretty much everything in a home, usually triggered by a major life change like downsizing or settling a loved one's estate. Think of it as a highly organized, entire-house version of a garage sale, where every single item has its own price tag.
Why Take Your Estate Tag Sale Online?
Let's be honest, dealing with a big downsize or a family member's estate is incredibly stressful. The old-school way of doing things—a chaotic, in-person weekend sale—just piles on more pressure. You're managing crowds, haggling over prices, and dealing with piles of cash.
Moving the whole process online changes the game completely. It turns a frantic event into a calm, controlled project. You get more convenience, better security, and frankly, a better bottom line. Instead of just hoping the right people drive by on a specific Saturday, you open up the sale to a much wider net of local buyers. This almost always means better prices and more items sold.
It's a Smarter, Digital-First Way to Sell
The benefits of an online sale become obvious almost immediately. When you create a digital catalog, you're essentially bringing the entire estate right to your buyers' screens. They can browse and buy from their couch, on their own time. This completely sidesteps the need for dozens of strangers walking through a private home for hours, which is a huge relief for safety and privacy.
An online platform brings a level of organization that's nearly impossible to match with a traditional sale. The advantages are huge:
- A Bigger Pool of Buyers: You can reach hundreds of people who would never see a yard sign, including those collectors searching for very specific things.
- Controlled Access: Forget the security risks and the wear-and-tear on the property from foot traffic. You decide who comes to the house and when.
- A Flexible Timeline: Your sale is open 24/7 during the run dates, not just a few cramped hours on a weekend.
- Simple, Secure Payments: Ditching the cash box is a game-changer. Digital payments are secure and you don't have to worry about bounced checks or trips to the bank.
The estate sale industry is already catching on. A recent survey showed that 51% of estate sale professionals now use online tools to complement their physical sales. It's a powerful hybrid approach. You can dig into the details in the full 2024 Estate Sale Industry Survey.
The Modern Choice is Yours
At the end of the day, running your own online estate tag sale puts you in the driver's seat. You get to skip the massive commission fees that traditional estate sale companies charge, which can eat up 30-50% of your total earnings. You set the prices, you control the timeline, and you manage the pickup schedule—all with a platform designed to make it as simple as possible. It's an approach that not only helps you make more money but also eases the incredible pressure that comes with selling personal belongings.
Setting Up Your Sale for Success
A great online estate sale doesn't happen by accident. It's all about the prep work. This first phase is where you build the foundation for a smooth, profitable event, turning what could be a mountain of chaos into a series of manageable steps.
The biggest mistake I see people make is underestimating the time it takes. Sorting, cataloging, and marketing always take longer than you think. A rushed sale almost always means less money and more stress. Do yourself a favor and give yourself at least two to four weeks from the day you start sorting to your final pickup day.
A well-planned schedule is your best friend. It keeps you from hitting that last-minute panic button and lets you focus on one stage at a time.
Crafting Your Sale Timeline
The easiest way to map this out is to pick your ideal sale end date and simply work backward. This reverse-planning trick helps you set realistic deadlines for all the big tasks.
Here’s what a typical timeline looks like in the real world:
- Weeks 1-2: The Big Sort: This is where the real work happens. You’ll need to go room by room and make decisions: sell, keep, donate, or toss. It's tedious but absolutely critical.
- Week 3: Catalog and Photos: Now you turn all those "sell" items into online listings. Dedicate this week to taking good photos, writing solid descriptions, and figuring out pricing. For a deep dive, check out our guide on inventory management best practices.
- Week 4: Sale, Promotion & Pickup: Time to launch! This final week is all about getting the word out to local buyers and then coordinating a smooth, organized pickup event once the sale closes.
This structure ensures you put enough time into the most important part—getting everything organized before a single person sees an item.
My best advice? Don't try to sell every single thing. Be ruthless. Your goal is to make the most money, not to list every last knick-knack. You'll save yourself a ton of time and energy by donating or discarding low-value items.
Choosing the Right Online Platform
This is one of the most important decisions you'll make. The right platform feels like a true partner, while the wrong one can create a ton of headaches. You're looking for that sweet spot between powerful, easy-to-use features and a fair price.
When you’re comparing your options, zero in on these key features:
| Feature | What to Look For | Why It Matters |
|---|---|---|
| Commission & Fees | A simple, transparent fee structure. The lower the commission, the more money in your pocket. | Hidden fees are a classic "gotcha" that can eat into your profits. Platforms like DIYAuctions have a straightforward 10% commission. No surprises. |
| Ease of Use | An interface that makes sense. Uploading photos and writing listings should be easy, not a chore. | A clunky system just adds frustration to an already big job. You want to get in, get it done, and get out. |
| Payment Processing | Secure, built-in payment options. This is non-negotiable for protecting both you and your buyers. | Trying to manage payments yourself is a huge risk. A good platform handles all the transactions securely so you don't have to. |
| Buyer Reach | Tools that help you connect with a network of local buyers who are ready to shop. | You can have the best stuff in the world, but it won't sell if no one sees it. The platform needs to help you find your audience. |
Putting in the effort to pick the right platform upfront makes everything else fall into place. It clears the technical hurdles and lets you focus on what really matters: sorting the items and running a killer sale.
Building an Irresistible Digital Catalog
Your online catalog is your digital storefront. It’s not just a list of things for sale; it’s the single most important tool you have for convincing someone to buy. Think about it—buyers can’t pick things up or see them in person, so your photos and descriptions have to do all the heavy lifting.
Putting a little extra time in here pays off directly in your final earnings. You don't need a fancy camera or a photo studio. Your smartphone is more than capable of getting the job done, as long as you focus on making every item look its absolute best.
Mastering Smartphone Photography
I can’t stress this enough: bad photos will absolutely kill your sale. Buyers depend entirely on your pictures to judge an item's quality, condition, and whether it’s worth their money. The good news is that compelling photos are all about technique, not expensive gear.
- Let There Be Light: Natural light is your best friend. Find a spot near a big window, but try to avoid harsh, direct sun, which creates ugly shadows. If you have to shoot at night, grab a couple of lamps and position them to create soft, even lighting.
- Keep the Background Simple: A busy, cluttered background is distracting. A plain wall, a simple piece of fabric, or even a big sheet of white poster board works perfectly. You want the item to be the star of the show.
- Show It All Off: One photo is never enough. Take pictures of the front, back, sides, and any important details. Is there a maker's mark? A cool design feature? Get a close-up. For a piece of furniture, snap a wide shot and then zoom in on the wood grain or fabric texture.
- Be Honest About Flaws: This is a big one for building trust. If a teacup has a tiny chip or a table has a scratch, take a clear, close-up photo of it. People will appreciate your honesty and feel more confident buying from you.
Need more hands-on advice? We have a complete guide on how to take professional product photos that will help you get amazing results with just your phone.
This infographic breaks down the main phases of getting your sale ready, from the initial sort-through to getting the word out.
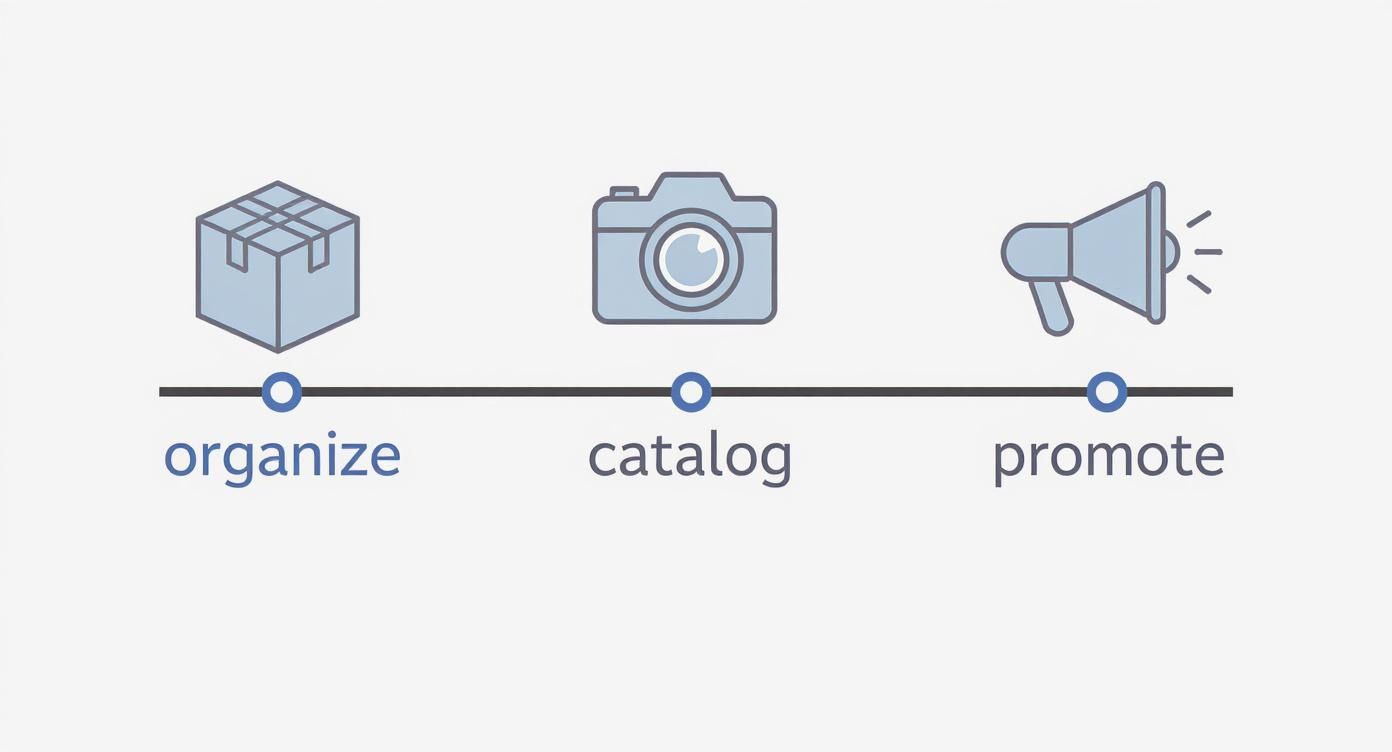
As you can see, creating the catalog is right in the middle—it’s where the physical work of organizing meets the digital work of selling.
Writing Descriptions That Sell
With great photos in hand, your next job is to tell the story with words. Your goal is to be clear, concise, and answer any question a buyer might have before they even think to ask it.
Start with a great title. Instead of just “Brown Chair,” go with something like “Mid-Century Modern Walnut Armchair by Drexel.” This immediately tells a buyer what they're looking at and hits important keywords for people searching.
In the description itself, be sure to cover these bases:
- Dimensions: Always include height, width, and depth. This is non-negotiable for furniture, but also super helpful for things like lamps and decor.
- Condition: Don't just say "used." Is it "like new," "gently used," or does it show "age-appropriate wear"? Call out any dings, scratches, or repairs.
- The Cool Factor: What makes this item special? Point out if it's made from cherry wood, has a unique history, or is from a well-known brand.
A great description does more than just inform. It prevents a ton of back-and-forth questions and makes sure buyers aren't disappointed when they show up for pickup.
The Art and Science of Pricing
Pricing can feel like the hardest part. You want to get what an item is worth, but you don't want to price it so high that nobody even considers it. The best approach is a mix of solid research and a flexible strategy.
For most everyday household goods, a quick search on eBay (make sure to filter by "Sold Items") or Facebook Marketplace will give you a good starting point. Find items in similar condition to see what people are actually paying for them.
High-value pieces are a different story. If you're dealing with fine art, antique jewelry, or rare collectibles, guessing is a risky move. This is where spending a little on a professional appraisal can save you from accidentally selling a treasure for pennies on the dollar.
Don't forget to build a discount strategy into your sale. It's a standard practice in the estate sale world and something buyers have come to expect. This creates urgency and helps you clear out as much as possible by the end.
Strategic Pricing Timeline for an Online Estate Tag Sale
Here's a look at a common discounting schedule designed to maximize sales over the course of the event.
| Sale Day | Discount Strategy | Rationale |
|---|---|---|
| Day 1 | Full Price | The most eager buyers and collectors will happily pay full price to get first dibs on the best items. |
| Day 2 | 25% Off | This is the perfect nudge for people who were on the fence on day one. |
| Final Day | 50% Off or More | At this point, the goal is volume. You want to sell as much as possible to minimize post-sale cleanup. |
This tiered approach helps create excitement and ensures you get the most out of your inventory from the first day to the last.
Marketing Your Sale to Local Buyers

Building a beautiful digital catalog is a huge step, but honestly, it’s only half the job. Even an incredible collection of treasures won't sell itself if buyers don't know it exists. Good marketing is what turns all your hard work into actual cash.
Forget just sticking a sign on the street corner and hoping for the best. For an online estate tag sale, your game plan has to be digital, targeted, and consistent. The real goal here is to build a wave of excitement that brings motivated buyers to your sale the minute it opens.
Tap Into Local Digital Hubs
Your best buyers are probably already hanging out online in local community groups. You just need to meet them where they are. These digital forums are absolute goldmines for reaching people actively hunting for secondhand gems right in your area.
I've found the most success by focusing energy on these three powerhouses:
- Local Facebook Groups: Search for groups dedicated to your town or county, like "Springfield Buy/Sell/Trade" or "Hillsdale County Online Garage Sale." These are hyper-local communities full of engaged members ready to buy.
- Nextdoor: This platform is built for neighborhood-level chatter, making it perfect for reaching people who live just a few minutes down the road. Its users are often highly motivated to find a local bargain.
- Facebook Marketplace: As a massive hub for buying and selling, Marketplace lets you create a central listing for your entire sale. From there, you can direct traffic from your other group posts back to your main Marketplace announcement or directly to your DIYAuctions sale page.
By posting across all these channels, you create multiple ways for your audience to find you, which dramatically increases your sale's visibility. Trust me, this multi-channel approach is crucial.
Crafting Posts That Actually Convert
Your promotional posts need to do more than just announce a sale. They need to create a sense of urgency and show people exactly why they need to check out your stuff. A bland, text-only post is just too easy to scroll past. You have to make people stop and look.
Think of your post as a movie trailer for your sale—you're showcasing the "greatest hits." Always, always include a gallery of your best photos. I recommend 5 to 10 high-quality images featuring your most desirable items. This could be antique furniture, unique collectibles, high-end electronics, or a pristine set of vintage dishware.
Here’s a simple but effective template I use that you can adapt:
Headline: Huge Online Estate Tag Sale in [Your Town] - Starts [Start Date]!
Body: Everything must go! We're hosting a complete online estate sale featuring [mention 2-3 standout item categories, e.g., mid-century modern furniture, vintage Pyrex, and quality tools].
Highlights:
- [Item 1 with a compelling detail, e.g., Solid Walnut Drexel Dining Table]
- [Item 2 with a compelling detail, e.g., Complete Set of 1960s CorningWare]
- [Item 3 with a compelling detail, e.g., Craftsman Tool Chest with Tools]
Logistics: The sale runs from [Start Date] to [End Date]. View the full catalog and purchase items here: [Link to Your Sale Page]
Pickup: Easy, scheduled pickup will be in [Your Neighborhood/Cross-Streets] on [Pickup Date].
This structure is easy to scan, immediately shows the value, and gives people all the critical info upfront. For a deeper dive, check out our full guide on effective estate sale marketing.
Timing and Engagement Are Everything
When you post is just as important as what you post. I’ve consistently seen the best results when posting in the evenings (between 7 PM and 9 PM) and on weekend mornings. That's when people are kicking back, relaxing, and scrolling through their feeds.
And please, don't just post once and walk away. A good strategy involves a "coming soon" announcement a few days before the sale, another post on launch day, and a "last chance" post on the final day, maybe even mentioning some last-minute discounts to create urgency.
Being responsive is also key. Answering comments and questions quickly shows you’re an organized, serious seller and builds the trust you need to make the sale a success.
Coordinating Payments and Safe Pickups

This is it—the final stretch where all your hard work pays off. Handling the money and the merchandise handoff smoothly is what makes a sale truly great. It’s all about locking in payments, dodging any fraud risks, and running a pickup day that’s safe and efficient for you and your buyers.
Nailing this last phase ensures everyone leaves happy and protects you from logistical nightmares. Using a platform with built-in, secure payment processing is your best first move. It means no fumbling with cash, chasing down payments, or worrying about bounced checks. You can just focus on getting items to their new homes.
Securing Payments and Avoiding Scams
Navigating online payments just takes a little awareness. While most buyers are fantastic, it pays to know the red flags to protect your earnings. A platform like DIYAuctions shoulder's most of this risk by processing all transactions through a secure system.
Still, you should know what to look for:
- Overpayment Offers: Be skeptical of anyone offering to pay more than the asking price and then asking for a refund of the difference. It's a classic scam.
- Strange Payment Requests: Politely decline any requests to use outside payment apps or wire transfers. Stick to the platform’s checkout.
- Suspicious Communication: If a buyer’s messages are vague, poorly written, or pressure you to ship before payment clears, trust your gut.
Your best defense is simple: keep all communication and payments right on the platform. It creates a secure paper trail and gives you a layer of protection you just don't have on your own.
Designing a Flawless Pickup Schedule
An organized pickup day is the secret to a stress-free finale. The goal is to avoid a chaotic free-for-all and instead create a steady, controlled flow of buyers.
The best way to do this is with an online scheduling tool. Once the sale is over, send a link to all winning bidders and let them book a specific 15 or 30-minute pickup slot. This one step prevents a traffic jam in the driveway and lets you give each buyer your attention. And if you have buyers who aren't local, knowing the cheapest way to send a parcel is a lifesaver for figuring out shipping costs ahead of time.
Be crystal clear about the rules from the very beginning. State in your sale description and again in your post-sale emails that buyers are responsible for bringing their own help, tools, and packing materials for large items.
Your pickup instructions email needs to have everything in one place.
- The Full Address: Only send the complete address after the sale has ended and payments are confirmed.
- Your Contact Info: A cell phone number is perfect for any day-of texts or calls.
- Reminder of Rules: Gently reiterate that buyers need to bring help for heavy items.
- A Scheduling Link: Point them directly to your scheduler (like Calendly or SignUpGenius) to lock in their time.
Managing No-Shows and Last-Minute Issues
Even with perfect planning, you might get a few no-shows. Don't panic—it happens. The best way to handle it is to have a clear policy spelled out in your sale terms from day one. A simple statement that items not picked up during the designated window will be considered abandoned without a refund works wonders.
This firm-but-fair approach encourages people to stick to the schedule. If someone reaches out with a legitimate problem, you can decide if you want to offer another time, but you’re not obligated. A great pickup event comes down to solid organization, clear communication, and sticking to your plan. It’s the perfect way to end your sale on a high note.
What to Do with Unsold Items and the Final Cleanup
https://www.youtube.com/embed/hRYW16bvD8Q
Once the last buyer has driven off with their new treasures, the energy shifts. The sale is done, but the job isn't quite over. Now it’s time to focus on the final, and equally crucial, phase: clearing the property for good.
Even the most successful online tag sale will have things left behind. That’s just the nature of the game. On average, you can expect about 20% of your initial inventory to remain unsold. It's a normal part of the process, with about 30% of items selling at full price and another 50% moving after discounts kick in. Knowing this ahead of time helps you create a solid post-sale plan.
The best way to tackle what’s left is to sort everything into two simple piles: items for donation and items for disposal. This one step makes the final clear-out feel much less overwhelming.
Donations and Charitable Pickups
You’d be surprised how many local charities would be thrilled to take your unsold furniture, clothing, and household goods. The best part? Many of them offer free pickup services for larger donations, which is a lifesaver when you're trying to empty an entire house.
A few great places to start calling are:
- Habitat for Humanity ReStore: They are fantastic for furniture, working appliances, and leftover building materials.
- The Salvation Army & Goodwill: These are the reliable go-tos for a huge variety of household goods and clothing.
- Local Shelters or Churches: Don't forget smaller community organizations. They often have very specific needs and are incredibly grateful for direct donations.
A quick pro tip: Always call these organizations before you start hauling things around. Confirm what they accept and, most importantly, get your pickup scheduled. It saves a ton of frustration and keeps your timeline on track.
Managing the Final Clear-Out
After the donation truck has pulled away, you'll be left with the true remnants—broken furniture, worn-out items, and general trash. The goal now is to get the property to "broom-swept" condition, meaning completely empty and tidy for its next chapter, whether that's a real estate showing or handing the keys to a new owner.
For everything that can't be donated, you have a couple of really efficient options. You can find a complete guide to general waste skip hire to figure out sizing, or simply hire a junk removal service. Both are excellent ways to get rid of everything in one fell swoop without making a dozen trips to the dump yourself.
Finally, it’s time for the most satisfying step: wrapping up the finances. Your online dashboard will have a detailed sales report ready for you. Take a few minutes to reconcile that report with your bank deposits. Seeing that final number is a great way to close out the project, giving you a clear picture of the revenue your hard work generated.
Have Questions About Online Estate Sales? You're Not Alone.
If you're running your first online estate tag sale, it's natural to have questions. Getting a handle on the key details is the best way to build confidence and make sure your event is a success from start to finish.
Let's start with one of the most common questions: timing. A well-paced sale is crucial—it needs to create a little buzz without dragging on for too long. For most DIY sales, we've found the sweet spot is a three to seven-day window. A shorter sale creates a sense of urgency, while a longer one gives buyers more time to browse and lets your marketing efforts really sink in. No matter how long the sale runs, always set a firm, specific pickup window, like the weekend right after the sale ends.
Avoiding First-Timer Mistakes
What's the single biggest mistake you can make? Hands down, it's posting bad photos and writing lazy descriptions. Your buyers can't touch or inspect the items, so your online catalog is everything. Blurry pictures or missing details about an item's condition and size will kill buyer trust and tank your final prices. The time you put into a quality catalog is a direct investment in your bottom line.
Another area that trips people up is pricing strategy.
The most effective strategy we've seen is pricing items just a bit higher than what you'd be happy to get. This is a classic estate sale model that leaves you room for strategic, pre-planned discounts to motivate buyers as the sale wraps up.
For example, you might offer 25% off on the second-to-last day and then a final 50% off on the last day. This tiered approach encourages serious buyers to grab what they want at full price early on, while the later discounts help you clear out as much as possible by the end. If you price too high from the start, you might scare people away. Price too low, and you're just leaving money on the table. A little research here is your best friend for finding that perfect middle ground.
More guides in Estate Sale Basics
July 26, 2026
Stamp Collection Valuation: A Practical Step-by-Step Guide
Stamp collection valuation made simple. Learn how to identify, grade, price, and sell your stamps with confidence for estate sales or consignment.
Read guideJuly 23, 2026
Estate Sales Brick NJ: Your 2026 Guide to Success
Planning your estate sales brick nj? Our guide covers permits, pricing, marketing, & running a safe sale with DIYAuctions.
Read guideJuly 19, 2026
How to Prevent No Shows at Your Estate Sale
Learn how to prevent no shows for your estate sale pickup. Our guide offers actionable policies, reminder templates, and scheduling tips for a smooth event.
Read guideGet the estate sale pricing guide
Enter your email for pricing ranges, planning notes, and a clearer path to launch.