How to Photograph Antiques for Online Estate Sales
Learn how to photograph antiques for online estate sales: lighting setups, shot lists, camera settings, and editing tips that make buyers trust your listings.
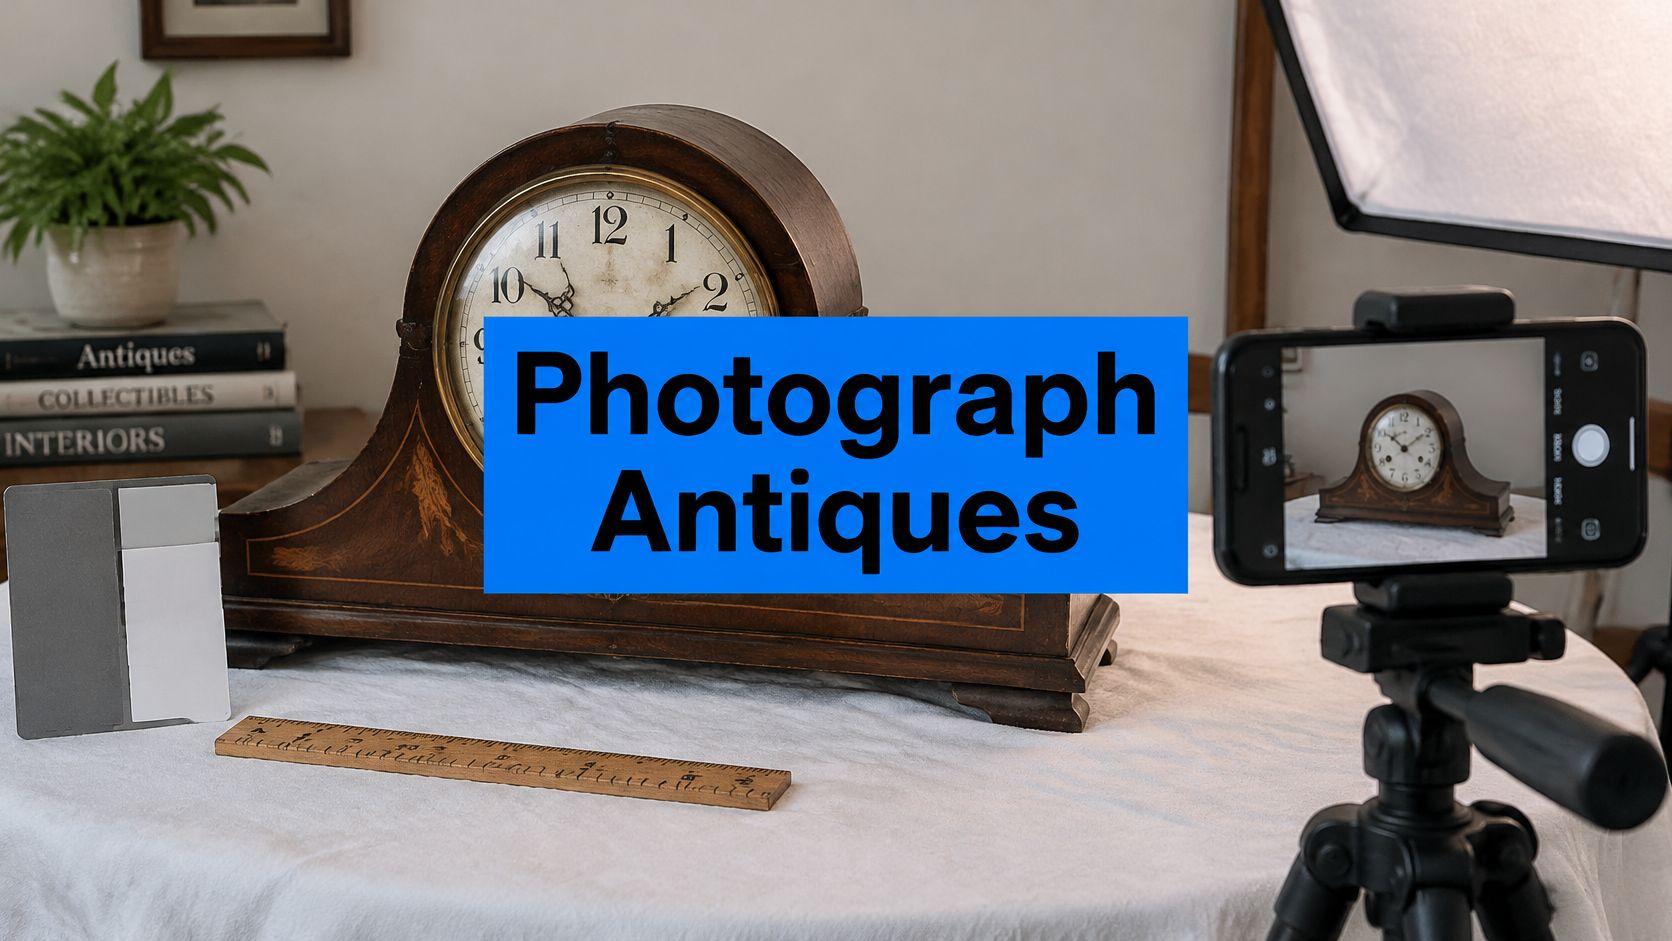
The mantel clock is on the dining table, the packing paper is still in the box, and the buyer who'll pay real money for it is three hundred miles away with a laptop. All they get is your photo set. Not the weight of the thing in the hand, not how the veneer catches the light, not the small chip on the back edge that you'd spot in ten seconds flat if you were standing in the room.
That gap is the whole problem with selling antiques online, and it's also the solution. A photo set is an inspection file. The sellers who price well aren't the ones with the prettiest pictures. They're the ones whose buyers stop sending questions because the photos already answered them.
Families come to DIYAuctions for exactly this work: settling a parent's home, downsizing after decades in one house, and clearing a house before it goes on the market. What follows is the routine I'd hand a first-timer on day one, using gear you probably already own.
The Shot List Every Antique Listing Needs
A buyer zooming into photo four is doing what an auction specialist does with a loupe. They're hunting the mark, the repair, the honest wear. Six frames per lot lets them finish that inspection without you in the room, and it lets you answer a dispute later with a picture instead of a memory.
Museum practice treats this as documentation, not decoration. The Library of Congress guidance for digitizing pictorial materials separates resolution, noise, dynamic range, tone reproduction and color reproduction into distinct quality criteria, calls for a grayscale target, a color reference and an accurate dimensional scale in the frame, and records one collection captured at 7,000 x 7,000 pixels in 12-bit grayscale or 36-bit color before being preserved at about 5,000 pixels on the long side.
| Shot | What it shows the buyer | How to frame it |
|---|---|---|
| Overall front | Full form, proportions and silhouette | Camera level with the object center, item fills about 80% of frame |
| Three-quarter view | Depth, sides, legs, handles and construction | Rotate the item 30-45 degrees, shoot from the same height as the front view |
| Maker's mark or label | Maker, pattern, origin and date codes | Fill the frame with the mark and include a coin or ruler for scale |
| Condition details | Scratches, crazing, repairs, veneer lifting, tarnish | Close up with raking light, showing the defect plus surrounding context |
| Back, base or underside | Joinery, hardware, construction and old labels | Turn or tip safely with two hands over a padded surface |
| Scale reference | True size at a glance | One shot with a ruler or standard object in the same plane as the item |
What the reference card actually proves
A gray card and a ruler in the frame do quiet, serious work. They let a viewer tell whether a dark patch is oxidation on the brass or a shadow the camera invented, whether a red cast belongs to the mahogany or to the lamp, and whether a maker's stamp is four millimeters across or fourteen. That judgment is the difference between "interesting" and "I'll bid."
One sale, one look
Shoot every lot on the same background, at the same distance and in the same lighting order. A mahogany dresser and a copper kettle then compare fairly side by side, because the buyer's eye isn't resetting between images. Consistency is the cheapest credibility you can buy.
Inherited estates are where this matters most. The seller often has no vocabulary for crazing, veneer lift or old repair, and doesn't need any: a fixed shot list replaces expertise with procedure. Save that table as the checklist you shoot against for every single lot. If you're still deciding which pieces deserve the full treatment, this guide to identifying valuable antiques will help you triage before the camera comes out.
Prep Each Item and Choose Your Camera
Prep takes five minutes and prevents most reshoots. Work through it in order, and make it a priority for anything with a fragile surface.
- Dust, never polish. A dry microfiber cloth, light pressure, no oil, wax or cream. Original patina and surface wear are part of what the buyer is paying for, and a freshly oiled table reads as either restoration or concealment.
- Leave the labels on. Old auction tags, dealer stickers, shipping labels, penciled stock numbers on the underside. They document provenance and they photograph as evidence.
- Stabilize before you turn. A loose finial, a tired hinge, a cracked bracket foot. Pad the table with a moving blanket and put two hands on the object, not one.
- Keep the evidence shots unedited later. Anything you shoot as a defect photo stays as shot. No cropping out the flaw, no healing brush, no filter.
The kit is short: a roll of neutral gray paper or two sheets of gray poster board taped up the wall and curved onto the table, a tripod, a ruler plus a quarter for scale, a gray card, gaffer tape, and a piece of white foam board as a reflector. That's the studio.
Phone or camera, decided by one question
A current phone on a tripod, in light you control, at its highest quality setting, is enough for most estate listings. It meters well, it focuses close, and it produces files a buyer can zoom.
A DSLR or mirrorless body earns its place for four specific things: manual white balance, RAW files, true macro focus on a tiny hallmark, and consistent batch output across a 200-lot estate. So the decision rule is simple. Start with the phone you own, and borrow or buy a camera only when jewelry, coins or marks become the bottleneck.
For those items, fill the frame with a macro-capable phone lens or a camera macro lens, shoot at f/8 to f/11 on the tripod, and lay a coin or millimeter ruler beside the mark so its size and sharpness can be judged.
Lighting Setups for Every Antique Surface
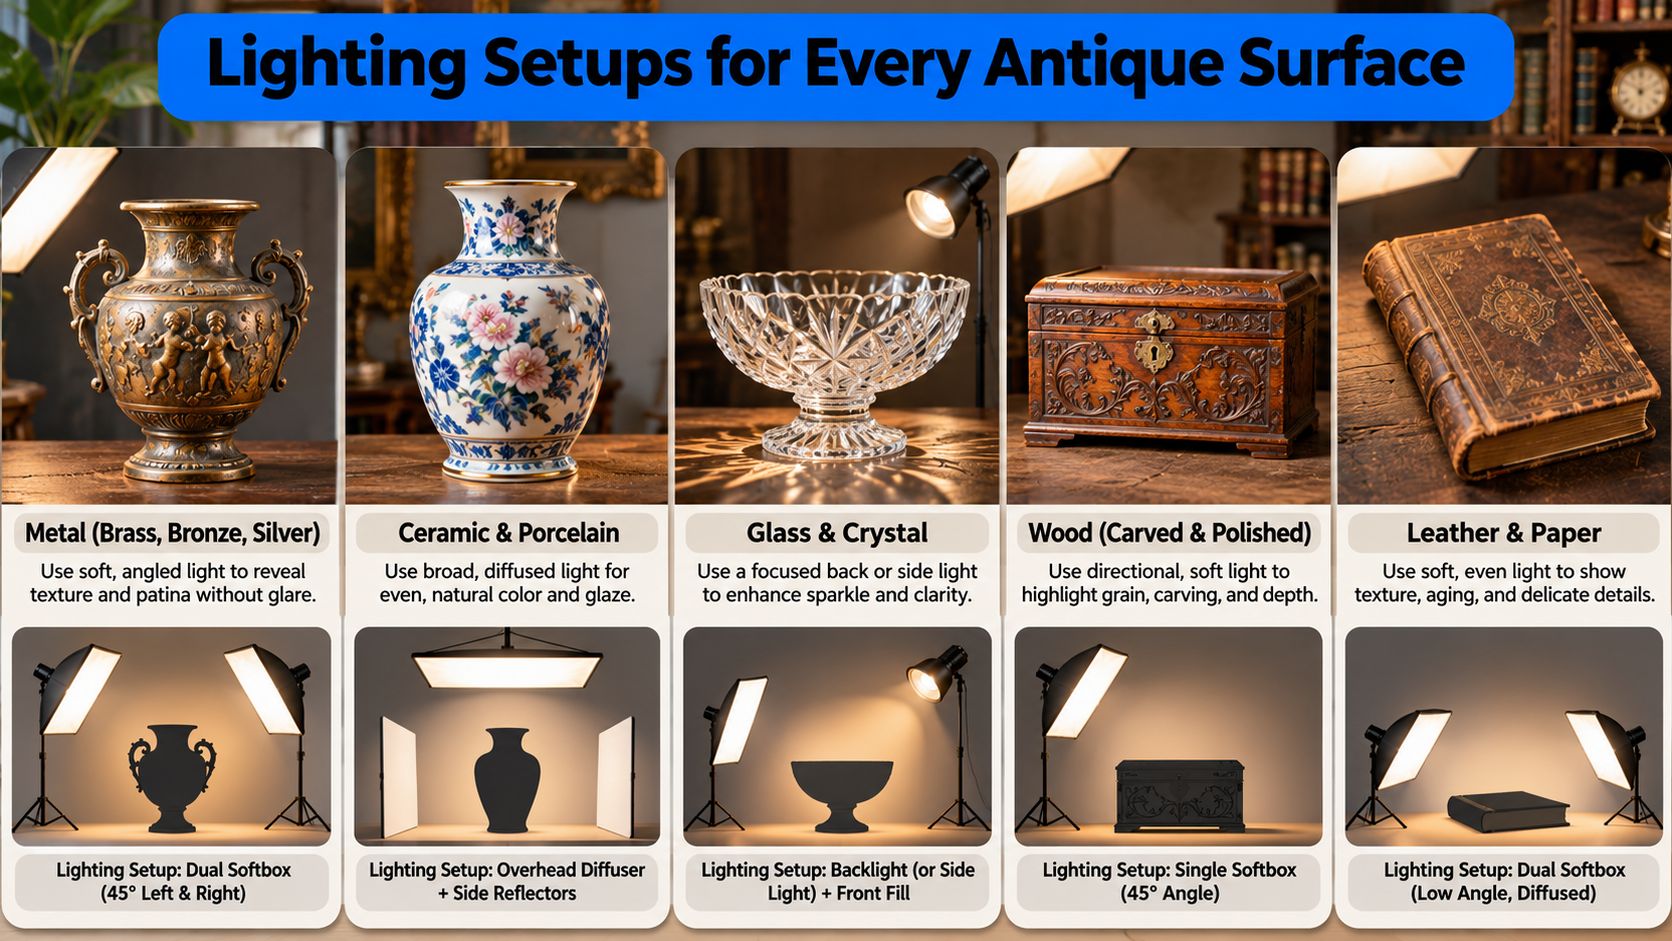
Light is a decision, not a mood. The lighting and colour guidance from National Museums Scotland is blunt about this: choose the setup from the surface problem in front of the lens rather than applying one arrangement to every antique, and photograph a gray card under every lighting configuration so you can set white balance from the matching frame later.
The default two-light setup
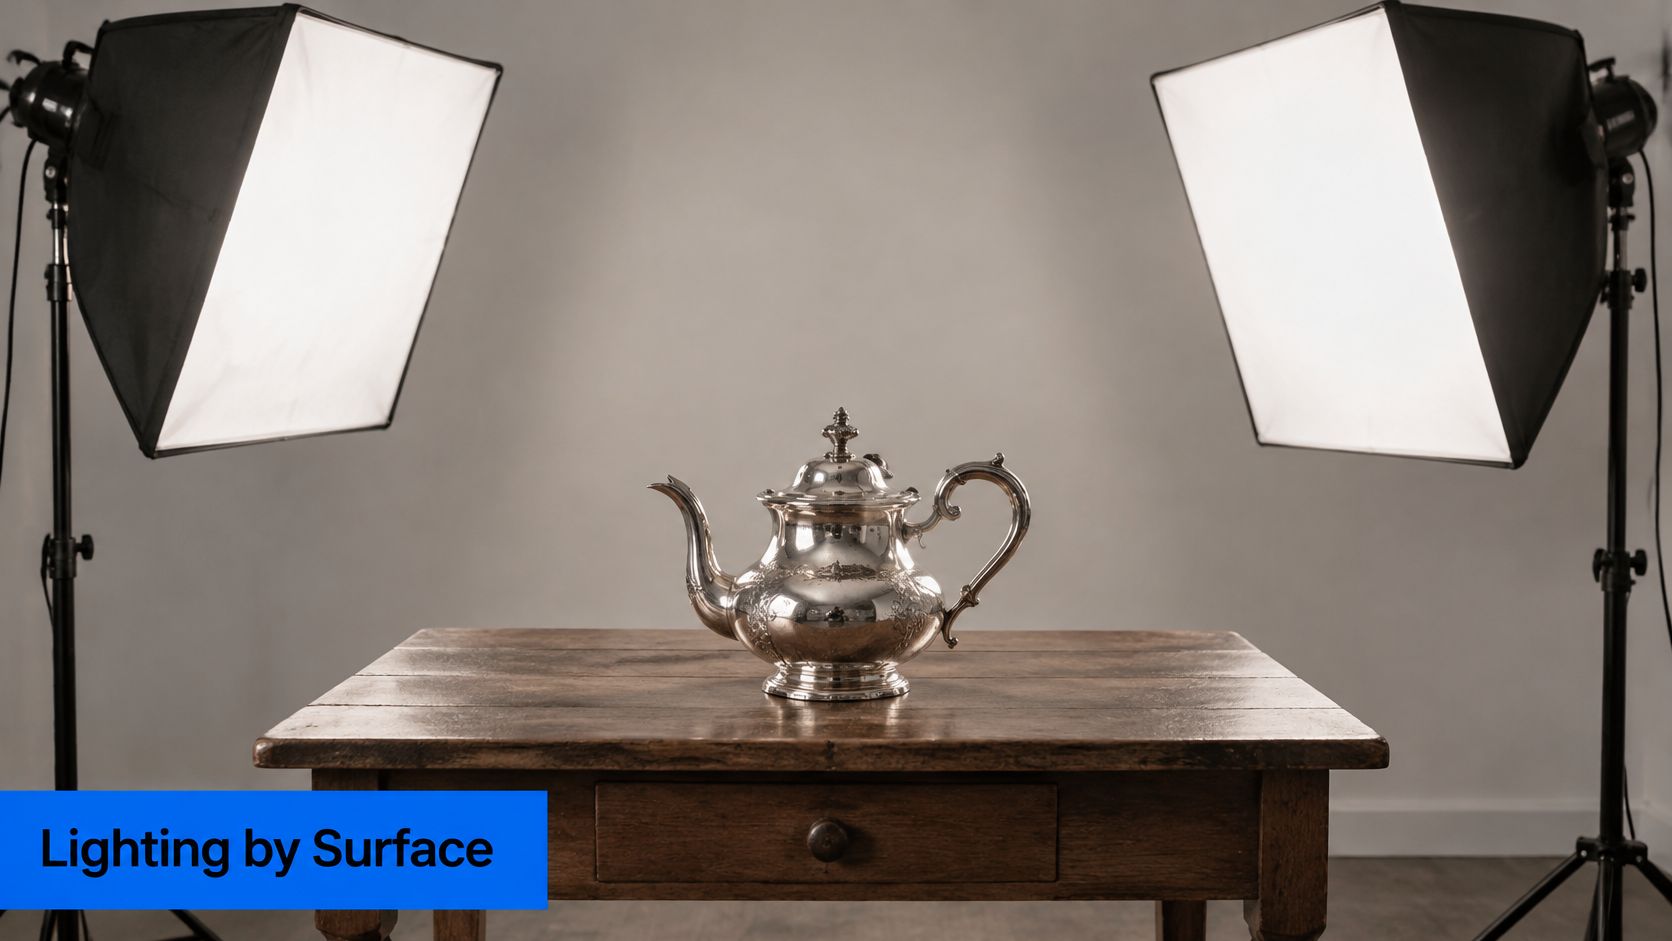
Start here for most lots. Two broad, diffuse lights of equal power, placed symmetrically at roughly 45 degrees to the front plane. The symmetry is the point: each light softens the shadow the other one casts, which gives you even tone and true color across matte wood, ceramics and textiles.
Turn the room lights off. Window light mixed with a household lamp renders the same object in visibly different colors across a single frame, and fluorescent fixtures are the worst offenders. One light type, one color temperature, one variable you control.
| Surface or item | Setup | What it reveals or avoids |
|---|---|---|
| Matte wood, ceramics, textiles | Two equal diffuse lights at 45 degrees with white reflector fill | True color and even tone without harsh shadows |
| Carved wood, embossed metal, engravings, tool marks | Lower one light and skim it across the surface as raking light | Crevices, texture and shallow relief |
| Polished metal, glass, varnish, framed works | Lights moved to the sides, large diffusion, polarizer or cross-polarization | Suppresses specular glare that hides inscriptions |
| Translucent glass, porcelain, tears or punctures | Safe transmitted or backlight behind the item | Thickness, cracks and hidden structural damage |
| Window-light-only room | Setup side-on to the window, white reflector opposite, sheer curtain diffusion | Soft directional light without direct-sun contrast |
Match the light to the surface
Raking light is the workhorse for anything with relief. Drop one lamp low and skim the beam across the surface so it catches in the crevices of carving, the struck detail of embossed silver, the tool marks on a hand-planed drawer side.
Polished metal, varnish, glass and glazed frames need the opposite treatment. Walk the lights farther to the sides, use the biggest diffusers you have, and test a polarizer or a cross-polarized arrangement on the glare. Never judge a hallmark from a single reflection-heavy frame.
When the window is the only light
Set up side-on to the window so the light rakes in from the side, bounce it back with the white foam board on the opposite side, and diffuse the glass with a sheer curtain. Direct sun pouring through the pane produces harsh contrast and shifting color minute by minute. Move the table, not the schedule.
Working rule: if the light setup changed between two shots of the same object, the color did too. A gray-card frame under each configuration is the only reliable way back.
The Per-Lot Shooting Routine
The National Park Service museum photography appendix sets out the sequence that makes a catalog repeatable: a neutral gray background, an identification label, a metric scale and a gray or color control card beside the object, all in the same plane as the piece so size and color can be read without perspective distortion.
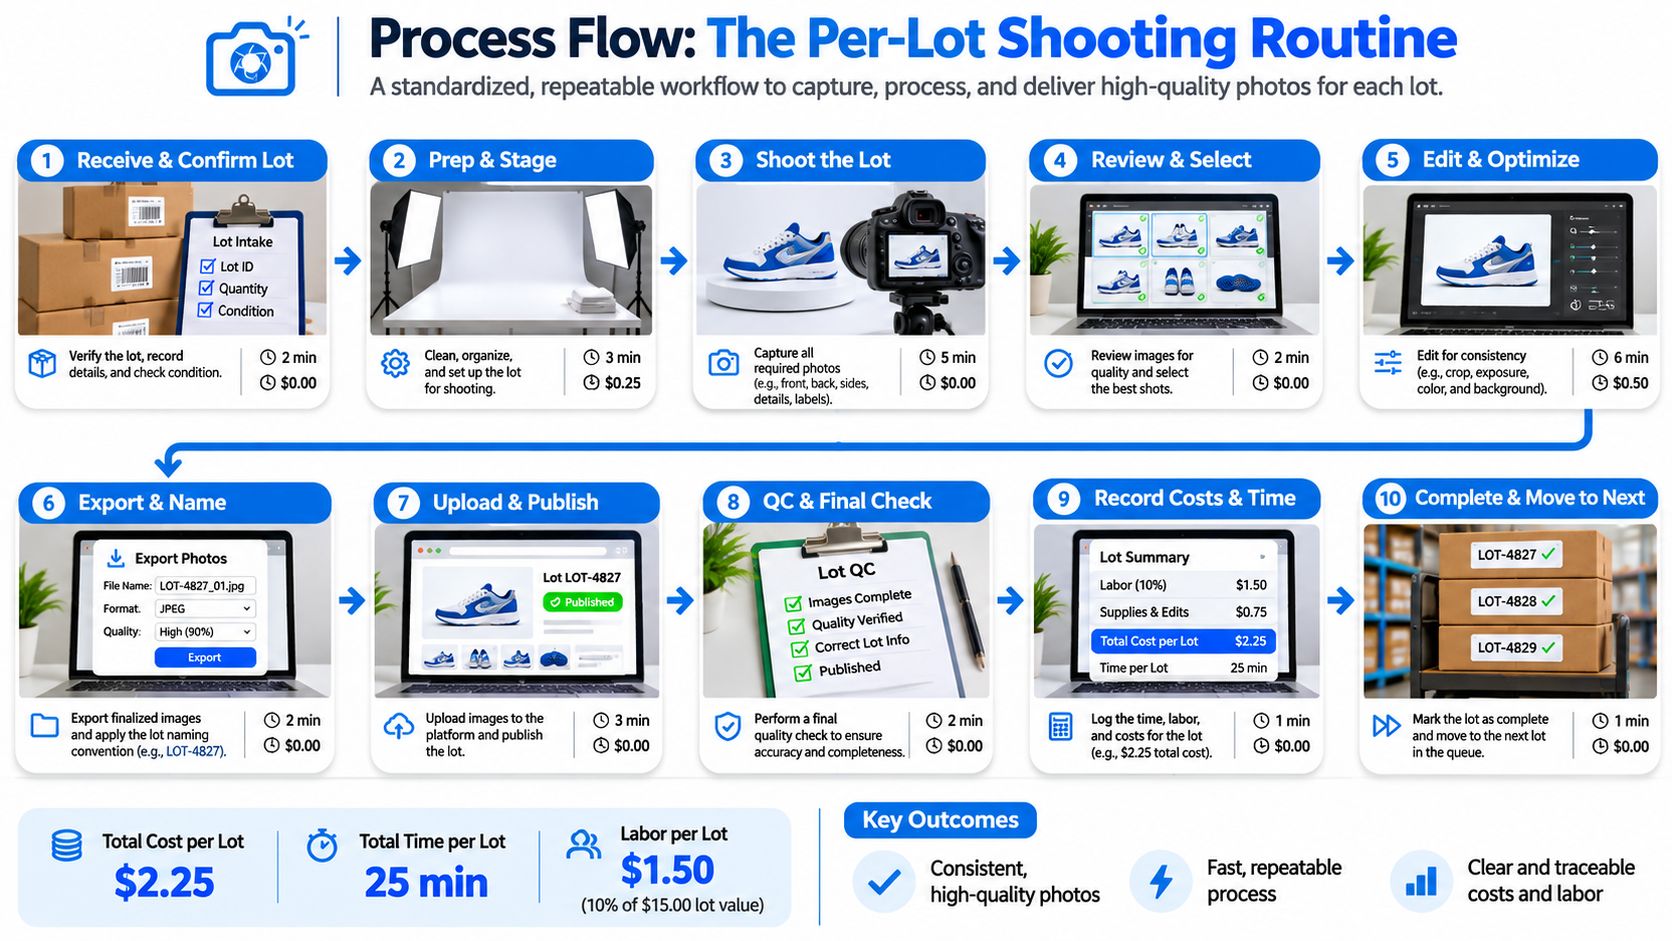
Run the same six steps for every lot in the sale:
- Set the sweep and place the item. Gray paper, object centered, label, ruler and gray card laid flat beside it in the same plane.
- Mount and level. Tripod on, camera level with the object's center for the straight-on views. Check the verticals in the back of a chair or the edge of a case.
- Kill the room lights. Only your two lamps light the lot.
- Shoot the shot list in order. Overall front at about 80 percent of frame, then the three-quarter view from the same height, then marks, hardware, repairs and damage with a scale in the close-ups.
- Meter from the gray card. Not from the object, not from the background.
- Take one frame with the target fully visible. That's the frame you'll correct the whole lot from.
Settings that hold up across 200 lots
On a camera, ISO 100 to 400 and f/8 to f/11 buys you depth of field so the front edge of a table and the back edge both read. Set the shutter speed from the meter rather than a fixed rule, because the tripod holds a slow exposure steady. On a phone, tap to focus, lock exposure, use the timer or a remote, and never touch digital zoom. Walk in with your feet instead.
For two-light work, the geometry that keeps giving me clean catalog images is a key light about 6 feet away at 45 degrees to the object's front plane and a fill light 7 to 8 feet away at 60 to 70 degrees, with heights adjusted until both the front and the top surface read. Hold one shooting height for the whole sale. The catalog looks like one person shot it, because one person did.
Editing, File Names and Listing Metadata
Capture RAW on a camera, or the highest-quality JPEG or HEIC your phone offers, and keep every frame of a lot together in one folder. Then edit in a fixed order so the whole catalog lands in the same place.
- Correct white balance from the gray-card frame taken under that lighting setup, then apply the same correction to every frame in the lot.
- Straighten and crop consistently so items sit at the same apparent scale across the sale. A teacup and a dresser shouldn't fill their frames identically, but the margins should be predictable.
- Adjust exposure and contrast modestly. No filters, no saturation boosts. Wood tone, gilt, patina and textile dyes read as condition information to a buyer, and shifting them is a misrepresentation whether you meant it or not.
- Export with the long edge around 2,000 to 3,000 pixels and skip aggressive sharpening, which invents white edges around cracks and crazing that weren't there.
The Getty Conservation Institute guidance on documenting bronze sculpture draws the line clearly: documentation should use even light and avoid excessively hard shadows, while commercial catalog photography may be more expressive. Estate listings live on the documentation side, because buyers need to see scratches, dents, crazing, oxidation, repairs and uneven finishes rather than a handsome silhouette. The same source notes that roughly 300 pixels per inch at original size is generally considered the minimum for reproducing a photograph well at that size. Run the arithmetic backwards: a 10-inch-wide clock at that rate needs about 3,000 pixels across, which is why the export target isn't arbitrary.
Name files so you can find a photo in ten seconds
Use a LotNumber_Item_View pattern: 014Clock_front.jpg, 014Clock_mark.jpg, 014Clock_damage.jpg. A consistent file naming convention is the difference between a clean catalog and a folder full of IMG_4471 that nobody, including you, can sort through at 11pm before the sale opens.
Keep a spreadsheet row per lot: item name, materials, dimensions recorded against your measurement standards, condition notes and photo count. Write the listing description straight from the sheet and cite the photo numbers from the filenames. No hunting, no guessing.
Diagnosing Glare, Casts and Hidden Damage
Most bad antique photos fail in one of five predictable ways. The fix is almost always a change on set, not in the editing software.
| Symptom in the photo | Likely cause | Fix |
|---|---|---|
| Glare hides an inscription or hallmark | Light too frontal or too close to polished surfaces | Move lights to the sides, add diffusion, try a polarizer |
| Orange or blue cast across the whole lot | Mixed daylight, incandescent or fluorescent sources | Turn off overheads, use one light type, set white balance from the gray-card frame |
| Deep shadows hide damage or texture | A single hard light source | Add a fill light or white reflector at the opposite 45 degrees |
| Ordinary wear looks severe in the lead photo | Dramatic raking light used as the main image | Keep raking shots as labeled supplements and lead with the neutral overview |
| Colors differ between lots in the catalog | White balance recalibrated inconsistently | Re-shoot the gray card for every setup and batch-correct from that frame |
A polarizing filter cuts reflections on varnish, glass and glazed frames, and it costs you about one stop of light. Compensate with a slower shutter on the tripod rather than by raising ISO, which buys back noise you'll spend an hour cleaning up. Fluorescent contamination is fixed by switching the fixture off, never by correction afterward.
Photograph the flaw twice
The Canadian Conservation Institute's notes on lighting techniques make the case that standard 45-degree lighting reveals true color and tone but can conceal damage and texture, while raking light at a low angle exposes surface irregularities and transmitted light can show thickness, punctures or tears. That's the argument for a two-part record of any defect: one low-angle frame that makes it clear, and one even-light frame taken with a ruler and the surrounding area so a buyer can judge its size and proportion.
Lead with the honest overview, then add the evidence. Raking light used as your lead image makes ordinary wear look catastrophic, and buyers price catastrophe accordingly.
Never retouch out a crack, a repair, a stain or a lifted veneer. A concealed flaw that surfaces after pickup costs you far more trust, and often more money, than the flaw itself. Before the setup comes down, review every lot at full size on a laptop screen and reshoot any frame where glare, a cast or a shadow sits over the mark or defect you were trying to show.
Upload, Caption and Promote Your Estate Lots
The finished library becomes a listing in a fixed order: the clean overall shot first, the three-quarter view next, then marks and hardware, then captioned condition details. Reference photo numbers in the description itself. "See photo 5 for the veneer lift on the lower left" tells a buyer you're not hiding anything, and it tells them exactly where to look. Paste the dimensions, materials, maker and condition notes from your metadata sheet straight into the text.
Organize lots room by room. Sellers create lots and organize the house room by room, keeping the context only the family knows, and that context is a selling asset, not clutter. Photograph in room batches, then run the whole sale as one event with a single pickup day rather than scattering listings across five marketplaces and diluting the audience. If you want a platform built for that shape of sale, DIYAuctions runs seller-led estate sales and guides hosts from the first lot to pickup day, promotes the sale to local buyers and handles payments, so check the current fee terms before you list.
Captions need a different voice on Facebook than in the listing body. Fifteen minutes spent on matching tone to each platform beats a generic blurb reposted everywhere. And promoting an estate sale is its own skill: the auction marketing strategies that move lots are local, timed and specific about pickup logistics.
Block one afternoon this week. Not the whole house, ten lots. Set up the gray sweep once, shoot the six-shot list on each of them, name the files, correct the batch from the gray card and list all ten together. Once you've seen how few questions those listings attract, scale the routine to the rest of the estate. If you'd rather run the sale on a platform that handles the marketing, payments and pickup day, DIYAuctions charges a 10% commission capped at $1,000, which leaves the rest of the proceeds where they belong.
Get the estate sale pricing guide
Enter your email for pricing ranges, planning notes, and a clearer path to launch.