Master Your Product Photography Lighting Setup Today
Learn essential tips and gear for a perfect product photography lighting setup. Create stunning images that make your products stand out.
Your product photography lighting setup is the single most important part of creating images that actually sell. We're not talking about a massive, Hollywood-style production—often, it's just one to three lights paired with modifiers like softboxes to tame shadows and create beautiful highlights.
It's all about shaping light to define texture, communicate quality, and set a mood. This is what turns a basic snapshot into a high-converting asset for your store. Getting this right is far more about technique than it is about having the most expensive gear.
Understanding Core Lighting Principles
Before you even think about buying a single piece of equipment, you need to understand how light works. The principles of light quality, direction, and color are the foundation of every great product photo.
Once you master these concepts, you gain total creative control. You’ll be able to produce stunning images no matter your budget. Think of light as your primary tool—it's even more important than the camera itself.
The two fundamental types of light you'll be working with are hard light and soft light.
- Hard Light: This comes from a small, direct source, like the bare sun on a clear day or a single light bulb. It creates sharp, well-defined shadows and high contrast. Hard light is fantastic for emphasizing textures, like the rich grain in a piece of wood or the detailed weave of denim.
- Soft Light: This originates from a large, diffused source—think of a cloudy day or a light shining through a softbox. It wraps gently around your product, creating soft, feathered shadows and minimizing distracting reflections. This is your go-to for anything glossy, reflective, or delicate, such as jewelry, skincare bottles, and glassware.
The Impact of Light Direction
Where you place your light source will dramatically change how your product looks. Shifting a light just a few inches can completely alter the perceived shape, depth, and mood of the shot.
If you place a light directly in front of your product, it can look flat and boring.
But move that same light to a 45-degree angle, and you instantly create shadows that reveal dimension and form. The product suddenly feels more tangible and three-dimensional. This is why getting your angles right is so critical for a successful product photography lighting setup.
The goal isn't just to illuminate the product; it's to sculpt it. Good lighting guides the viewer's eye, highlights key features, and builds a sense of quality and professionalism that convinces a customer to click "buy."
Color Temperature and Consistency
Finally, let's talk about color temperature, which is measured in Kelvin (K). Have you ever taken a photo indoors and noticed everything looks a bit yellow or orange? That’s what happens when you mix different light sources.
Natural daylight is quite cool (around 5500K), while the light bulbs in your house are typically warm (around 3000K).
For accurate product colors, consistency is everything. Always use lights with the same color temperature and do your best to block out any ambient room light. This ensures your product’s true colors shine through, which builds trust with your customers and helps reduce returns.
This need for controlled, consistent lighting has fueled major industry growth. In fact, the studio lighting market was valued at $2.5 billion in 2025 and is expected to keep growing, largely because soft, diffuse lighting setups are so essential for enhancing products without harsh reflections. You can explore more about these market trends and how they're shaping modern photography.
Choosing the Right Lighting Gear for Your Budget
Diving into lighting equipment can feel overwhelming, but outfitting your studio for great product shots doesn’t have to empty your wallet. The secret is making smart choices that fit your product, your space, and the look you’re going for.
Your first big decision comes down to one question: continuous lights or strobes? They each have their place, and knowing the difference is the key to spending your money wisely.
Continuous Lights vs. Strobes
Continuous lights, like the LEDs you see everywhere now, do exactly what their name implies—they stay on. This makes them incredibly intuitive, especially for beginners. What you see is literally what you get. You can move the light, adjust its power, and see exactly how the shadows and highlights change on your product in real-time, all before you even think about hitting the shutter button.
Strobes, also known as flashes, work differently. They deliver a very powerful, very brief burst of light the instant your camera's shutter opens. There's a bit of a learning curve, for sure, but that power is what lets you freeze motion with incredible clarity. Think dynamic shots, like a beverage splash or a product dropping onto a surface.
Pro Tip: For the vast majority of e-commerce product photography—especially for static items on a white background—continuous LED lights are more than enough to get the job done. They’re easy to use, versatile, and perfect for creating consistent, professional images without the technical headaches of strobes.
It's no surprise that the market for this gear is booming. The global photography lighting equipment market was valued at a whopping $4.3 billion in 2022 and is on track to hit $7.2 billion by 2030. Much of that growth is thanks to versatile and energy-efficient LED systems becoming the go-to for product photographers everywhere. You can read more about the growth of photography lighting equipment if you're interested in the market trends.
To make the choice even clearer, here’s a quick breakdown of how these two lighting types stack up.
Continuous Lights vs Strobes A Quick Comparison
| Feature | Continuous Lighting (LED) | Strobe Lighting (Flash) |
|---|---|---|
| Best For | Beginners, video, static product shots, e-commerce | Freezing motion (splashes, action), overpowering ambient light |
| Ease of Use | Very easy (what you see is what you get) | Steeper learning curve (requires test shots) |
| Power Output | Lower, but sufficient for most product photography | Extremely high, great for bright environments or action shots |
| Video Capability | Excellent, as the light is always on | Not suitable for video |
| Cost | Generally more affordable for a complete setup | Can be more expensive, especially with triggers and modifiers |
| Real-time Preview | Yes, you see the effect of your changes instantly | No, you must take a photo to see the lighting result |
Ultimately, for most sellers just getting started, continuous LEDs offer the fastest path to great-looking photos.
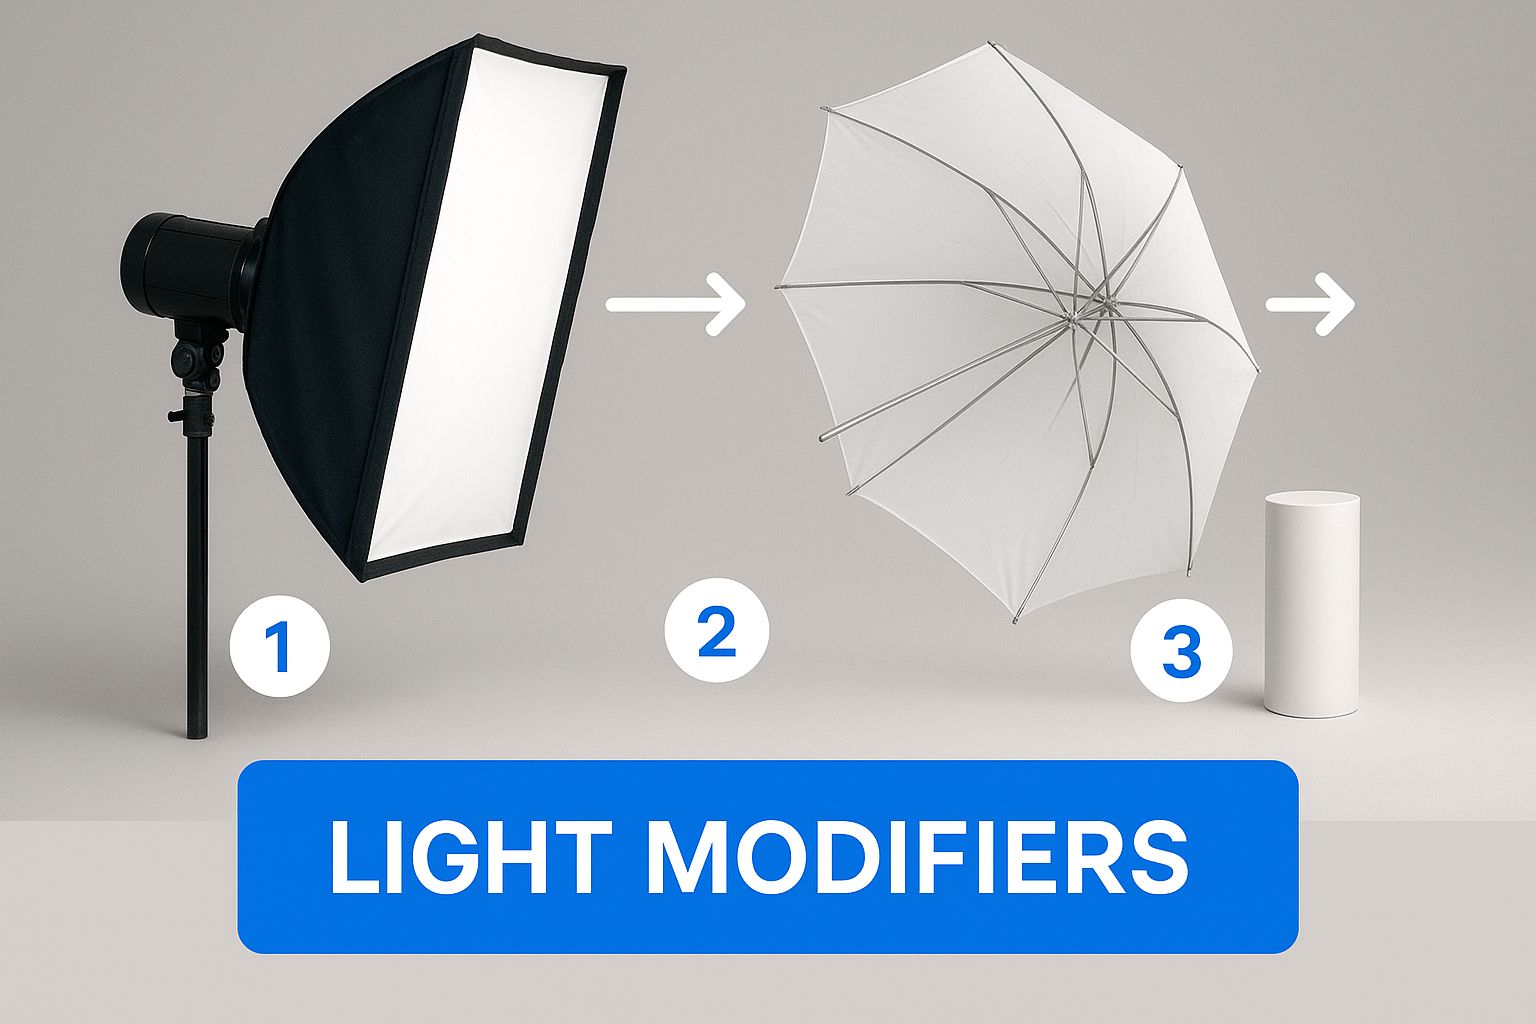
Essential Light Modifiers
Just owning a light is only half the battle. How you shape that light is what separates amateur snapshots from professional photographs. Light modifiers are the tools you attach to your light to soften, direct, or control its output.
Here are the absolute must-haves for any starter kit:
- Softboxes: Think of these as the workhorse of product photography. They’re fabric boxes that go over your light to diffuse the beam, creating beautiful, even illumination. They are perfect for minimizing those harsh, distracting reflections on shiny items like jewelry, glass, or electronics.
- Umbrellas: An umbrella gives you a much broader and softer spread of light than a softbox. They’re fantastic for lighting larger scenes or when you need to create a gentle, wrap-around light from a bit further away.
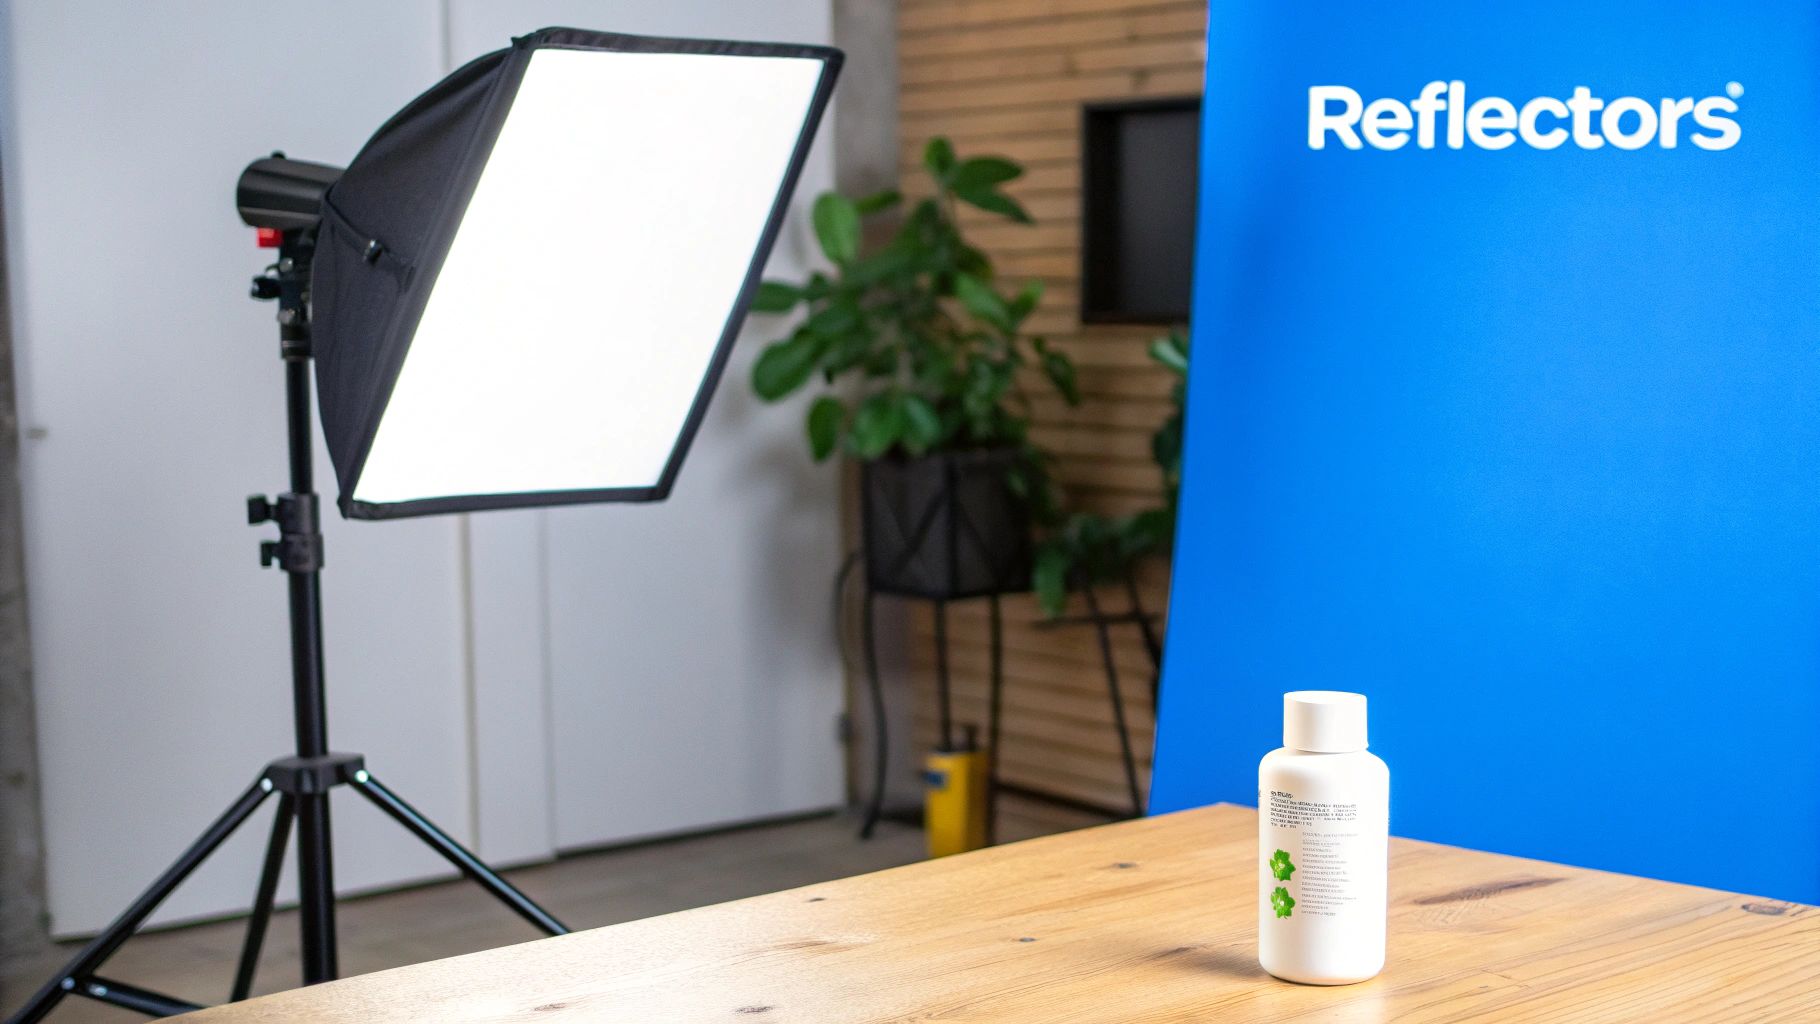
- Reflectors: Often just a simple piece of white or silver foam board, a reflector is your best friend on a budget. You place it opposite your main light to bounce light back into the shadows, filling them in and adding dimension to your product without having to buy a second light.
By building your kit with these key pieces, you can achieve a high-end, polished look. For a deeper dive into our favorite gear, be sure to check out our complete guide to the best lighting for product photography. Getting the right combination of lights and modifiers is the key to taking total control over your final image.
Mastering Classic One, Two, and Three-Light Setups
Okay, you've got the gear. Now for the fun part: putting it all to work.
If you can master a few foundational lighting setups, you'll have the confidence to shoot just about any product that comes your way. These aren't just rigid formulas; they're the building blocks every professional photographer knows. We'll start with the simplest and, honestly, one of the most powerful setups you can learn.
The Essential One-Light Setup
Don't mistake "simple" for "basic." A single, well-placed light can create incredibly dramatic, high-end images. The goal isn't just to make the product visible; it's to sculpt it with light and shadow. This minimalist approach is also the best way to really see and understand how light behaves.
Grab a single light source—a strobe or LED with a softbox is perfect—and place it at roughly a 45-degree angle to your product. This classic position, sometimes called Rembrandt lighting, immediately creates depth by casting a soft shadow on the opposite side.
But you don't want those shadows to turn into black holes where detail gets lost. That's where a simple reflector comes in. A cheap white foam board is all you need. Place it on the opposite side of your key light to gently bounce some light back onto the product. This "fills" in the shadows just enough, giving you a balanced, pro-level look without adding a second light.
A single light and a reflector is the most powerful and educational setup you can master. It forces you to be intentional about light direction, quality, and shadow control. It teaches you everything.
The Standard Two-Light Setup
When you need a bit more precision and control, the two-light setup is the industry workhorse. This approach adds a dedicated fill light to soften the shadows cast by your main key light, giving you total command over the mood and contrast of the shot.
Here's how it breaks down:
- Key Light: This is your primary light. Position it at that familiar 45-degree angle, just like before. This should be the most powerful light in your scene.
- Fill Light: Place your second light, also fitted with a softbox, on the opposite side. Here's the key: set its power to about 50% of your key light's intensity. Its only job is to soften the shadows, not blast them away.
This balance between key and fill creates that clean, polished look that's perfect for e-commerce. It highlights product details without making the image feel flat or uninspired. It's my go-to for everything from electronics to clothing.
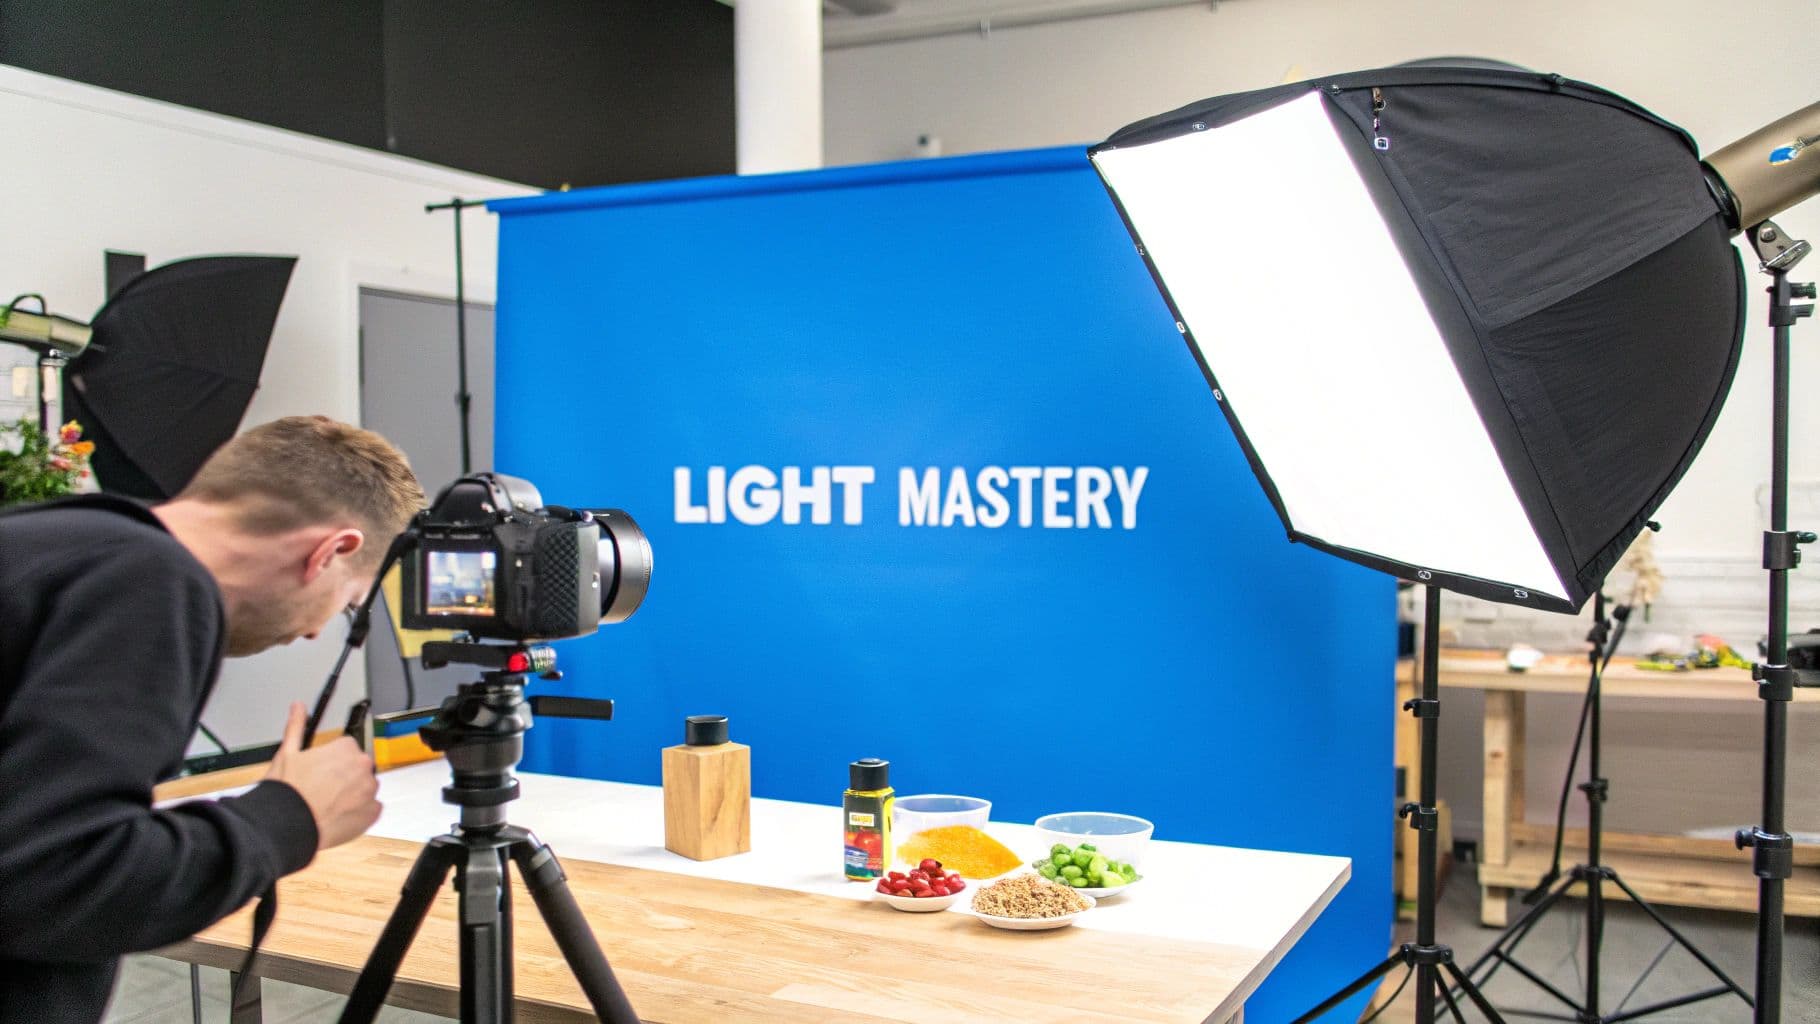
The Dynamic Three-Light Setup
Ready for that truly high-end, commercial feel? The three-light setup is how you make a product leap off the background. It takes the key and fill lights from the previous setup and adds one more critical element.
The backlight (often called a rim or hair light) is positioned behind the product, angled either toward the back of the item or back toward your camera.
This image shows a great example of a multi-light arrangement and the importance of using modifiers like softboxes to shape the light.
The sole purpose of this backlight is to create a subtle, bright outline along the edges of your product. This glowing "rim" cleanly separates the subject from the background, adding a fantastic sense of depth and making the whole image pop.
It’s especially effective for products with interesting silhouettes or textures, like glassware, bottles, and tech gadgets. You'll want to dial in the backlight's power so it's just strong enough to create that separation without blowing out the highlights. Nail this, and you've achieved the level of polish that defines top-tier product photography.
Using Light Modifiers to Sculpt Your Scene
Getting your hands on a great set of lights is really just step one. The real art behind a professional product photography lighting setup is learning how to shape that light. Think of light modifiers as your sculpting tools—they’re what transform a raw, harsh beam into something soft, controlled, and beautiful.
Without a modifier, a bare bulb just blasts your product with light, creating ugly, distracting shadows and hotspots, especially on anything with a sheen. By adding a modifier, you get to diffuse, direct, or bounce that light to create a very specific look. This is the secret behind that clean, high-end vibe that makes products jump off the page.
Creating Soft Light with Softboxes and Umbrellas
Nine times out of ten, the goal in product photography is to create soft, flattering light. For that job, two tools are absolutely essential: the softbox and the umbrella.
A softbox is exactly what it sounds like—a fabric box that fits over your light with a white diffusion panel on the front. It creates a gorgeous, directional light that looks a lot like a bright window on an overcast day. That controlled softness is a lifesaver for minimizing reflections on tricky items like glass bottles, electronics, or jewelry.
An umbrella, on the other hand, throws light everywhere. A shoot-through umbrella gives you a broad, diffused light that’s perfect for lighting up larger products or even an entire scene. A bounce umbrella creates an even softer effect by reflecting the light, but be warned—it can spill light all over your set if you aren't careful.
The larger the light source relative to the subject, the softer the light will be. This is why a big softbox placed close to a small product creates such smooth, gentle shadows and highlights.
Precision Tools for Ultimate Control
While softboxes and umbrellas are the workhorses of any studio, sometimes you need a scalpel, not a sledgehammer. This is where more specialized modifiers come into play, giving you pinpoint control over where light goes—and just as importantly, where it doesn't.
These are the tools that add drama and polish:
- Grids: These honeycomb-like inserts snap onto the front of a softbox or reflector. They act like blinders, narrowing the beam of light and stopping it from spilling onto your background. A grid is your best friend when you want a moody, focused look or need to add a subtle spotlight.
- Snoots: A snoot is a simple cone-shaped tube that funnels light into a super-tight, circular beam. It’s the perfect tool for creating a dramatic pop of light on one specific feature, like the logo on a bottle or the gem on a ring, without lighting anything else around it.
- Bounce Cards & Reflectors: It might just be a piece of white foam board, but a bounce card is an incredibly powerful tool. Place it opposite your main light, and it will gently kick some light back into the shadows, brightening them just enough to bring out the detail. Honestly, this simple trick can often save you from needing a second light.
The goal isn't just to master one of these, but to learn how they work together. Choosing the right modifier is a key step in defining textures, controlling reflections, and creating a mood that fits the brand you're shooting for.
Choosing the Right Light Modifier
With so many options, picking the right tool for the job can feel overwhelming at first. The table below breaks down the most common modifiers to help you decide what you need for a specific shot.
| Modifier Type | Effect on Light | Best For |
|---|---|---|
| Softbox | Soft, directional, controlled | Most products, especially shiny or reflective items like glass, metal, and electronics. |
| Umbrella | Broad, soft, less controlled | Large products, group shots, or creating a very wide, even light across a whole scene. |
| Grid | Narrows the beam, prevents spill | Creating mood, isolating the subject from the background, adding a focused spotlight. |
| Snoot | Creates a very tight, circular beam | Highlighting tiny details like logos, textures, or jewelry facets with precision. |
| Reflector/Bounce Card | Fills in shadows with reflected light | Reducing contrast, brightening shadow areas, and adding a subtle touch of light without a second source. |
By combining these tools, you’re no longer just lighting a product—you're sculpting it. Mastering modifiers is what will take your images from simple snapshots to professional, compelling product shots that actually drive sales.
Solving Common Product Lighting Problems
Even with the best gear in the world, every product photographer hits a wall now and then. Unexpected reflections, weird color casts, and subjects that just look flat—it happens to all of us. The real skill is knowing how to diagnose and fix these issues quickly, without having to tear down your entire lighting setup and start from scratch.
One of the biggest culprits is harsh reflections and glare, especially when you're shooting anything glossy or metallic. This is almost always caused by a light source that’s too small and direct, basically acting like a mirror on your product’s surface. The fix? Make your light source bigger and softer.
A large softbox is your best friend here. Move it closer to your product to make the light wrap around it more gently. If you're still getting hotspots, you can add another layer of diffusion—a simple sheer white panel between the light and your subject works wonders. For those extra-tricky items like chrome or glass, a polarizing filter on your lens can be a lifesaver, cutting out specific light waves causing the glare.
Taming Pesky Shadows and Color Issues
Another headache every photographer faces is managing distracting shadows. Hard, dark shadows can swallow up important details and make an otherwise great product look cheap. The easiest way to fix this is with a simple white bounce card or reflector placed opposite your main light. It will gently kick some light back into the shadows, giving your shot a much more professional feel without needing a whole second light.
Inconsistent color is another major problem, and it usually pops up when you're mixing different types of light. If you have a window letting in daylight while you're using an LED lamp, your camera's white balance is going to get seriously confused. The solution is to block out all the ambient light and then set a custom white balance on your camera. This ensures you get perfect, color-accurate images every single time—a non-negotiable step for products where color is a key selling point, like clothing or cosmetics.
The demand for this level of quality has caused the photography equipment market to boom. In 2023, the market was valued at around USD 2.5 billion and is expected to nearly double by 2032 as more sellers realize just how critical good lighting is. You can discover more insights about photography lighting market trends to see how new innovations are making pro-level gear more accessible than ever.
Key Takeaway: Don't fight reflections and shadows—control them. Softer light from larger sources, strategic use of reflectors, and a correct white balance are your three most powerful tools for solving 90% of common lighting problems.
This problem-solving mindset goes way beyond just taking pictures. For example, running a successful event like an estate sale requires a very similar approach to planning and execution, which we cover in our guide to estate sale marketing.
Answering Your Top Lighting Setup Questions
As you start dialing in your lighting for product photos, you're bound to run into a few head-scratchers. It’s all part of the learning curve, and figuring out the answers now will save you a ton of frustration later. Let's dig into some of the most common questions I hear from photographers.
Can I Just Use Natural Window Light?
You absolutely can! In fact, natural light from a window can produce a gorgeous, soft look that’s tough to beat. The key is knowing how to manage it.
The best approach is to place your product near a large window, but make sure it’s out of direct sunlight. Direct sun creates nasty, hard shadows that will distract from your product.
To take it a step further, grab a simple white foam board and place it on the side of your product opposite the window. This bounces the light back, filling in any dark spots and instantly making your shot look more professional. The only real downside? Natural light is unpredictable. It changes constantly, which makes it tough to get consistent shots for an e-commerce store. That's why most pros eventually move to an artificial lighting setup for more control.
What's the Difference Between a Key Light and a Fill Light?
Think of your lights as a team, with each one having a specific role.
Your key light is the team captain. It's your main, and usually brightest, light source. It's the one that does the heavy lifting, defining the shape of your product and creating the main shadows that give it dimension.
The fill light is its trusty sidekick. It's a secondary, dimmer light that you place on the opposite side of the key light. Its only job is to soften the shadows created by the key light so you can see more detail in the darker areas.
A great rule of thumb is to set your fill light to about half the power of your key light. This ratio gives you a classic, balanced look without making the lighting feel totally flat.
How Do I Stop Getting Harsh Reflections on Shiny Products?
Ah, the classic struggle. Taming reflections on glossy items is one of the biggest hurdles in product photography, but the solution is actually pretty simple.
The secret is to make your light source as big and soft as you possibly can, relative to the size of your product.
A large softbox is your best friend here. You can also achieve a similar effect by bouncing your light off a huge white surface, like a wall or a large piece of foam board. This wraps the light around your product, smoothing out those distracting hot spots. Sometimes, just moving your light a few inches left or right is enough to shift a pesky reflection off of a brand logo or key feature.
For super reflective things like chrome or jewelry, you might need to build a "light tent" by surrounding the product with white diffusion material. This creates a clean, reflection-free environment. Protecting your work and ensuring you get a quality result is always the goal, a principle that applies to your business security, too. For our sellers, we offer detailed guides on what is fraud protection to help you keep every transaction secure.
More guides in Estate Sale Basics
July 26, 2026
Stamp Collection Valuation: A Practical Step-by-Step Guide
Stamp collection valuation made simple. Learn how to identify, grade, price, and sell your stamps with confidence for estate sales or consignment.
Read guideJuly 23, 2026
Estate Sales Brick NJ: Your 2026 Guide to Success
Planning your estate sales brick nj? Our guide covers permits, pricing, marketing, & running a safe sale with DIYAuctions.
Read guideJuly 19, 2026
How to Prevent No Shows at Your Estate Sale
Learn how to prevent no shows for your estate sale pickup. Our guide offers actionable policies, reminder templates, and scheduling tips for a smooth event.
Read guideGet the estate sale pricing guide
Enter your email for pricing ranges, planning notes, and a clearer path to launch.