Senior Downsizing Help A Guide to a Simpler Move
Discover our guide to senior downsizing help. Learn practical strategies for planning, sorting, and selling items for a stress-free and profitable transition.

Let's be honest: "downsizing" is a word that carries a lot of weight. It’s so much more than just moving boxes. It’s the process of thoughtfully sifting through a lifetime of memories and belongings to simplify life in a smaller, more manageable home. This is a huge life change, one that marks a new chapter focused on ease and comfort.
Starting Your Downsizing Journey
Making the decision to downsize is a big one. It's usually driven by the desire for a simpler life—one with less to maintain and more time for what really matters. Maybe the goal is to unlock some home equity for retirement, move closer to the grandkids, or just live in a space that fits your current needs, not the needs you had 20 years ago.
Think of this as a chance to consciously curate your environment. You get to decide what’s truly important and let go of the rest. Instead of seeing it as a loss, try to see it as an empowering move toward a more comfortable future. A big part of this decision often involves comparing the pros and cons of aging in place versus moving. A practical look at options like home instead of senior care can help families make a really informed choice.
Having Supportive Family Conversations
A smooth downsizing process absolutely hinges on open communication. These aren’t always easy conversations, since they touch on memories, independence, and big changes. The key is for everyone to approach the topic with empathy and respect.
- Talk about the "Why": Keep the conversation focused on the positives, like better safety, less stress from home maintenance, and more freedom to actually enjoy retirement.
- Really Listen: Make sure the senior's voice is front and center. They should be in the driver's seat. Their feelings and preferences need to guide every decision.
- Offer Help, Not Pressure: Frame your involvement as support. Instead of saying "you need to get rid of this," try "how about I help you sort through this closet this weekend?"
A successful downsize is a team effort. It’s about working together to create a plan that honors a lifetime of memories while getting excited for a new chapter.
Setting a Realistic Timeline
Rushing this process is a guaranteed recipe for stress. You need time for thoughtful decisions to avoid feeling completely burned out. From what we've seen, a 3-to-6-month timeframe is about right. It gives you enough breathing room to sort through belongings without getting overwhelmed and to handle all the logistics without a last-minute panic.
The trick is to break the enormous task into small, manageable chunks. Dedicate one weekend to the guest room closet, the next to the kitchen pantry. This steady, piece-by-piece progress builds momentum and makes the whole thing feel possible. To help you map it all out, our comprehensive downsizing checklist for seniors gives you a clear roadmap from start to finish, ensuring no detail gets missed along the way.
Building a Practical Downsizing Timeline
Let’s be honest: a successful downsize almost never happens by winging it. Trying to sort through decades of memories and belongings in a single frantic weekend is a surefire way to get completely overwhelmed. A thoughtful, well-paced plan, on the other hand, turns a mountain of a task into a series of manageable hills. It’s the kind of senior downsizing help that keeps you sane and moving forward.
The best place to start isn't with a single box or a roll of packing tape—it's with a tape measure. Before you can decide what to keep, you have to know exactly what your new space can handle. Measure the rooms, check the closet dimensions, and sketch out a basic floor plan. This one simple task gives you an objective filter for every single decision to come, helping you avoid the classic mistake of moving a beloved sofa that has no chance of fitting through the new door.
Mapping Out Key Milestones
Once you know the dimensions you're working with, you can build a realistic schedule. I've found that a three-to-six-month window is the sweet spot. It gives you enough time to be thoughtful without feeling rushed or panicked. This timeframe also happens to align with some major demographic shifts.
Globally, 80% of adults aged 65 and older would prefer to age in place, which means downsizing is becoming a massive need. In the U.S. alone, the 80+ population is set to jump by 36% over the next decade, which will create unprecedented demand for smart ways to liquidate assets. If you're interested in the financial side of things, this article on AInvest.com offers some great strategies for retirees.
Here’s a simple way to break down your timeline:
- Months 1-2: The Sorting Phase. This is where you make progress one small bite at a time. Focus on one specific area each week—maybe the linen closet one weekend and the kitchen junk drawer the next. The goal here is steady progress, not instant perfection.
- Month 3: The Logistics Phase. Now it's time to get practical. Research and book movers, schedule donation pickups, and start planning an estate sale for the items you want to sell.
- Final Month: The Packing Phase. With all the hard decisions made, you can finally concentrate on just packing the "keep" pile and coordinating the last few details for moving day.
This visual gives a great overview of the downsizing journey, breaking it down from the first conversation to the final move.
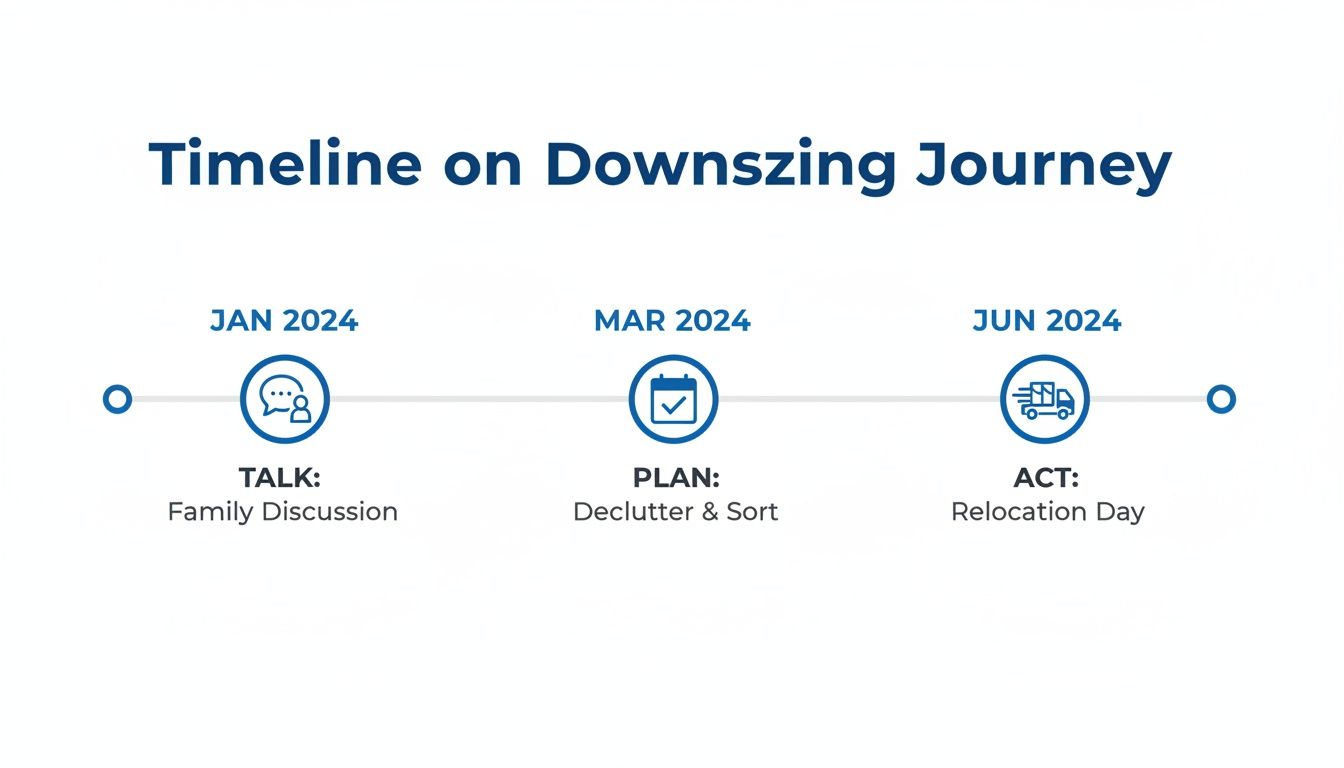
As the graphic shows, a smooth transition flows logically from good communication and solid planning to decisive action.
A Flexible Week-By-Week Approach
Life happens, so your timeline needs to bend without breaking. Rigid, unforgiving schedules just add unnecessary stress. Below is a sample framework you can adapt to your own situation, designed to keep you moving forward one small goal at a time.
Weeks 1-4: Building the Foundation
- Measure & Plan: Get that floor plan for the new place done.
- Start Small: Pick a low-emotion spot to sort first, like a bathroom or laundry room.
- Family Meeting: Talk about sentimental items. Who might want Grandma's china or Dad's old tools?
- Paperwork Purge: Go through old files and shred what you no longer need.
Weeks 5-8: Gaining Momentum
- Kitchen Deep Dive: Empty those cabinets and donate duplicate appliances.
- Closet Clear-Out: The one-year rule is your friend here. If you haven't worn it in a year, it's time to let it go.
- Research Movers: Don't just pick the first one you find. Get at least three quotes from reputable companies.
- Go Digital: Scan and digitize old photos, important letters, and key documents.
Remember, the goal isn't just to empty a house. It's to thoughtfully choose what will fill your next chapter with comfort and joy. Give yourself some grace and focus on one small win each day.
Weeks 9-12: The Final Stretch
- Book Your Team: Finalize the moving date and schedule those donation pickups.
- Handle Utilities: Arrange to have services transferred or disconnected.
- Pack Non-Essentials: Start boxing up seasonal items, guest room decor, books, and anything you won't need in the final weeks.
- "First Night" Box: This is a lifesaver. Pack a box with medications, toiletries, chargers, and important documents for your first 24 hours in the new home.
A Room-By-Room Guide to Sorting and Decluttering
Once you have a timeline, the real work begins. This isn’t just about packing boxes; it’s about making thoughtful decisions for your next chapter. You’re actively curating the life you want to live—one that's simpler, less cluttered, and full of things that truly matter.
To keep from feeling buried before you even start, you need a system. The simplest and most effective one I've seen is the Four-Box Method. In every room, set up four distinct zones or containers: Keep, Sell/Auction, Donate, and Discard. It's a straightforward approach that forces a decision on every single item, completely eliminating that paralyzing "I'll deal with it later" pile.

This simple framework helps you stay focused and make clear-headed decisions.
The Four-Box Sorting Method
| Category | What Goes In It? | Key Question to Ask |
|---|---|---|
| Keep | Items you love, use regularly, or are essential for your new home. | "Will this serve a purpose or bring me joy in my new space?" |
| Sell/Auction | Items with monetary value that you no longer need. Furniture, collectibles, quality kitchenware. | "Could someone else get great value out of this?" |
| Donate | Usable items that aren't valuable enough to sell. Clothing, books, everyday household goods. | "Is this in good condition for another family to use?" |
| Discard | Broken, stained, expired, or unusable items. | "Is this truly at the end of its life?" |
Using this method consistently in every room will build incredible momentum.
Strategies For High-Clutter Zones
Every house has them—those spots overflowing with duplicates, forgotten items, and decades of stuff. Think of the garage, the kitchen, the closets. Don't dread them. Tackling these areas first delivers the biggest and most satisfying wins.
The Kitchen A classic culprit for clutter. How many vegetable peelers, novelty mugs, or single-use gadgets does one person really need? Be honest.
- Consolidate ruthlessly. You need one good set of pots and pans, one set of everyday dishes. That platter you use for the massive Thanksgiving dinner you'll no longer be hosting? It’s time for it to find a new home.
- Check expiration dates. This is the easiest win in the whole house. Go through the pantry and spice rack. You’ll be shocked at how much you can clear out.
- Evaluate small appliances. The bread maker used twice, the juicer from five years ago... they are prime candidates for the "Sell" or "Donate" box. If you don't use it weekly, it goes.
Closets and Clothing Wardrobes are often museums of who we used to be. The best tool for curating your closet is the one-year rule.
If you haven't worn an item in the last 12 months, it's time to let it go. This simple guideline removes emotion from the decision and focuses on practical, everyday use.
Think about your new lifestyle. If you're no longer heading to the office, you can part with most of the business attire. Focus on building a wardrobe of comfortable, versatile pieces you’ll actually wear.
How To Handle Sentimental Items
Here’s where things can get tough. We're talking about your grandmother's china, a box of old photos, your child's first drawing. Parting with items tied to precious memories feels like parting with the memory itself—but it doesn't have to be.
The memory isn't in the object; the object is just a trigger for it. The goal is to honor your memories, not let them bury you in clutter.
- Create a Memory Box: Pick one or two special boxes just for your most cherished keepsakes—photos, letters, small mementos. Knowing you have a dedicated, protected home for these treasures makes letting go of the rest so much easier.
- Digitize Everything Possible: Old photos, home videos, and your kids' art projects take up a ton of space. Use a simple scanning app on your phone or a local service to create digital copies that you can share with the whole family.
- Pass Heirlooms On Now: Why wait? Give that special piece of jewelry or furniture to a child or grandchild today. You get to see the joy it brings them and share the story behind it, ensuring its history and meaning are passed down, too.
For a more structured approach, our detailed room-by-room declutter checklist provides specific prompts to guide you through every space in the house.
Making The Final Call
Sorting is a marathon, not a sprint. It takes physical and emotional energy. As you work, keep your "why" front and center: the vision of a simpler, more manageable, and peaceful home.
Work in short, focused bursts. Set a timer for 90 minutes and then take a real break. Pushing yourself for hours on end only leads to decision fatigue, which is when you start just keeping things to avoid making another choice.
Celebrate the small wins—a cleared-out bookshelf, an organized junk drawer. Every single step, no matter how small, is progress toward your goal.
Turning Unwanted Items Into Cash

After all the emotional heavy lifting of sorting through memories, you’re left with a collection of items that won’t be moving with you. Don't think of it as just "stuff"—it's an asset. The next step is turning those items into cash that can help pay for the move, buy new furniture, or just add a little cushion to your savings.
The real trick is finding a way to get the most money back without creating a logistical headache. Traditional routes like consignment or yard sales have their place, but they often come with big downsides, from sky-high commission fees to the sheer exhaustion of managing them. For seniors and their families, efficiency and control are everything.
Choosing Your Sales Strategy
Before you even think about listing an item, you need to understand your options. Every method strikes a different balance between profit, convenience, and how much work you have to put in.
- Consignment Shops: These are great for high-end clothing or designer furniture, but they are incredibly picky about what they'll take. You'll give up a large cut of the sale, and it can take months to see any money.
- Local Classifieds & Marketplaces: Using platforms like Facebook Marketplace or Craigslist gives you direct access to buyers, which is good for selling bulky items fast. But it also means fielding endless messages, haggling over prices, and dealing with unreliable no-shows for pickup.
- Traditional Estate Sales: Hiring a company to come in and handle everything sounds tempting, but that convenience comes at a serious cost. While they are a common form of senior downsizing help, the fees are often staggering.
With traditional estate sales, it’s not uncommon for fees to swallow 30-50% of your profits. Modern platforms like DIYAuctions are flipping that model on its head, letting you keep up to 90% of the proceeds with a flat 10% commission that’s capped at $1,000.
Imagine a boomer couple in Florida selling a house full of furniture and collectibles. Instead of hiring an expensive service, they just use an app to catalog their items, set their own prices, and host a single pickup day. The platform handles all the marketing and secure payments. It's a modern solution that addresses the challenges many seniors face, a trend highlighted in reports like this one on real estate trends impacting seniors on NAR.realtor.
The Modern Approach: An Online DIY Estate Sale
Running your own online estate sale gives you total control. You get the wide reach of an online auction combined with the simplicity of a single pickup day, cutting out the biggest hassles of other methods. You avoid giving away a massive chunk of your profits but still get professional-level marketing and payment processing.
It’s like having a personal assistant for your sale—you make all the important decisions, but a powerful tool handles the tedious work you'd rather not do.
The real advantage of a DIY online auction is the combination of control and convenience. You set the rules, the prices, and the schedule, all while a dedicated platform handles the marketing, payments, and buyer communication.
Cataloging Your Items Like A Pro
A great catalog is the bedrock of a successful sale. It’s your opportunity to show off what you’re selling and get buyers excited. The good news is, you don’t need to be a pro photographer to do it right.
Taking Great Photos A picture is truly worth a thousand words—and can be worth hundreds of dollars.
- Find Good Lighting: Natural light is your best friend. Move smaller items near a window. For big furniture, open the blinds and turn on the lights. Avoid using a harsh flash at all costs.
- Use a Simple Background: A cluttered background is distracting. Put items in front of a plain wall or even a simple bedsheet. The item itself should be the star of the show.
- Show Multiple Angles: Snap photos of the front, back, sides, and any important details. If there’s a scratch or a scuff, take a picture of it. Honesty builds trust and prevents issues on pickup day.
Writing Effective Descriptions Your description needs to answer a buyer's questions before they ask them. Keep it clear, concise, and honest.
- Include Key Details: Always list the brand, dimensions, material, and age if you know it. For any piece of furniture, measurements are an absolute must.
- Describe the Condition: Be specific. Instead of "good condition," say "minor scuff on the left leg" or "no stains or tears."
- Tell a Small Story (Optional): For unique pieces, a short note about its history can make a real difference. "This solid oak desk was my father's for 40 years" has a much greater appeal than "old wooden desk."
Managing a Stress-Free Pickup Day
One of the biggest wins of a platform-managed sale is that all pickups happen in one scheduled window. This is a complete game-changer compared to the chaos of juggling dozens of individual meetups.
To make sure your pickup day is smooth sailing:
- Organize Items Logically: Before the day arrives, group sold items by buyer. Use sticky notes with the buyer's name on each item or group of items.
- Create a Clear Path: If you can, move everything to one central spot like the garage or a cleared-out living room. This makes it easy for buyers to grab their things without trekking through your whole house.
- Confirm Appointments: While the platform handles scheduling, sending a quick reminder the day before can dramatically reduce no-shows.
By taking a modern, controlled approach, you can transform the chore of selling items into an empowering and profitable final step in your downsizing journey.
Managing Your Final Moving Logistics
You’ve made it through the marathon of sorting and selling, and the finish line is finally in sight. Now it's time to shift your focus from the past to the future and tackle the practical details of the move itself.
This last phase is all about coordination. It’s about tying up all the loose ends to make sure the transition from your old home to your new one is as smooth as possible. A little bit of planning right here, right now, is the best senior downsizing help you can get—it’s what turns potential moving-day chaos into a calm, organized process.

Vetting and Hiring Reputable Movers
First things first: you need to book your moving team. Please don't just hire the first company you find online. A good mover is more than just a truck and some muscle; they are a partner responsible for safely transporting your most cherished belongings.
Finding a company you can trust involves more than a quick price check. You're handing them a lifetime of possessions, so it pays to be diligent.
- Get Multiple Quotes: You should always get in-home estimates from at least three different insured moving companies. Be very wary of any company that tries to give you a quote over the phone without actually seeing what needs to be moved.
- Verify Credentials: Ask for their U.S. Department of Transportation (DOT) number and check their insurance and licensing status. Any legitimate mover will have this information ready and won't hesitate to share it.
- Read Recent Reviews: Look for feedback from other families or seniors who have gone through a downsize. Pay close attention to comments about their professionalism, if they were on time, and how they handled any unexpected problems that came up.
Once you’ve picked your company, read the contract from top to bottom before you sign. Make sure it clearly states the agreed-upon price, the insurance coverage, and the exact date and time for your move. This piece of paper is your peace of mind.
The Final Pre-Move Checklist
With the movers booked, a series of small but critical tasks need to be handled in the last few weeks. These are the details that often get forgotten in the rush, but they are absolutely vital for a seamless move. For more specific guidance on this stage, check out our tips on packing help for seniors.
Here's a list of essential to-dos for that final month:
- Schedule Pickups: If you have large items left for donation or need a bulk trash pickup, get that on the calendar now. These services often book up weeks in advance.
- Transfer Utilities: Call your utility providers (gas, electric, water, internet, etc.) to schedule the service cutoff at your old home and activation at your new one. Pro tip: set the cutoff for the day after you move out to avoid any last-minute issues.
- File Change of Address: Head to the post office or the USPS website to officially forward your mail. This simple step ensures no important bills or documents get lost in the shuffle.
- Notify Key Parties: Don’t forget to update your address with banks, credit card companies, doctors, insurance providers, and any subscription services you use.
Create a "First Night Essentials Box." This is a game-changer. It's a single box with everything you'll need for the first 24 hours in your new home, so you aren't frantically searching for a toothbrush after a long, tiring day.
Your essentials box will feel like a lifesaver. Pack it with medications, toiletries, phone chargers, important papers (like the moving contract), a change of clothes, and some snacks and drinks. Crucially, keep this box with you—don't let it go on the moving truck.
Finally, having reliable moving boxes is a small thing that makes a big difference. Sturdy boxes protect your belongings and make the whole unpacking process go that much smoother. By methodically working through these final steps, you're setting yourself up for a calm and comfortable arrival in your new home.
Of course. Here is the rewritten section, crafted to sound completely human-written, following the style and tone of the provided examples.
Your Top Senior Downsizing Questions, Answered
Even the most buttoned-up downsizing plan will have a few curveballs. It’s a process that’s as much about emotion as it is about logistics. We get a lot of questions from families in the thick of it, so let's tackle some of the most common ones we hear.
How Long Does The Senior Downsizing Process Usually Take?
Realistically, you should give yourself three to six months. While every situation has its own unique rhythm, that timeframe seems to be the sweet spot. It gives you enough breathing room to sort through everything thoughtfully, make plans for selling items, and line up movers without that constant feeling of being rushed.
The secret to keeping stress at bay is starting early and chipping away at the project in small, manageable pieces. Think weekly goals. This week, it’s the hall closet. Next week, the kitchen cabinets. This approach prevents you from feeling buried and helps you build real momentum.
Rushing is the enemy of a peaceful downsize. Giving yourself several months allows you to make mindful decisions, honor your memories, and transition into your next chapter with confidence instead of chaos.
What Is The Hardest Part of Downsizing for Most Seniors?
Hands down, the biggest hurdle is letting go of sentimental items. We're not just talking about "stuff"—we're talking about tangible links to precious memories, people we've loved, and chapters of our lives. It’s completely normal for this part of the journey to be tough.
We've seen families navigate this emotional terrain successfully with a few key strategies:
- Digitize memories like old photos and letters that you can't keep physically.
- Create a single "memory box" for the most irreplaceable keepsakes.
- Pass heirlooms on to family members who will truly cherish their history.
The most important thing is to acknowledge that these feelings are a valid part of the process. Giving yourself permission to feel sad is the first step toward moving forward.
What Is The Best Way To Sell Furniture and Other Large Items?
When it comes to bulky items like furniture, local online platforms are your best friend. A service like DIYAuctions is a game-changer here because it lets you run the entire sale from your home, keeping you in the driver’s seat.
You can list your items easily, and buyers will bid on them directly. But the best part? They’re responsible for picking everything up on a single day that you choose. This completely sidesteps the headache of coordinating dozens of individual pickups and lets you avoid the hefty commission fees that traditional estate sale companies charge.
Should I Hire Professional Downsizing Help Or Do It Myself?
This really comes down to your personal support system, physical abilities, and the amount of time you can realistically commit. Going the DIY route can be incredibly empowering and financially smart, especially when you have a great tool for the selling part.
But it doesn't have to be an all-or-nothing decision. We often see families succeed with a hybrid approach. You can manage the big-picture decisions and sorting to maintain control and save money, then bring in hired help for the heavy lifting, like packing boxes or moving the furniture out on pickup day.
More guides in Downsizing & Relocation
June 17, 2026
Senior Relocation Assistance: Your Complete 2026 Guide
Find practical senior relocation assistance with our step-by-step guide. Learn to assess needs, find funding, and manage downsizing for a smooth transition.
Read guideFebruary 24, 2026
A Guide to Senior Moving Services for a Seamless Transition
Discover how senior moving services can simplify your relocation. This guide covers downsizing, planning, and hiring the right team for a stress-free move.
Read guideFebruary 19, 2026
A Practical Guide to Stress-Free Moves for Seniors
Planning moves for seniors can be overwhelming. Our guide offers practical advice on downsizing, selling items, and settling in for a smooth transition.
Read guideGet the estate sale pricing guide
Enter your email for pricing ranges, planning notes, and a clearer path to launch.